When it comes to content management, how would you deal with automating it?
You’ve probably thought of Data Exchange Framework for setting up content import from external sources on a regular basis, or Sitecore PowerShell Extensions as the universal Swiss Army knife that allows doing everything.
Sitecore XM Cloud is a modern SaaS solution and therefore offers you one more way of managing and importing content via GraphQL mutations. This is also an option for the latest 10.3 XM/XP platforms bringing them a step closer to the composable world of today.
There is a video walkthrough of the wholee exercise at the bottom of this post.
Please welcome: Authoring and Management API!
The documentation prompts a broad and awe-inspiring list of things you can do with Authoring API against your instance: create and delete items, templates, and media. It also empowers you to do some operations around site context and perform a content search on your CM instance.
Management API in addition gives you control over operations using queries and mutations for the following GraphQL types:
- Archiving
- Database
- Indexing
- Job
- Language
- Publishing
- Security
- Workflow
- Rules
With that in mind, you can create and structure your content, reindex, and publish it to Experience Edge entirely using this API. So let’s take a look at how it works!
Uploading a picture to Media Library using GraphQL Authoring API
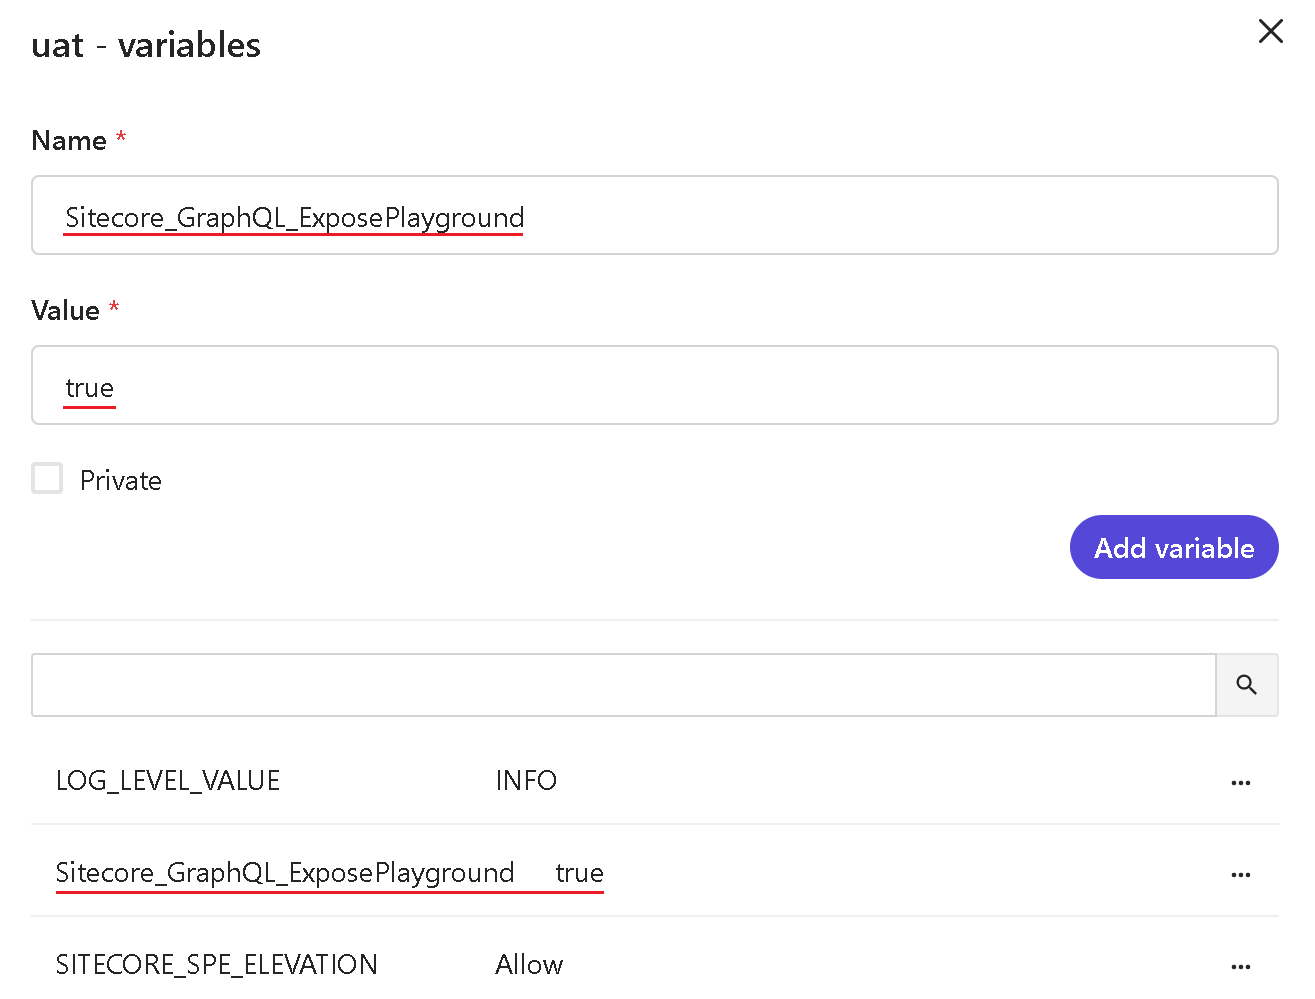
First of all, it is disabled by default, so we need to switch by setting Sitecore_GraphQL_ExposePlayground environmental variable to true. Since these variables expand at build time you also need to re-deploy the environments
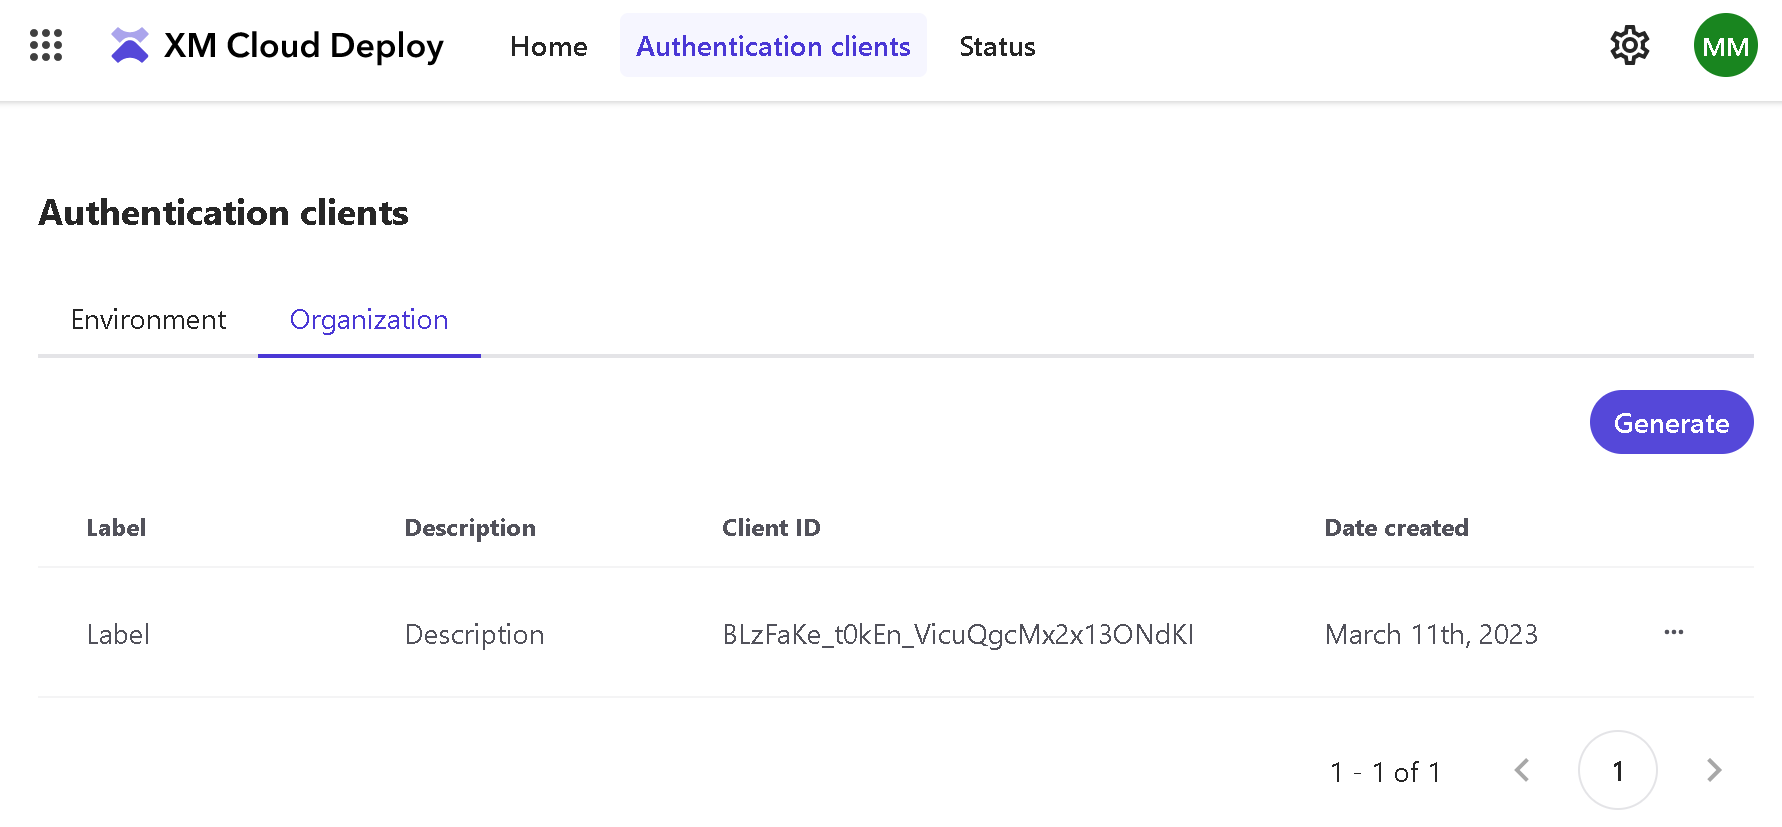
Once deployment is complete, you can start playing with it. Security in a composable world typically works with OAuth, Authoring and Management API is not an exclusion here. In order to obtain an access token, you need to authorize it first with your client ID and client secret which you set up with XM Cloud Deploy app:
There are different ways of authorization (for example, using CLI dotnet sitecore cloud login command), but since the need to fully automate the routine, I will be using /oauth/token endpoint. Also, it is worth mentioning that after getting initially already authorized with CLI, your client ID / secret pair is stored at .sitecore\user.json file so let’s take it from there. Here’s the code:
$userJson = "$PSScriptRoot/../../.sitecore/user.json"

if(-not(Test-Path$userJson)){
    Write-Error"The specified file '$userJson' does not exist."
    return
}

$userJson = Get-Content$userJson | ConvertFrom-Json
$clientId = $userJson.endpoints.xmCloud.clientId
$clientSecret = $userJson.endpoints.xmCloud.clientSecret
$authorityUrl = $userJson.endpoints.xmCloud.authority
$audience = $userJson.endpoints.xmCloud.audience
$grantType = "client_credentials"

$body = @{
    client_id = $clientId
    client_secret = $clientSecret
    audience = $audience
    grant_type = $grantType
}

$response = Invoke-RestMethod -Uri "${authorityUrl}oauth/token" -Method Post -ContentType "application/x-www-form-urlencoded" -Body $body
return $response.access_token
Now we got the access token and it should be passed as a header with every single request to GraphQL API:
“Authorization” = “Bearer <access_token>”
Next, let’s make a mutation query that returns us a pre-signed upload URL from the passing API endpoint and a target Sitecore path that you want to upload your media to. Here’s the code:
[CmdletBinding()]
Param(
    [Parameter(Mandatory=$true, HelpMessage="The URL of the endpoint where the file will be uploaded.")]
    [string]$EndpointUrl,
    [Parameter(Mandatory=$true, HelpMessage="The JWT token to use for authentication.")]
    [string]$JWT,
    [Parameter(Mandatory=$true, HelpMessage="The path of the file to be uploaded.")]
    [string]$UploadPath
)

$query = @"
mutation
{
  uploadMedia(input: { itemPath: "$UploadPath" }) {
    presignedUploadUrl
  }
}
"@

$body = @{ query = $query} | ConvertTo-Json
$headers = @{
    "Content-Type" = "application/json"
    "Authorization" = "Bearer $JWT"
}

# Invoke the GraphQL endpoint using Invoke-RestMethod and pass in the query and headers
$response = Invoke-RestMethod -Method POST -Uri $EndpointUrl -Headers $headers -Body $body
$result = $response.data.uploadMedia
return $result.presignedUploadUrl
Now that we have the pre-signed upload URL, we can perform media upload passing the local file to process:
[CmdletBinding()]
Param(
    [Parameter(Mandatory=$true, HelpMessage="The URL to upload the file to.")]
    [string]$UploadUrl,
    [Parameter(Mandatory=$true, HelpMessage="The JWT token to use for authentication.")]
    [string]$JWT,
    [Parameter(Mandatory=$true, HelpMessage="The path to the file to be uploaded.")]
    [string]$FilePath
)

if(-not(Test-Path$FilePath)){
    Write-Error"The specified file '$FilePath' does not exist."
    return
}

$result = & curl.exe --request POST $UploadUrl --header "Authorization: Bearer $JWT" --form =@"$FilePath" -s
$result = $result | ConvertFrom-Json
return $result
This script will return the details of a newly uploaded media item, such as:
- item name
- item full path
- item ID
I combined all the above cmdlets into a single Demo-UploadPicture.ps1 script that cares about passing all the parameters and performs the upload operation:

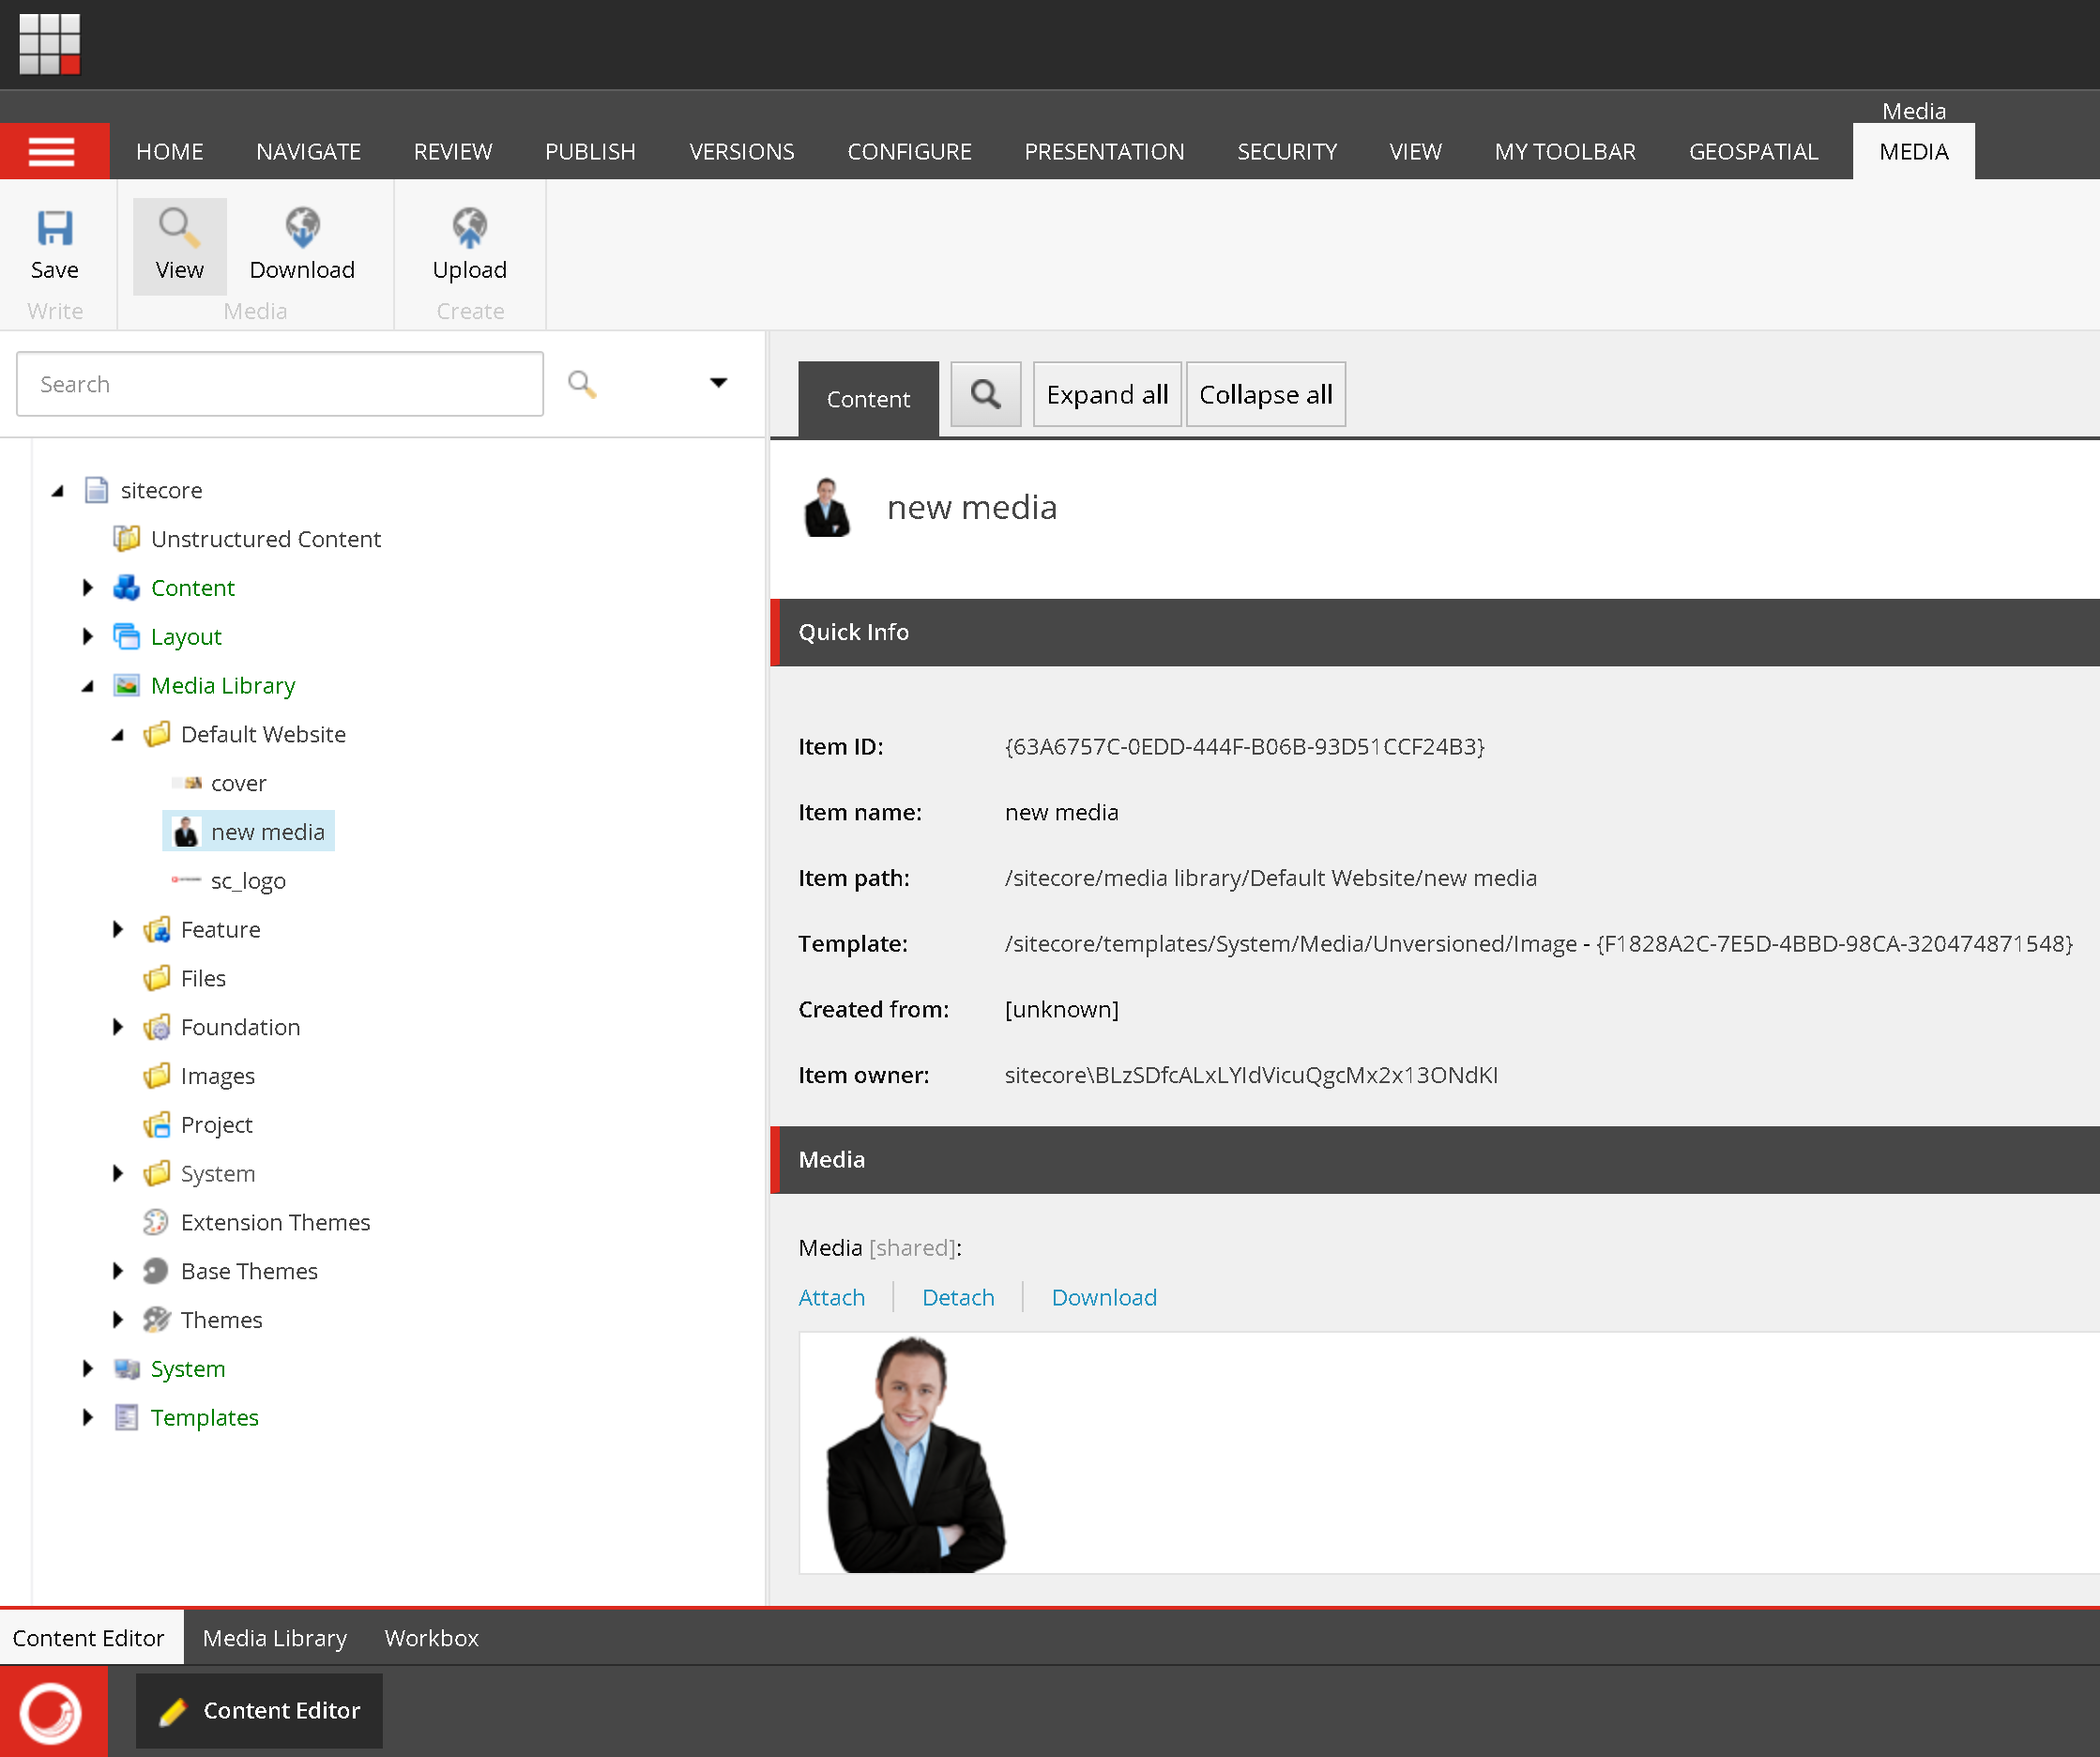
The upload immediately results in Media Library at the requested path:
Pros:
- a modern platform agnostic approach
- works nicely with webhooks
- allows automating pretty much everything
- excellent management options making DevOps easier
Cons:
- cumbersome token operations
- doesn’t allow batching, therefore takes a request per each operation
Verdict
It is great to have a variety of different tools in your belt rather than having a single hammer in a hand with everything around turning into nails. Hope this new tool brings your automation skills to a new level!