Experience Sitecore ! | All posts tagged 'IIS'

Experience Sitecore !

More than 200 articles about the best DXP by Martin Miles

Running IIS on local Windows Nano Server in Hyper-V rather than in docker

I've been enjoying Docker for a while, its flexibility and optimized images. However, there are two things, in general, I'd like to improve with the ops process:

  1. getting more control over the containers
  2. obtaining even more persistence, like the ability to create snapshots, switching between them, and few more features very common for traditional VMs

I have a host machine running Windows 10 x64 Professional, that's why I benefit from Hyper-V coming out-of-the-box with this OS. Saying that I mean creating a chain of checkpoints, switching between them, backing up and restoring images as well as other traditional ops activities - that all happens nicely and rapidly! Not to say that VMs work as effective, as the host does - at least I do not feel any difference.

The downside, however, is an extreme size of VMs - some are taking 50+ gigs of drive space!  That's due to Windows 10 running inside, so obviously looking at docker windows systems I felt quite jealous since Windows Server Core takes about 4 gigs and Nano Server is only half a gig! That's still 100 times more than smallest Alpine image, but still the smallest windows unit option possible.

So wondered if that's possible to have Nano Server, but hosted at local Hyper-V in Windows 10, so that I can not just cluster them as many as I may need without any host machine performance impact, but also mix them with other OS VMs sharing the same network and resources. And of course, get the ability to do checkpoints and remote management (PowerShell in that case since Nano does not have any UI). Going ahead, I confirm that all of the above was achieved, and this article explains how.


Content

  1. Defining objectives
  2. Preparing virtual drive
  3. Setting up a VM
  4. Running Nano Server
  5. Remote administration
  6. The result


1. Defining objectives

Achievables for this exercise are listed below:
  
  • Running Nano Server as a guest OS from Hyper-V manager using UI.
  • Being able to utilize all Hyper-V features, such as checkpoints, backups and restore
  • Run several machines in the same stable and configurable virtual network
  • Mixing various types of containers, such as bot GUI and non-GUI Windows OS along with Linux
  • Get the minimal Windows-based OS with IIS running
  • Being able to manage that OS remotely (with PowerShell since that OS does not have UI)

2. Preparing a virtual drive


While you can manually create Nano server virtual hard drive with a (long) PowerShell command, there is a nice tool that allows you to define what you'd like to get as the result. Here's this tool - NanoServerImageBuilder.msi (2.6MB). Once run it will look up for the prerequisites.

If you miss any of the dependencies, Nano Server Image Builder will identify them, download and install:


After installation, you'll have two options, and since we are going to build a virtual hard drive for VM - select the top one:


At this stage, you need to provide Windows Server 2016 installation ISO.


As the dialogue box kindly advises, the server OS image should contain the NanoServer folder at the root of ISO image:

When choosing an edition - pick up Datacenter as it is the smallest one. From optional packages make sure you check IIS as that's among out achievable lisе:

Give a machine name and admin password:

If you intend to manage your VM from a Hyper-V virtual subnet only (and not from outside networks), leave this unchecked:

As for IP address - we'll use DHCP client, but having static IP is an optional benefit - feel free to choose if you need that.

And that's it! As you see, this tool is just a GUI wrapper over a PowerShell command extracting necessary components and generating a Nano Server virtual hard drive out of traditional Windows Server 2016 ISO image. That actual command is listed below as well:

The tool ends up with creating a VHD-file which is a virtual hard drive containing our Nano Server (and yes, it is half-a-gig in size!), but at the next stage we need to create a new VM and attach created drive to it in order to run a VM:


3. Setting up a VM

As usual, create a new Virtual Machine. Once done, attach the drive and complete the wizard:


4. Running Nano Server

In Hyper-V Manager you are now able to run Nano Sever:


That's the only UI you may be able to see from your image. Enter the Administrator password you provided upon image creation:


The choice of available options with UI is not as impressive at all:


Networking is probably the only useful configuration screen here. Obviously, that's where you configure network parameters such as IP addresses, network mask, DHCP and the rest of them - use it not configured network correctly at the stage of preparing a virtual hard drive.

Done and let's finally turn to the most interesting part - remote management!


5. Remote administration

Just before you start, run the command below in order to find out if WSMan in enabled. The WSMan provider is a set of tools for PowerShell that lets you add, change, clear, and delete WS-Management configuration data on local or remote computers. 
The screenshot below tells me it is up and running there at Nano Server:
Test-WsMan IP_ADDRESS


At the next step, you may need to run these two commands: first enables PowerShell Remoting and the second creates a rule of treating everything as a trusted host (it is safer to use exact IP address instead of *-asterisk wildcard).

Enable-PSRemoting           #     we need to enable PowerShell remoting first
Set-Item WSMan:\localhost\Client\TrustedHosts *        #     adding hosts to trusted

Now let's try to execute PowerShell command remotely (within a context of given Nano Server). This command runs code within curly braces on Nano Server - an example below shows root level of remote C-drive:

Invoke-Command -ComputerName 192.168.181.136 -ScriptBlock { Get-ChildItem C:\ } -credential Administrator


Alternatively, you may "enter" an interactive mode (same that you get by using -it with Docker), and run commands one by one, all in the context of remote Nano Server. Let's, for example, navigate into IIS directory and check what is there:

Enter-PSSession -ComputerName 192.168.181.136 -Credential Administrator


6. The result

You might have seen those default HTM and PNG files, coming with IIS by default at the previous remote output. When starting correctly prepared Nano Server, IIS is also up and running showing the default website. 


From now on I can backup, restore and duplicate the instance that has IIS running straight away and is remotely manageable via PowerShell. I can use it as a base image for further experiments without an impact on the performance of a host machine.

Please bear in mind that Nano Server does not support full .NET Framework, so you can only run .NET Core and static websites from such IIS instance. If you need full .NET Framework - use a similar approach with Windows Server Core.

Hope you find this useful!

Get rid of IIS Express processes when debuggind Helix solutions

Problem: you are running a solution with a large number of projects (as we normally have with Helix) and willing to debug it. You are attaching to IIS process (from Debug menu of Visual Studio, or using magical hotkeys) but that takes way too much time to happen. You CPU usage increases and even likely to boost the cooling fans. Another thing you can evidence - slowly responding icon os IIS Express in the system tray:


What comes to one's mind as the first possible solution? To opt out of using IIS Express in favour of full local IIS, as soon as we are using it anyway to host our Helix-based solution. So you open up Web tab of Project Properties and indeed evidence that IIS Express is configured and has Project Url set to http://localhost with some specific long-digit port number:


Then expectedly you change it to Local IIS with Project Url having something similar to http://platform.dev.localwhere hostname for platform.dev.local already exists in your Windows hosts file as well as in IIS binding for that particular website, so that running this URL in a browser will, in fact, give you that locally running website. But you get a weird error instead:


Things are a bit worse, because if you deny creating a Virtual Directory, you'll get a message box as on the image below, and won't be able to close your project tab as it remains modified and will prompt you the same message again and again until you manually terminate devenv.exe process from Task Manager.


What happens? Something has alternative settings preventing you from changing to Local IIS. So need to find this out. After investigating a while I came across...

The solution contains two steps. Part one occurs because there is already a project extension file (ex. Sitecore.Foundation.Serialization.csproj.user) along with your actual project file, that extends (overrides) project settings. Normally, all *.user files are excluded from a source control so your colleague may not experience that same problem despite running the same code from the same repo branch. What exactly prevents you from saving Local IIS changes is UseIISExpress setting, so change it to false:

<PropertyGroup>
  <UseIISExpress>false</UseIISExpress>
</PropertyGroup>

Or just delete it - then settings from actual *.сsproj file will take effect, but as soon as you somehow customise your project, even as little as just clicking "Show All Files" button in the Solution Explorer - then *.user file will be immediately created. So let's move to the second part of this exercise. Now we need to change actual project to use Local IIS. Make sure you set already familiar UseIISExpress property to false

<PropertyGroup>
  <UseIISExpress>false</UseIISExpress>
</PropertyGroup>
and also specify Local IIS to false, CustomServerURL to true with the correct URL where your site is running:
<UseIIS>False</UseIIS>
<UseCustomServer>True</UseCustomServer>
<CustomServerUrl>http://platform.dev.local</CustomServerUrl>
<SaveServerSettingsInUserFile>False</SaveServerSettingsInUserFile>
So now all works. It loads correctly and you can modify and save Web tab of Project Properties without anу issues:


Also, if you already have virtual folders created under your IIS website, make sure they are removed and the website itself contains the right web folder path:


That's it. Please also pay attention to applicationhost.config file that resides under \.vs\config folder in order to be picked by IIS Express. You may delete it without any potential damage, as we just got rid of IIS Express.

Hope this helps!

Sitecore with SEO: overview and compare ways for managing duplicate content

In this blog post I decided to cover all ways of managing duplicate content in Sitecore and overview possible ways of dealing with that with emphasis on SEO. So, we have the following options to consider:

  1. Duplicates
  2. Clones
  3. Proxies
  4. Aliases
  5. IIS URL Rewrite module
  6. Sitecore Redirect Module
  7. External Reverse Proxy

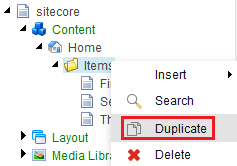
1. Duplicates are commonly known and most straightforward way of creating duplicates (clones) of the items. The easiest way to perform that operation is to right click the item you'd want to copy, select Duplicate from context menu and specify new item's name.


This ends up with an entirely independent new item (and all its ancestors) located at the same level, including all field values, presentation details, permissions etc. Beware the locks and workflows - those also would be exact match of those original items have. After that, new item lives it own life and is no way synchronized to its original prototype (except Standard Values, for sure, as both new and duplicate items share the same template).

Also it's worth of mentioning Copy To - this brings similar behavior, but allows to create duplicates keeping same name but at other paths rather than original item. Copy To is available from the same context menu.


2. Clones are sort of similar to duplicates with the difference that no new item is created when using clones. To create a clone for a highlighted item from a Sitecore tree, select Configure tab, hit Clone and specify where you'd want to locate your clone.


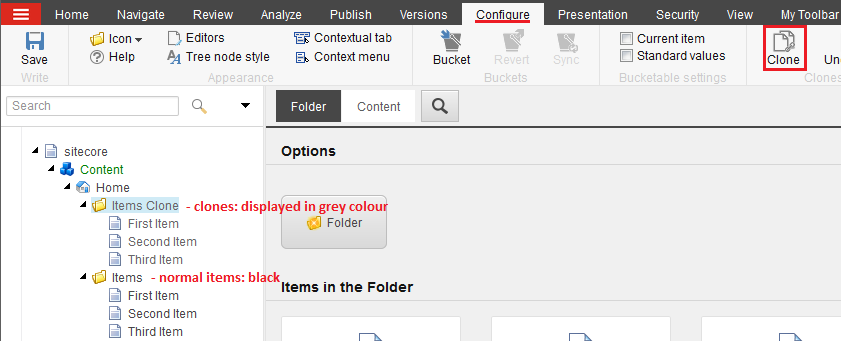
Notice, that clones are displayed in content tree in a slightly light font color, I personally think that may create some future issues when business users may perform some actions on item without realizing that item is a clone. Why is that important to know? Let's view the way clones function on a lower level.

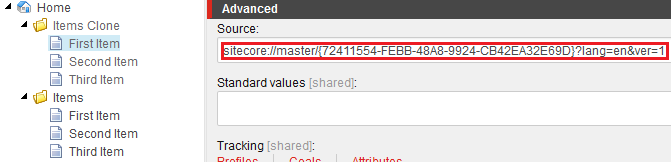
When you create a clone the item and the values are not physically copied. Instead, the inheritance similar to the one between Standard Values (that is sort of prototype item for a template) and real template item, is created (clone inherits not from s.v. but from original item). When you modify a filed value of original item, that would affect same field of cloned item. However the reverse process, when you modify a field value on cloned item, overrides that individual field value and it is no more tied to original item's field. Other fields of the same item will still keep the reference to their originals. Clones use the __Source field of the Advanced section from standard template to specify the cloned item:


Unlike duplicates, clones do not clone most of standard fields (those coming from standard template) like locks / workflows and statistics (created, updated, revision). But they do clone security settings, which, again, can be overridden for a clone item.

If you want to get rid of clone item - there are 2 ways to do that: just delete the clone (obvious) and unclone it. Uncloning turns cloned item into a normal item and copies field values from originals. Clones exist only in master database, when you perform publishing to CD servers - uncloning takes place there.

You also can do some crazy things like creating clones of clones - inheritances chain take place in this case; each field at each level can be overridden, for sure.

To get even more understanding on how clones work in Sitecore I recommend reading Cloning What Ifs article.


3. Proxies is another mechanism of creating and managing duplicate content in Sitecore. The are frequently used in cases similar when you have an item that you may want to be a child of multiple parent items. In order to use them you must ensure a config file setting called proxiesEnabled is true; then you create proxy items at /Sitecore/System/Proxies based on /System/Proxy template. However, proxies considered to be outdated in favor of Clones. Please do not use Proxies!


4. Aliases are the different beast. They are perfectly good for promos and campaigns as the normally specify a quick URL for campaign landing page. Aliases have out-of-box limitation that they are set only per root level and not multisite-friendly (however there is a link that explains how to implement that feature on your own).

Aliases are defined under /sitecore/system/Aliases based on the System/Alias template.

There is just one field in alias template that allows to select target item.

There are two more overheads when working with aliases - sometimes you may need to identify if an item is alias:

bool isAlias = Context.Database.Aliases.Exists(path);

Also you may need to set canonical URLs on them to improve SEO. Good way of doing that is:

public class AliasResolver : Sitecore.Pipelines.HttpRequest.AliasResolver
{
    public override void Process(HttpRequestArgs args)
    {
        base.Process(args);

        if (Context.Item != null)
        {
            args.Context.Items["CanonicalUrl"] = Context.Item.GetFullUrl(args.Context.Request.Url);
        }
    }
}

Also, do not forget to publish your aliases to content delivery databases, as they won't work until published.


5. IIS URL Rewrite module is probably most functional option, it is external to Sitecore, that means it happens before routing and before pipelines.

For the drawbacks of using IIS URL Rewrite I would mention that you'd need to have access to IIS Manager or web.config write permission on each of content delivery servers. I previously wrote a blog post IIS URL Rewrite module - few SEO tricks that can demonstrate how powerful it is.

Also I would beware you of some specific Sitecore URLs and create appropriate extensions (ex. for WebResource.axd - take from real code).


6. Sitecore Redirect Module is another good choice as it does perfect server side 301 redirect for both URLs and items. It is almost as powerful as IIS URL Rewrite, but because it is configured in Sitecore - you do not need to have CD environments access at all - just create and publish redirect rules (as you normally do with generic content) - they will take effect immediately! Module is transparent to multi-site configuration, it can do redirects from one site's URL or item to another.

One more advantage of the module - availability of source code, so functionality can be extended to any bespoke requirement, also it becomes compatible with new Sitecore versions by just rebuilding it with appropriate Sitecore.Kernel.dll and replacing updated module DLL in webroot bin folder.

The only drawback, probably, is that in default state it performs only 301 redirects (however you may implement whatever you require). Please remember, that 301 requests are cached by browser -so you you are testing it intensively - you may need to purge browser cache from time to time.


7. External Reverse Proxy can be another option. It can do not only rewrites to external websites, but also rewrite some requests to alternative internal URL and pass that to IIS as "given" and further down to Sitecore. I met such scenarios several times on projects I took part. By the way, did you know that IIS can also serve as reverse proxy?

Performing rewrites and URL resolving logic outside of Sitecore can be both advantageous and disadvantageous. What traps does it bring?

Well, imagine you are new developer who start working on a new working copy of source code. When you run locally you may have different URL patterns compared to those on production environment. Business users usually deal with external production URLs and do not know internal structure, so that is how they form tasks and change requests. If you are not enough lucky to have comprehensive documentation or senior colleagues who can explain how is that configured - you may end up in multiple puzzling hours of attempting to find and match URLs from different environments.

Also, SEO much relies on sitemaps, so if you are using dynamic sitemaps - you need to implement that custom URL resolving logic that you have on reverse proxy. Also Sitemap Module from the Market would not work for you in that case.


I hope this article helped you to understand you options are with their pros and cons and to pick up a proper implementation depending on exact scenario.

IIS URL Rewrite module - as reverse proxy with links rewrite

Not many people know that IIS itself can serve as Reverse Proxy, with rewriting URLs on-the-fly. We are going to take a look on how to configure that feature. Let's assume we have 2 websites - primary website that has URL http://test2/ and is a hosted by IIS, moreover there is an instance of Sitecore installed; and another external static website that has URL http://external/ and it has few static pages and resources. For this experiment I got external website hosted at the same IIS instance, while in reality it can be literary anything and anywhere.


Apart from having IIS, you will need the following prerequisite:

- URL Rewrite Module installed, version 2.0

- Application Request Routing version 2.0


The easiest way to get all the prerequisites is to install them through Web Platform Installer. It will install all of them so you'll just need to have IIS refreshed and get ready to start.


External website contains static.html file with the following code

<div>
    img/sitecore.png<br>
    <img src="img/sitecore.png" alt="sitecore" width="230" height="106">
</div>
<div>
    /img/sitecore.png<br>
    <img src="/img/sitecore.png" alt="sitecore" width="230" height="106">
</div>
<div>
    http://external/img/sitecore.png<br>
    <img src="http://external/img/sitecore.png" alt="sitecore" width="230" height="106">
</div>
<p>
    <a href="sitecore.zip">sitecore.zip</a><br>
    <a href="/sitecore.zip">/sitecore.zip</a><br>
    <a href="http://external/sitecore.zip">http://external/sitecore.zip</a><br>
</p>

This code has 3 images and 3 links to an archive file, each of them is either relative link (from the doc level, for sure) or absolute link (from web root) or fully qualified link including domain name and protocol. This HTML renders renders into the following screenshot:


Our objective is to have a "virtual" "folder" called ext on the test2 website so that it "mapped" to external website and also correctly "maps" and rewrites all the resources of external website on resulting page.

Example:

When we hit http://test2/ in browser - we get default Sitecore page as it is provided by Test2 website, as normally.

When we hit http://test/ext/static.html - we get the page at that URL but with the content of external/static.html page with all links and references rewritten to be test2/ext/*.* instead of external/*.*

So, to make IIS Rewrite work as reverse Proxy, let's do the following steps:


Make sure "Enable proxy"is checked, otherwise nothing will work.


In URL Rewrite section, click "Add Rule(s)" link, then from popup screen select "Reverse Proxy" and specify the rule. Also check outbound rules as the are rules that factually rewrite internal links. Please note that this function may add some overhead to your website performance.


After you specify the rules - one inbound and 2 outbound (they are shown below) - reverse proxy now functions and you may verify that by requesting the following ULR (as on the screenshot below):


Notice, that all links and images look correct, as the were before. To ensure they were rewritten correctly, let's view the source file of resulting page. Here is it:

<div>
    img/sitecore.png<br>
    <img src="img/sitecore.png" alt="sitecore" width="230" height="106">
</div>
<div>
    /img/sitecore.png<br>
    <img src="http://test2/ext/img/sitecore.png" alt="sitecore" width="230" height="106">
</div>
<div>
    http://external/img/sitecore.png<br>
    <img src="http://test2/ext/img/sitecore.png" alt="sitecore" width="230" height="106">
</div>
<p>
    <a href="sitecore.zip">sitecore.zip</a><br>
    <a href="http://test2/ext/sitecore.zip">/sitecore.zip</a><br>
    <a href="http://test2/ext/sitecore.zip">http://external/sitecore.zip</a><br>
</p>

As there were no need to rewrite relative URLs - they remain untouched. However root-folder URL and full URL were rewritten to satisfy new domain name and desired folder-path.

And finally, here is resulting configuration that makes it all work. Whatever we have previously configured is stored in the configuration file within system.webserver node in rewrite section:

<rewrite>
      <rules>
        <clear></clear>
          <rule name="ReverseProxyInboundRule2" stopprocessing="true">
            <match url="(ext)/(.*)?"></match>  
              <conditions>
                  <add input="{CACHE_URL}" pattern="^(https?)://"></add>
              </conditions>
              <action type="Rewrite" url="{C:1}://external/{R:2}"></action>
          </rule>
      </rules>
      <outboundrules>
        <rule name="ReverseProxyOutboundRule2" precondition="ResponseIsHtml1">
          <match filterbytags="A, Form, Img" pattern="^/(.*)" negate="false"></match>
          <action type="Rewrite" value="http://test2/ext/{R:1}"></action>
        </rule>
        <rule name="ReverseProxyOutboundRule1" precondition="ResponseIsHtml1">
          <match filterbytags="A, Form, Img" pattern="^http://external/(.*)?" negate="false"></match>
          <action type="Rewrite" value="http://test2/ext/{R:1}"></action>
        </rule>
        <preconditions>
              <precondition name="ResponseIsHtml1">
                  <add input="{RESPONSE_CONTENT_TYPE}" pattern="^text/html"></add>
              </precondition>
          </preconditions>
      </outboundrules>
    </rewrite>

There is no need to use visual configurer at all, you may just drop this snippet on web.config into appropriate section and it will start working straight away!


IIS URL Rewrite module - few SEO tricks


1. Canonicals - do 301 permanent redirect (this also works with HTTPS).


2. Rewrite URL lowercase - one more rewrite rule aiming SEO improvement.


3. Append trailing slash - this is another SEO (sometimes arguable) improvement. It is believed that having trailing slash on your URLs (except when it deals with file names for sure) will improve search engines ranking.


4. Query string rewrite - the example of extracting query string parameters and rewriting it in your own manner


5. Redirect to HTTPS - forcely redirect all non-secure request to HTTPS


6. Prevent image hot-linking - disallow strangers of reusing images hosted on your website in order to protect them and traffic.


How websites are resolved with Sitecore - the essentials

What actually happens when you type website URL in browser and how is your request factually served in sitecore. We are going to use www.site.com as the URL for our example. This is simplified version where only most important steps are covered.

First of all, as you hit this URL in browser's address bar, it retrieves IP address by the host name from DNS server. Then it creates request to IP address resolved with host name (www.site.com) in HTTP header. There may be multiple traffic managers / load balancers on the route to the server, but eventually request gets to that IP address to the specified port (as we use normal HTTP, then the port is default 80).

On the server computer there should be specific software running and listening to that port (80) otherwise request will fail. In our scenario, that is the Microsoft IIS web server. Below are two most important IS configuration screens:


On the first screenshot you see Site Bindings screen that binds exact website within current IIS instance to specific port and hostname (if set). There can be multiple website hosted within same IIS instance, so you we usually vary them by hostname / port combinations. The example above shows that all requests to port 80 with the hostname www.site.com would be served by current website. Second record shows that all requests to port 443 (which is default to HTTP) would be served by the same site as well.


The second screenshot assigns our website www.site.com to a folder on a disk drive which becomes a web root for our site.

Root of the website should have a configuration file called web.config, that may be split and overridden in subfolders and that itself overrides global web.config and machine.config files with default settings. Every sitecore-based website contains <sitecore> node in the configuration file, that is where all sitecore settings are defined, including <sites> node that specifies all the websites per current Sitecore instance.


Important to note that sites are determined by "first match" principle, so order is critical. If you look at our www.site.com record - you'll notice that it specifies hostname - all requests matching that name will be served by this site. Other setting set what database is used for particular site (name should match database name from connection string), what is starting sitecore tree node within that database - factual page item that is being returned. There are also html caching setting, sitecore domain name for the site, etc.

The rest of request to current Sitecore instance, that do no math our host name pattern will be served by site called "website", it does not have hostName specified, so it will serve everything else and return /sitecore/content/home item.

Let's assume the site has been published from master database to web database, as per configuration. Here's below how sitecore tree looks like in Sitecore Content Editor:


Our website's home item (selected) is called SiteCom and it will return the page with "www.site.com"in title. Let's see the browser:


Here we done. That is our www.site.com landing page loaded!


Advanced topic: How to host several sites within the same Sitecore instance without specifying a hostname, just on different ports


Attach to IIS - debugging Sitecore with just one hotkey!

Debugging Sitecore in most cases requires you to open attach to a process menu in Visual Studio, then enable display for processes of all users, find appropriate IIS process and фееср to it. To much hassle, isn't it, especially taking into account that you may need to repeat that again and again hundreds / thousands times as a part of your work?

Ok, here's the solution to take your debugging pain off: Attach To IIS extension for Visual Studio. At the moment there are extensions for 2012 and 2013 version, as I haven't tried it in 2015 preview.


Download extensions for your Visual Studio version:

Attach_To_IIS_2012.vsix (58.6KB)