I've been enjoying Docker for a while, its flexibility and optimized images. However, there are two things, in general, I'd like to improve with the ops process:
- getting more control over the containers
- obtaining even more persistence, like the ability to create snapshots, switching between them, and few more features very common for traditional VMs
I have a host machine running Windows 10 x64 Professional, that's why I benefit from Hyper-V coming out-of-the-box with this OS. Saying that I mean creating a chain of checkpoints, switching between them, backing up and restoring images as well as other traditional ops activities - that all happens nicely and rapidly! Not to say that VMs work as effective, as the host does - at least I do not feel any difference.
The downside, however, is an extreme size of VMs - some are taking 50+ gigs of drive space! That's due to Windows 10 running inside, so obviously looking at docker windows systems I felt quite jealous since Windows Server Core takes about 4 gigs and Nano Server is only half a gig! That's still 100 times more than smallest Alpine image, but still the smallest windows unit option possible.
So wondered if that's possible to have Nano Server, but hosted at local Hyper-V in Windows 10, so that I can not just cluster them as many as I may need without any host machine performance impact, but also mix them with other OS VMs sharing the same network and resources. And of course, get the ability to do checkpoints and remote management (PowerShell in that case since Nano does not have any UI). Going ahead, I confirm that all of the above was achieved, and this article explains how.
Content
- Defining objectives
- Preparing virtual drive
- Setting up a VM
- Running Nano Server
- Remote administration
- The result
1. Defining objectives
Achievables for this exercise are listed below:
- Running Nano Server as a guest OS from Hyper-V manager using UI.
- Being able to utilize all Hyper-V features, such as checkpoints, backups and restore
- Run several machines in the same stable and configurable virtual network
- Mixing various types of containers, such as bot GUI and non-GUI Windows OS along with Linux
- Get the minimal Windows-based OS with IIS running
- Being able to manage that OS remotely (with PowerShell since that OS does not have UI)
2. Preparing a virtual drive
While you can manually create Nano server virtual hard drive with a (long) PowerShell command, there is a nice tool that allows you to define what you'd like to get as the result. Here's this tool - NanoServerImageBuilder.msi (2.6MB). Once run it will look up for the prerequisites.
If you miss any of the dependencies, Nano Server Image Builder will identify them, download and install:

After installation, you'll have two options, and since we are going to build a virtual hard drive for VM - select the top one:

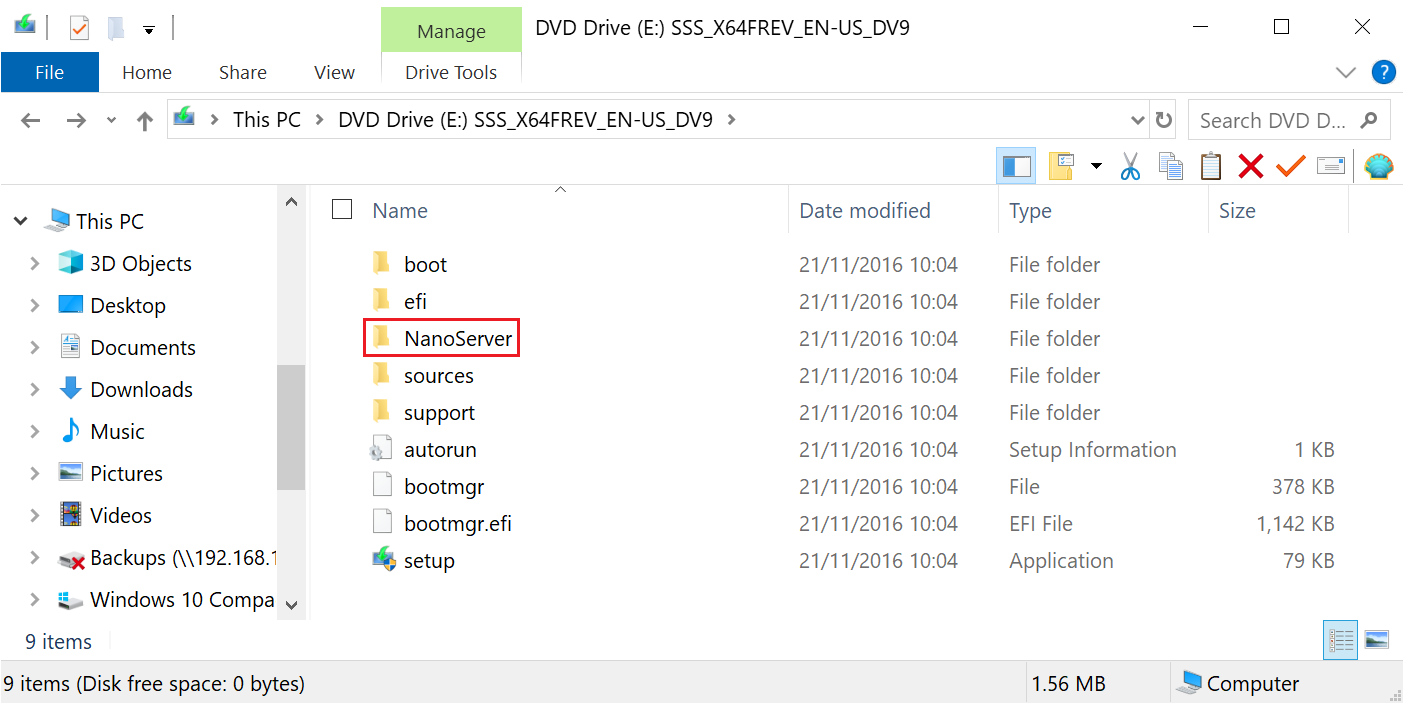
At this stage, you need to provide Windows Server 2016 installation ISO.

As the dialogue box kindly advises, the server OS image should contain the NanoServer folder at the root of ISO image:
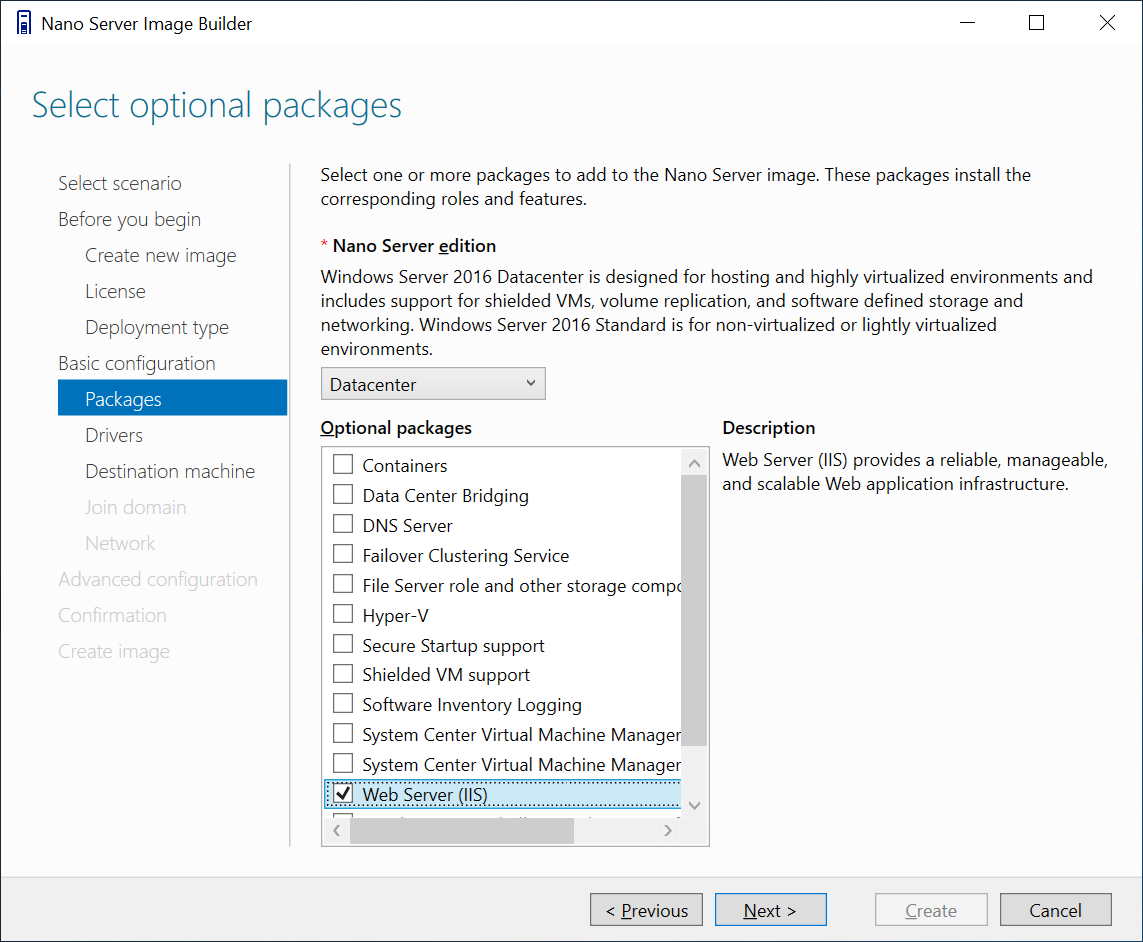
When choosing an edition - pick up Datacenter as it is the smallest one. From optional packages make sure you check IIS as that's among out achievable lisе:
Give a machine name and admin password:
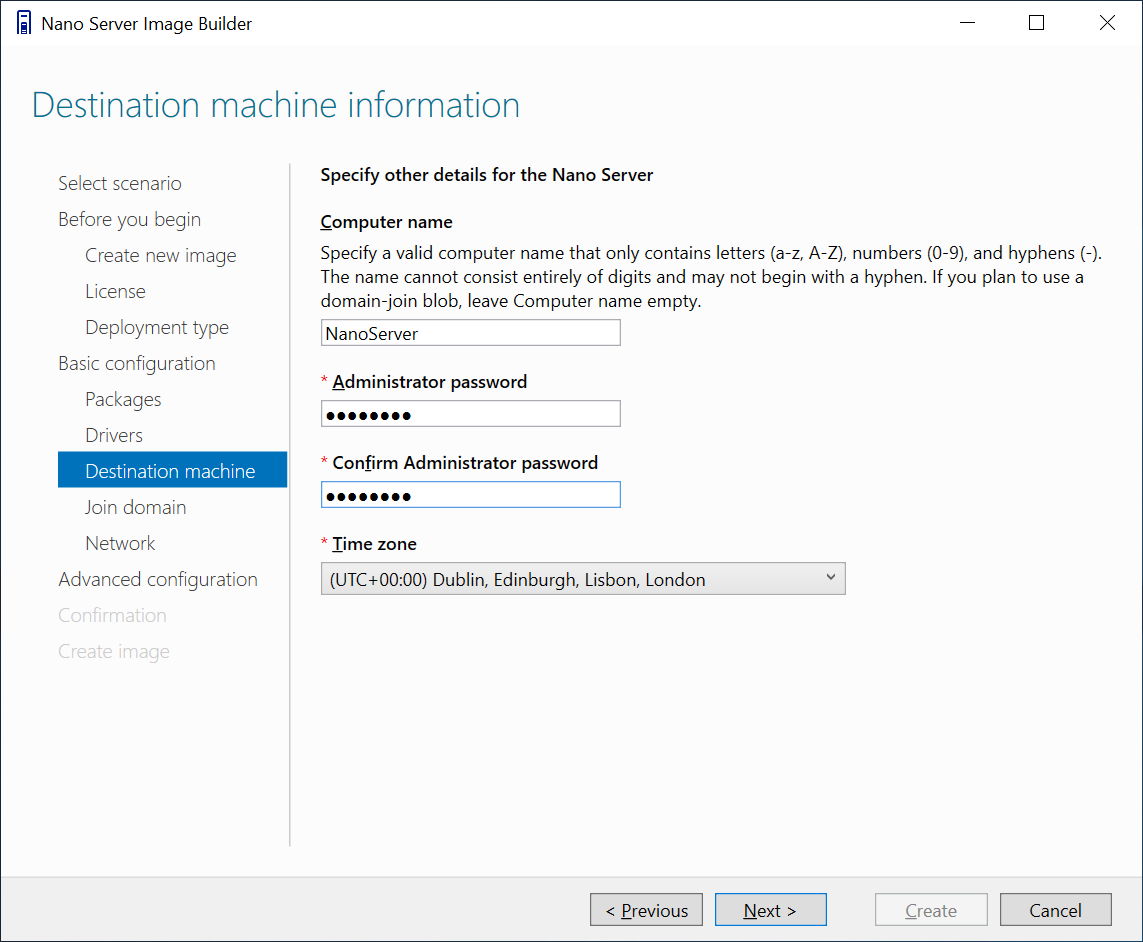
If you intend to manage your VM from a Hyper-V virtual subnet only (and not from outside networks), leave this unchecked:
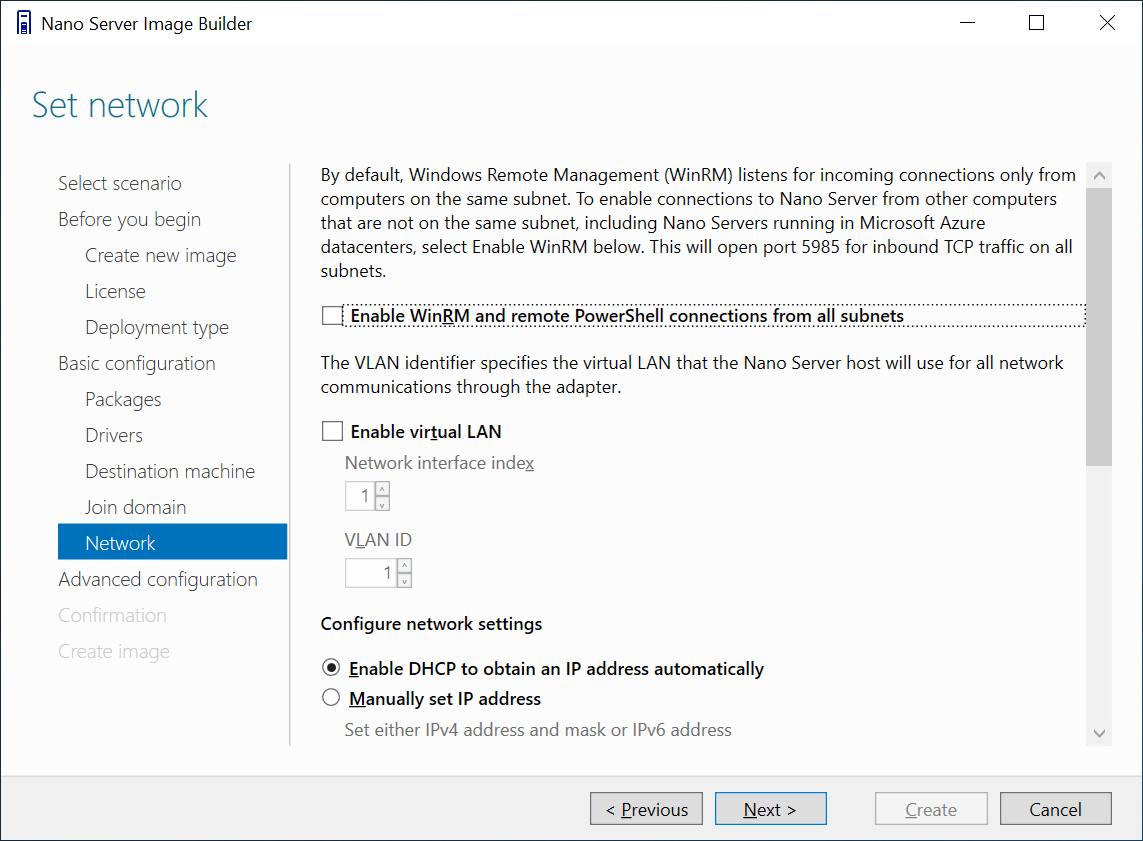
As for IP address - we'll use DHCP client, but having static IP is an optional benefit - feel free to choose if you need that.
And that's it! As you see, this tool is just a GUI wrapper over a PowerShell command extracting necessary components and generating a Nano Server virtual hard drive out of traditional Windows Server 2016 ISO image. That actual command is listed below as well:
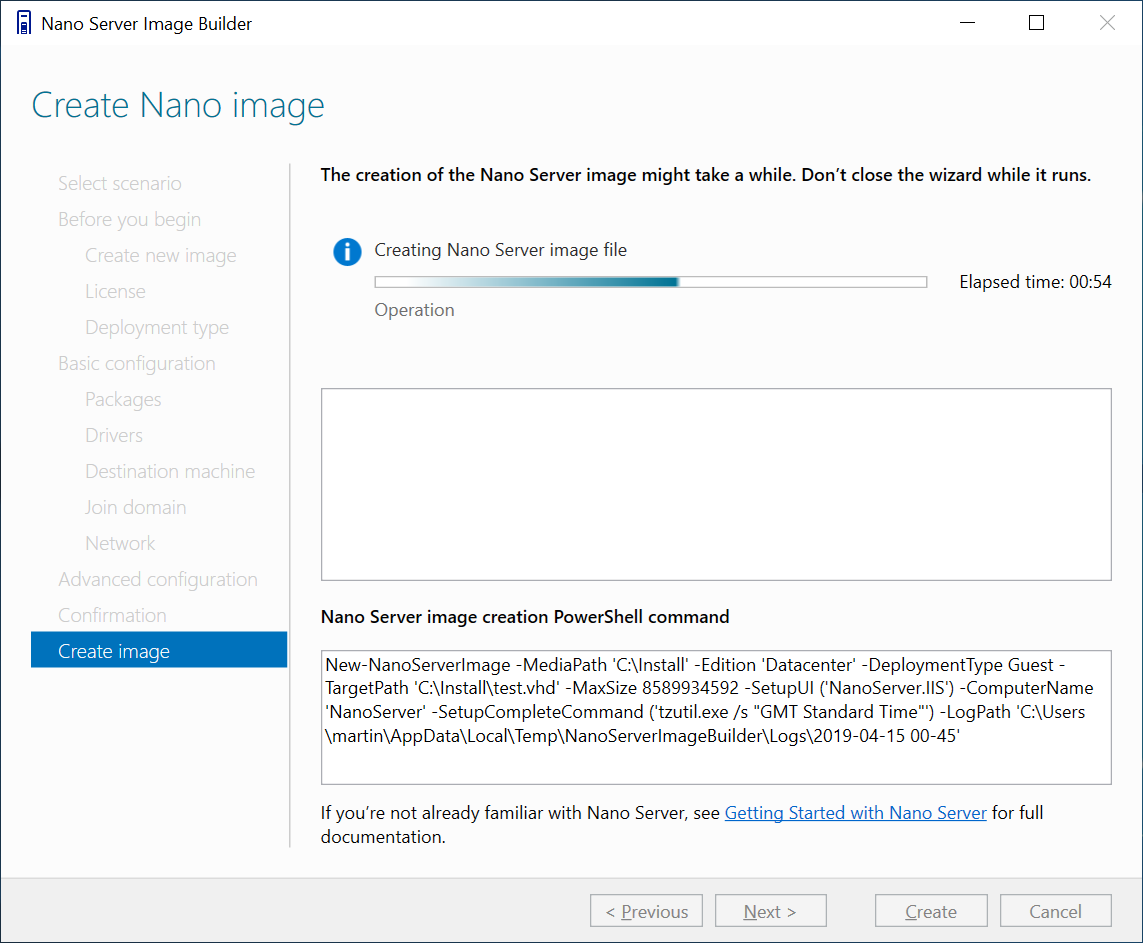
The tool ends up with creating a VHD-file which is a virtual hard drive containing our Nano Server (and yes, it is half-a-gig in size!), but at the next stage we need to create a new VM and attach created drive to it in order to run a VM:
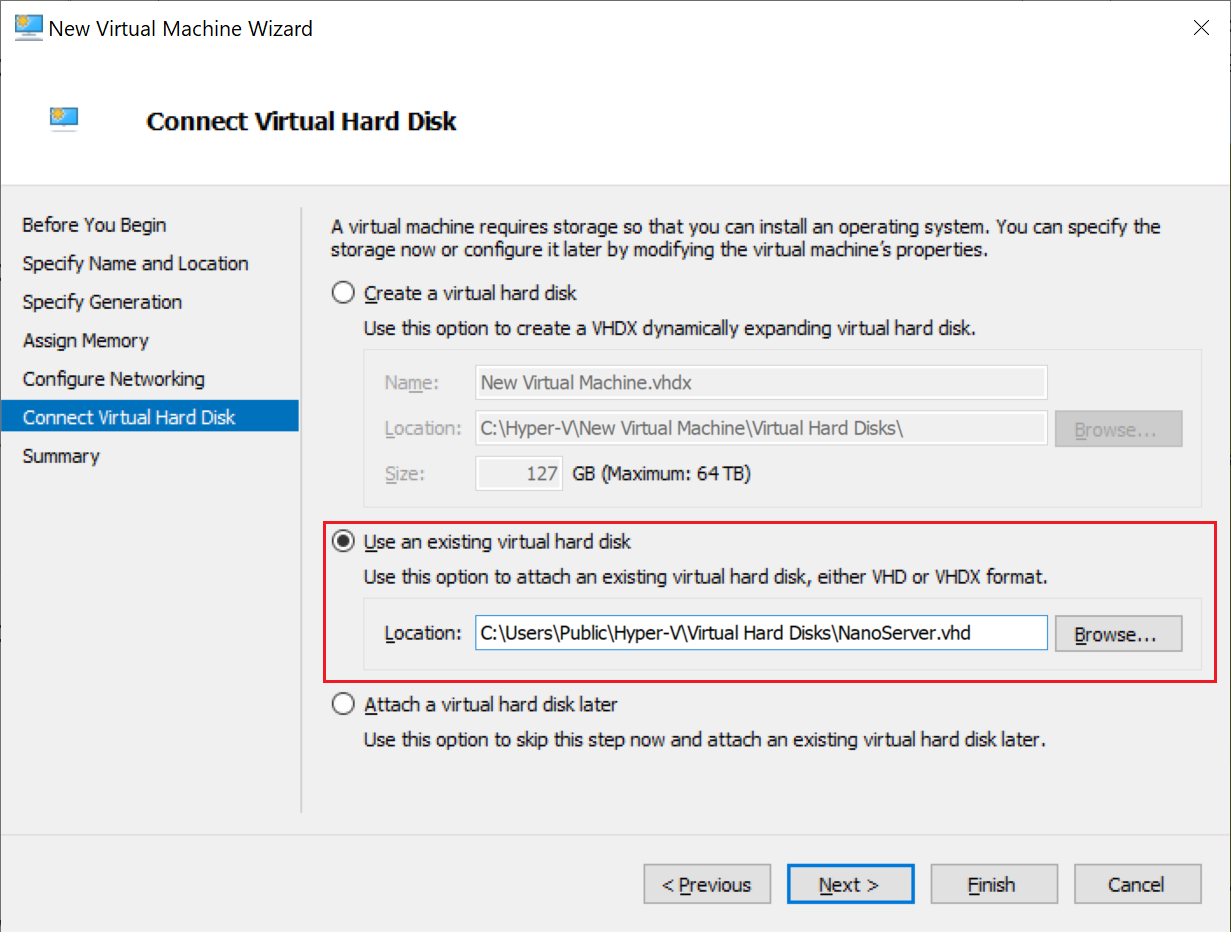
3. Setting up a VM
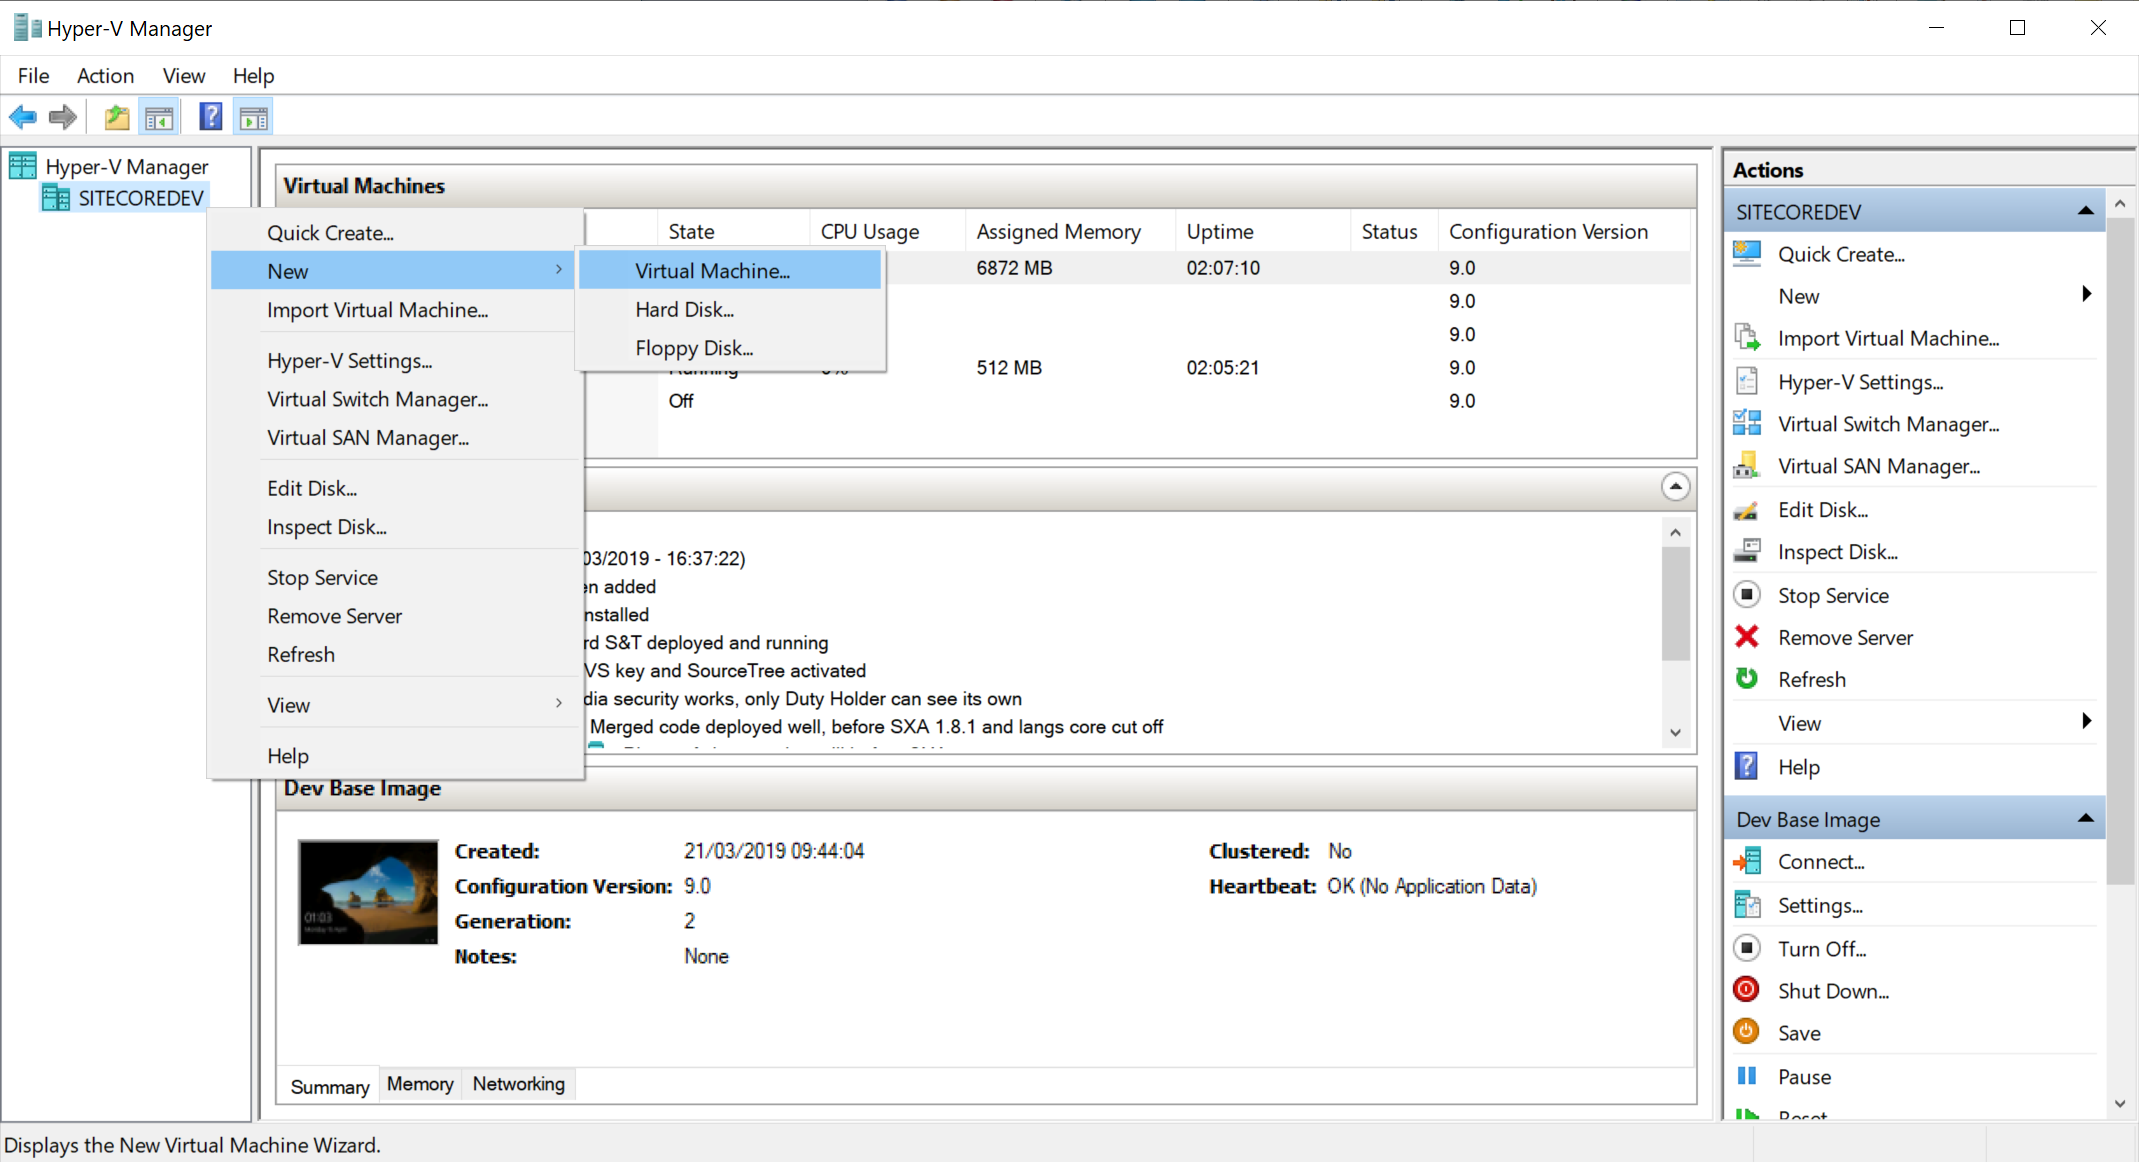
As usual, create a new Virtual Machine. Once done, attach the drive and complete the wizard:
4. Running Nano Server
In Hyper-V Manager you are now able to run Nano Sever:

That's the only UI you may be able to see from your image. Enter the Administrator password you provided upon image creation:

The choice of available options with UI is not as impressive at all:

Networking is probably the only useful configuration screen here. Obviously, that's where you configure network parameters such as IP addresses, network mask, DHCP and the rest of them - use it not configured network correctly at the stage of preparing a virtual hard drive.

Done and let's finally turn to the most interesting part - remote management!
5. Remote administration
Just before you start, run the command below in order to find out if WSMan in enabled. The
WSMan provider is a set of tools for PowerShell that lets you add, change, clear, and delete WS-Management configuration data on local or remote computers.
The screenshot below tells me it is up and running there at Nano Server:
Test-WsMan IP_ADDRESS

At the next step, you may need to run these two commands: first enables PowerShell Remoting and the second creates a rule of treating everything as a trusted host (it is safer to use exact IP address instead of *-asterisk wildcard).
Enable-PSRemoting           #     we need to enable PowerShell remoting first
Set-Item WSMan:\localhost\Client\TrustedHosts *        #     adding hosts to trusted
Now let's try to execute PowerShell command remotely (within a context of given Nano Server). This command runs code within curly braces on Nano Server - an example below shows root level of remote C-drive:
Invoke-Command -ComputerName 192.168.181.136 -ScriptBlock { Get-ChildItem C:\ } -credential Administrator

Alternatively, you may "enter" an interactive mode (same that you get by using -it with Docker), and run commands one by one, all in the context of remote Nano Server. Let's, for example, navigate into IIS directory and check what is there:
Enter-PSSession -ComputerName 192.168.181.136 -Credential Administrator

6. The result
You might have seen those default HTM and PNG files, coming with IIS by default at the previous remote output. When starting correctly prepared Nano Server, IIS is also up and running showing the default website.

From now on I can backup, restore and duplicate the instance that has IIS running straight away and is remotely manageable via PowerShell. I can use it as a base image for further experiments without an impact on the performance of a host machine.
Please bear in mind that Nano Server does not support full .NET Framework, so you can only run .NET Core and static websites from such IIS instance. If you need full .NET Framework - use a similar approach with Windows Server Core.
Hope you find this useful!