As we know, Sitecore version 8.0 incorporated popular the module called Web Forms for Marketers (WFFM), and it became an integral part of Sitecore. WFFM is still shipped as a package, however now through Sitecore SDN portal, rather than via Marketplace as before.
So, let's assume you have a brand clean install of Sitecore (I have 8.0 Update 4 for this example). In order to download WFFM for 8.0 Update 4 please follow to https://dev.sitecore.net/Downloads/Sitecore_Experience_Platform/8_0/Sitecore_Experience_Platform_80_Update4.aspx and find download link below in the module section.
Remark 1: zip archive you download is not a package - it is normal archive containing 2 child packages - first is package for CM instance and additionally contains all dialogs etc. while another is just CD installation package. For our demonstration, unpack Web Forms for Marketers 8.0 rev. 150625.zip into /Data/Packages directory and use Development Tools - Installation Wizard, as you normally install packages.
Remark 2: ensure you have Mongo up and running, otherwise it will come to "package never installs" issue (more details about that bug here). it is required just for installation, after you have it installed you it is safe to turn off Mongo - WFFM will save data to database without any problems.
Remark 3: it may take up to 5 minutes to install the package, so please do not panic, as soon as you got Mongo running - you'll reach the point when it prompts you for setting Placeholder settings.
After WFFM installation is complete, you may configure a form. By default WFFM contains several pre-created forms as an example for people to play with it and get acknowledges with the module. For those who are new to WFFM here is a screenshot below displaying how to locate Form Designer:

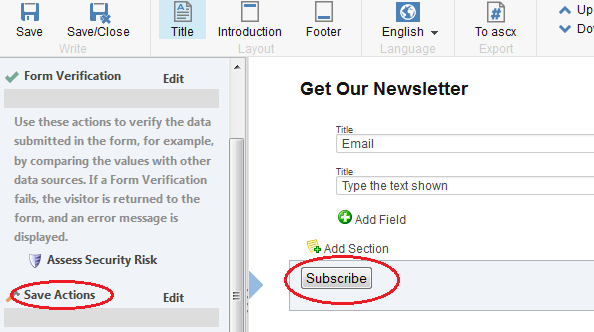
Selecting Form Designer above loads a screen with the list of existing forms. Let's pick Get Our Newsletter form and click OK. Form Designer will load form configuration screen with fields and Subscribe button at the bottom. A click to that button opens Submit panel left hand side with several settings for pre-save (validation), save and post-save (success page / success message).
Remark 4: Those who used to work with previous versions of WFFM will be frustrated by missing Save to Database action from save actions menu. These are save actions that come out of box:
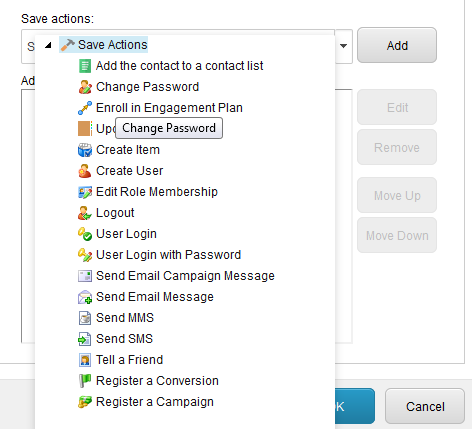
There is nothing to worry about, Save to Database action is still there but is not displayed only because as it always happens. However:
Remark 5: SQL database itself is not coming with the package, so you need to pick database backup from one of previous versions - its schema remains the same. To make you life easier, I have attached forms empty database backup so you may download it by this link. In WFFM 8.0 there is the setting that references connection string name (in you ConnectionStrings.config file) that is used by WFFM.
<!-- CONNECTION STRING - Sets the name of the connection string -->
<setting name="WFM.ConnectionString" value="wfm" />
<add name="wfm" connectionString="Data Source=.;Initial Catalog=test2_Forms;Integrated Security=False;User ID=sa;Password=your_password" />
To make Get Our Newsletter form work, we need to assign it to some page. Default landing page called Home will work well for our purpose. This is how you set a form to a placeholder:
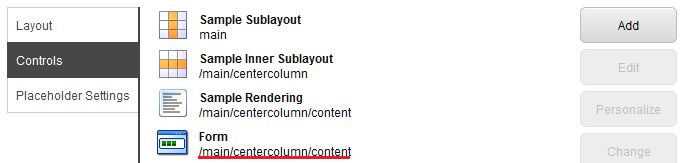
Image above displays webform, because we use default layout that comes with webforms aspx page. For MVC there is rendering called Form MVC. With next step below (as clicking Edit button) you need to specify which exact form should be served by this sublayout (or rendering for MVC):
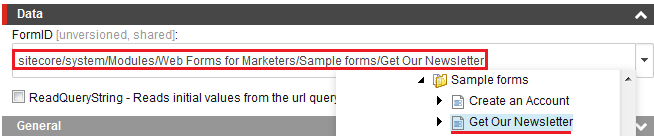
Now you may verify /Home page in Publish - Preview screen or publish web site and then load the page normally (http://your.site.name/) so you end up with something like on a screenshot below:

After you fill in valid email and click Subscribe button, you'll get "Thank you for filling in the form" message, that's in case database was references correctly. if not - there will be message abut unexpected error and corresponding exception details will appear in log file.
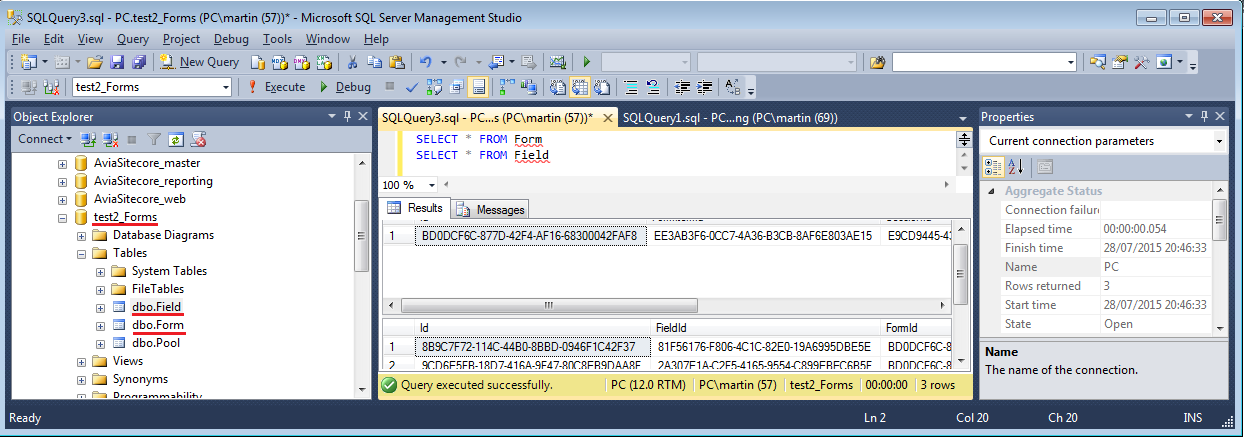
Let's get physically into database to verify the data has been stored correctly. In successful case you'll see one record in Form table and few records in Field table, one record per each form field.
That's all!
Following blog post will demonstrate how to make WFFM result screen display forms records from SQL database.