I was very anticipating to upgrade my solution to recently released XP 9.1 with SXA 1.8 and all its great features, however, I got a dependency on Sitecore Commerce, which hasn't (yet) updated to 9.1. Got nothing to do with that, but just wait for a month or so until XC 9.1 is out...
But wait, why not just update at least SXA to version 1.8 meanwhile? SXA 1.8 comes for both versions for 9.1 and 9.0 which means - in two runtimes .NET 4.7.1 and .NET 4.6.2 correspondingly. Done, upgraded. SXA 1.8 works well on top of clean Sitecore 9.0 update 2 instance for me.
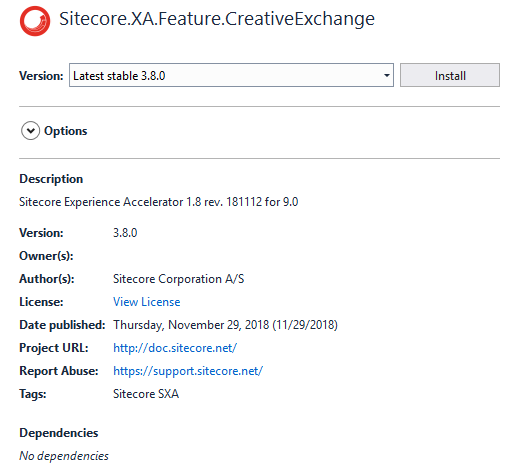
But when it came to updating NuGet packages in my solution, I was unable to do so because NuGet packages for my version for some reason demand .NET 4.7.1:

And that is my error:
Package Sitecore.XA.Feature.CreativeExchange 3.8.0 is not compatible with net462 (.NETFramework,Version=v4.6.2) / win-x86. Package Sitecore.XA.Feature.CreativeExchange 3.8.0 supports: net471 (.NETFramework,Version=v4.7.1)

Version 3.8.0 is the correct version of SXA 1.8 for 9.0 and it should support .NET 4.6.2, not 4.7.2. Version of SXA 1.8 for 9.1 has number 4.8.0 and that one indeed supports 4.7.1 runtime.
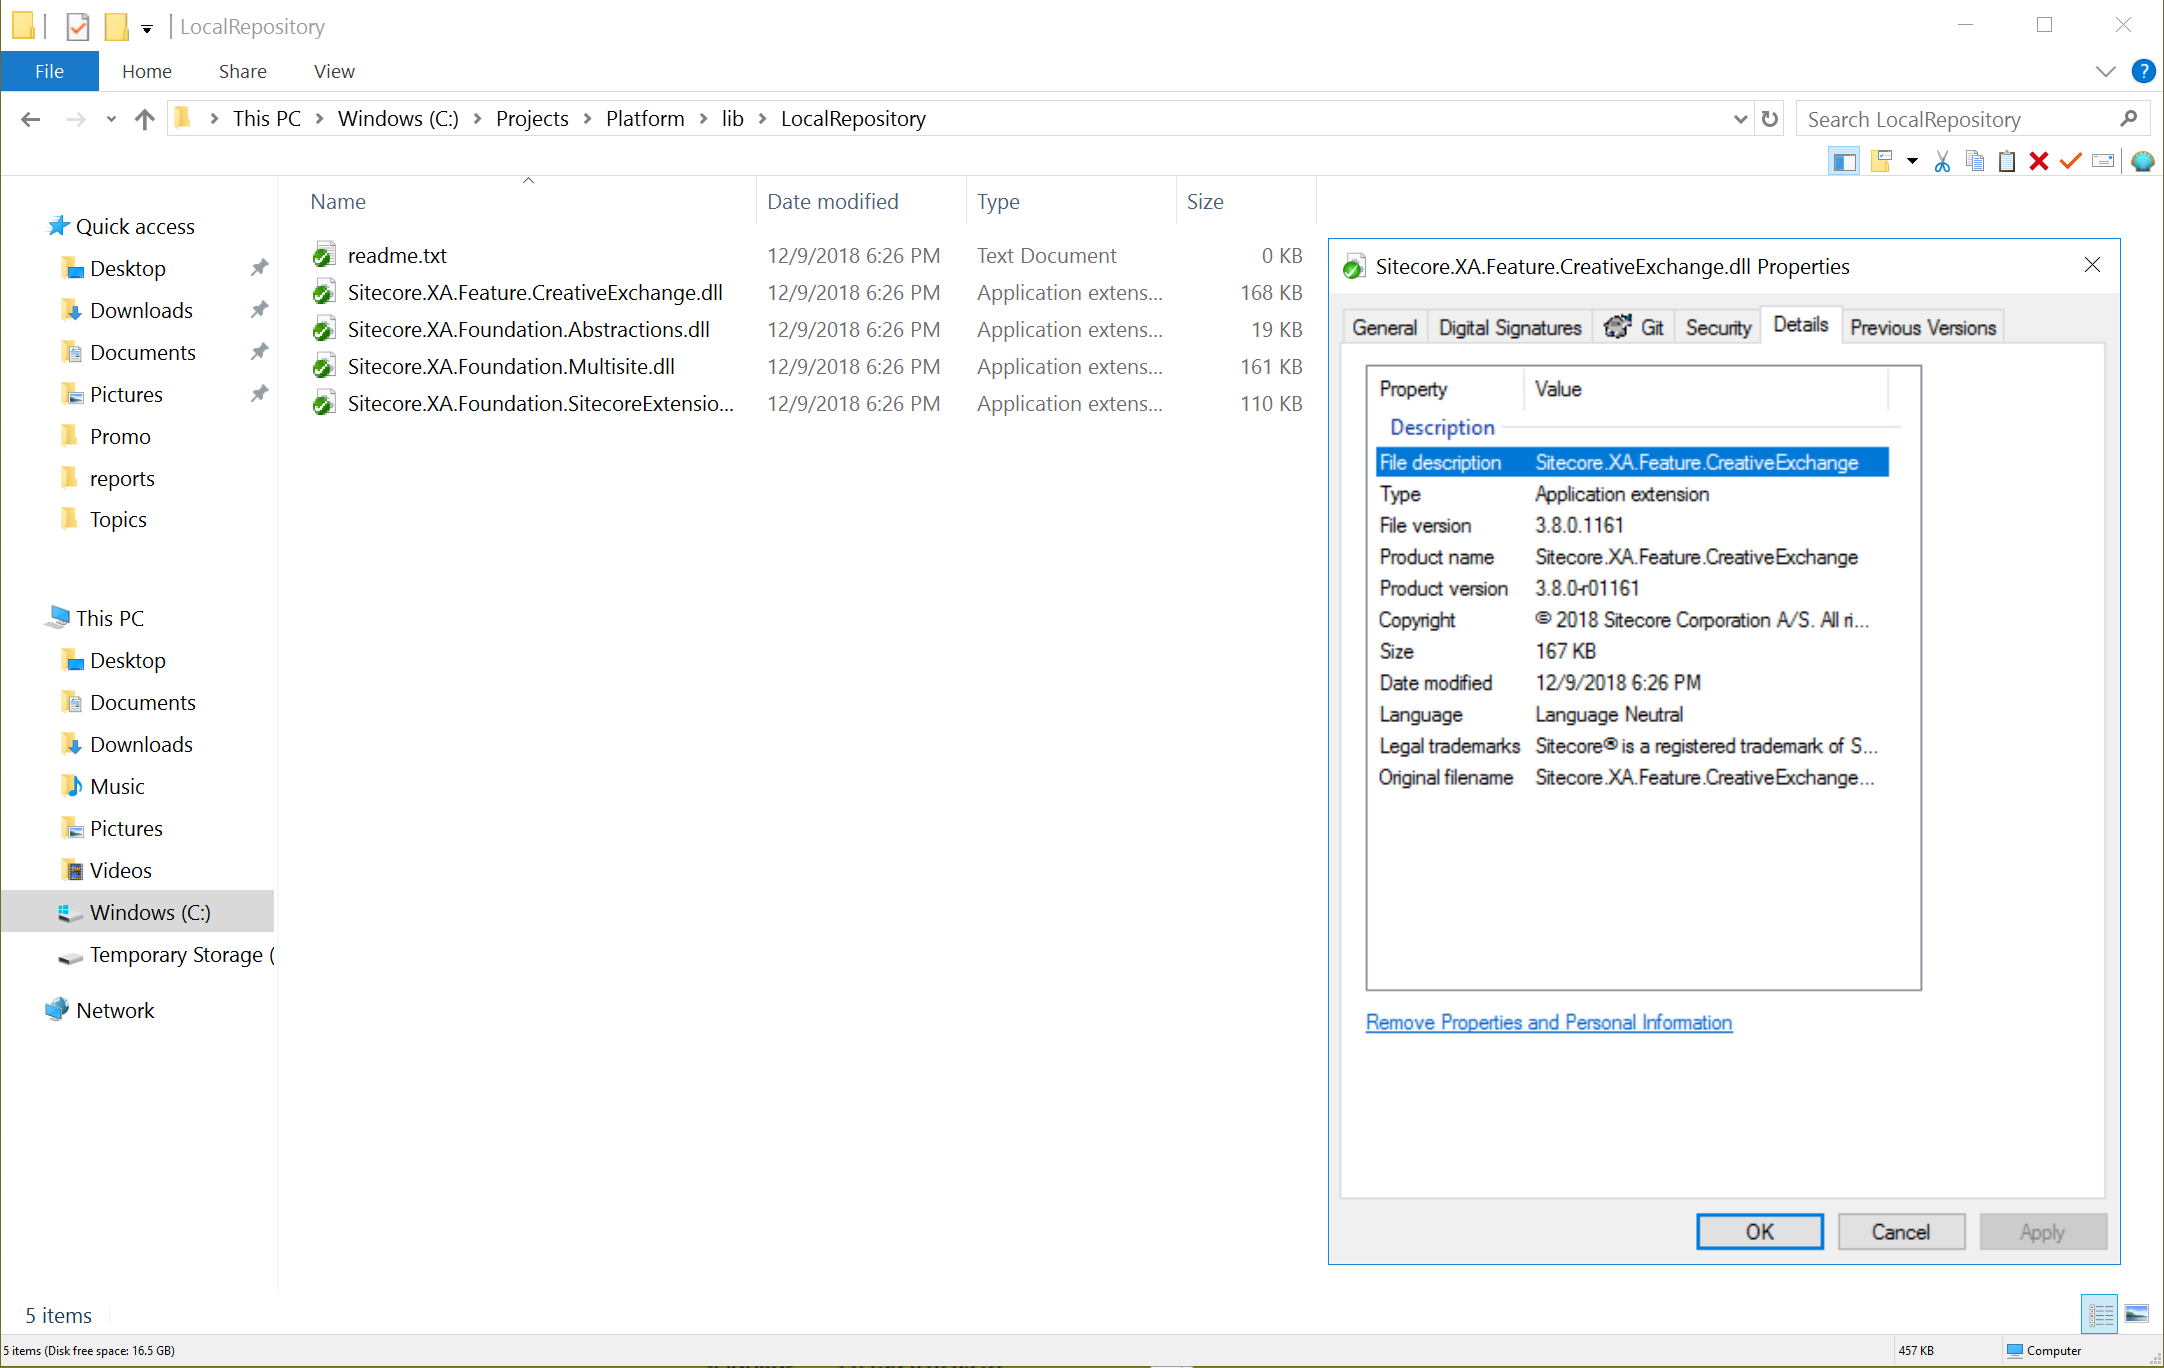
Since I cannot do anything about NuGet feeds, I turned back to the old lib\LocalRepository folder in my solution, simply copying all the required SXA 1.8 libraries from instance webroot (where I have SXA 1.8 working with clean 9.0 update instance) and referencing them instead from affected projects.

That did me a job for the moment. I will either update to the NuGets once it is fixed with the correct version or upgrade the entire solution to 9.1 when XC 9.1 is out, whatever comes earlier.
From time to time working with Sitecore I have to rely on automation (especially when working with CI / CD) so just decided to store some snippets for myself that use occasionally. This list will update with time.
- Run MsBuild from a console
- Config transform
- Test SQL connectivity from PowerShell
- Archive a folder and place it into a specific location using PowerShell only
- Unzip a folder from an archive using PowerShell only
- Install a NuGet package using CLI
- Run xUnit tests
- Push a NuGet package into a repository on example of Ocopus with API secret
- Upload a file to FTP using WebClient via PowerShell
- Transform of webconfig setting Sitecore 9 "role" and "localenv" variables
- Deserialize Unicorn from a PowerShell
- Create new IIS hostname winding for existing website
1. Run MsBuild from a consoleBuilding solution outside of Visual Studio or alternative IDE requires a manual call of MsBuild. In the very simple call you need to pass just two parameters - a solution itself and target, that can be Clean, Build etc.:
"c:\Program Files (x86)\Microsoft Visual Studio\2017\Enterprise\MSBuild\15.0\Bin\MSBuild.exe" c:\Projects\Platform\Platform.sln /t:Build
2. Config transform
Calling config transform described in more details by this link, so there is just a snippet below:
"C:\Program Files (x86)\Microsoft Visual Studio\2017\Enterprise\MSBuild\15.0\Bin\amd64\MSBuild.exe"
/nologo /maxcpucount
/nodeReuse:False
/property:Configuration=Debug
/property:Platform="Any CPU"
/property:WebConfigToTransform=C:\inetpub\wwwroot\Platform.dev.local\
/property:TransformFile=C:\Projects\Platform\src\Project\YourWebsite\code\web.config.xdt
/property:FileToTransform=web.config
/target:ApplyTransform
/toolsversion:15.0
/verbosity:minimal
C:\Projects\Platform\scripts\applytransform.targets
3. Test SQL connectivity from PowerShell
The easiest way to test connectivity between a custom machine running PowerShell and the desired SQL Server instance:
Invoke-Sqlcmd -ServerInstance 'hostname-and-instance-and-optionally-port' `
                      -Username 'sa' `
                      -Password 'Pa55W0rd!' `
                      -Query 'SELECT GETDATE() AS TimeOfQuery'
4. Archive a folder a place it into a specific location using PowerShell only
When you need to archive a folder you need to rely on an external tool such as zip, which brings another dependency into your pipeline. But that is not a case anymore when using PowerShell as it has entire power of .NET and that in turn has zip support within the namespaceSystem.Net.Compression. So why not to rely on PowerShell and .NET to do the entire job?
IF EXIST output.zip DEL /F output.zip
powershell.exe -nologo -noprofile -command "& { Add-Type -A 'System.IO.Compression.FileSystem'; [IO.Compression.ZipFile]::CreateFromDirectory('c:\Projects\Platform\build\output\', 'output.zip'); }"
5. Unzip a folder from an archive using PowerShell only
The reverse procedure of unzipping an archive into a folder can also be performed with .NET and PowerShell in the same manner:
powershell.exe -nologo -noprofile -command "& { Add-Type -A 'System.IO.Compression.FileSystem'; [IO.Compression.ZipFile]::ExtractToDirectory('c:\Projects\SomeArchive.zip', 'c:\inetpub\wwwroot\TargetFolder'); }"
6. Install a NuGet package using CLI
When you need to use NuGet from a console, you will be likely using NuGet CL. An example below shows installing a NuGet package into a folder passed as a parameter. Please keep in mind that package repositories should be mentioned in the accompanying configuration for nuget.exe:nuget install xunit.runner.console -OutputDirectory c:\Projects\!\NuGet\
7 Run xUnit tests
After installing xUnit running unit tests from a console, the rest is easy as than simply passing a library containing tests as a parameter:
c:\Projects\!\NuGet\xunit.runner.console.2.3.1\tools\net452\xunit.console.exe c:\Projects\Platform\src\Foundation\Dictionary\tests\bin\Debug\Sitecore.Foundation.Dictionary.Tests.dll
8. Push a NuGet package into a repository on an example of Octopus with API secret key
When you create a versioned package and may want to push that into NuGet repository, you will rely on nuget push command. A snippet shown below demonstrates that on the example of Octopus Deploy, passing it API key. A code below use to substitute current site context, pretty easy: NuGet.exe push Platform.68.0.0.nupkg -ApiKey API-UZYKODSIIRJZQF25QP2T7WFWG -Source http://winbuildserver.local:8080/nuget/packages
9. Upload a file to FTP using WebClient via PowerShellOne more trick to avoid using system dependencies by calling .NET commands via PowerShell. This time it is for sending a file over FTP to the remote server. Quite a disadvantage is storing the details open-text, including a password. That should be parametrised, of course:
$File = "c:\Projects\archive.zip"
$ftp = "ftp://hostname-and-port\username:Pa55w0rd@domain/path/more-folder/archive.zip"

"ftp url: $ftp"

$webclient = New-Object System.Net.WebClient
#$uri = New-Object System.Uri($ftp)

$uri = [uri]::EscapeUriString($ftp)

"Uploading $File..."

$webclient.UploadFile($uri, $File)
10. Transform of web.config settings for "role" and "localenv" variables
In Sitecore 9, one can set up an instance into a specific role that also takes predefined configurations. Further ahead, you may keep your numerous custom configurations next to each other targeting different 'roles' - that avoids clumsy config pathing and keeps settings functionally together in order to simplify maintenance. There is also localenv setting that helps you to distinguish various groups of servers from the same role, but residing in the different environments.
11. Deserialize Unicorn from a PowerShell
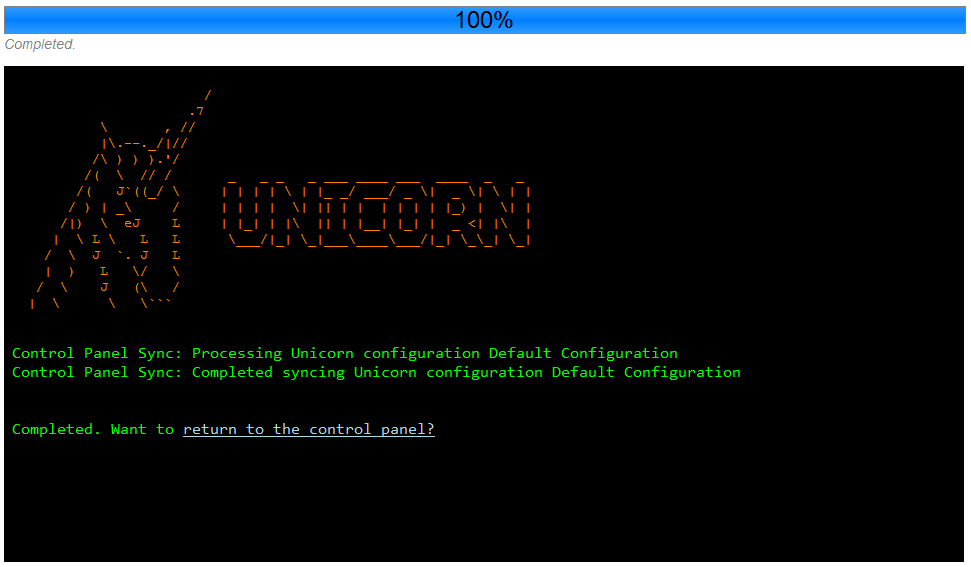
If you are using Unicorn in a Continuous Delivery pipeline, you need to make unicorn deserialise (sync) items into Sitecore from a console. Luckily, Unicorn has support for doing that by calling sync.ps1 that uses MicroCHAP.dll and supporting script Unicorn.psm1, passing Unicorn URL and a secret key as a parameter. That secret key can be configured at Unicorn.SharedSecret.config. Make sure there is unrestricted execution policy. Usage is pretty easy:
sync.ps1 -secret 749CABBC85EAD20CE55E2C6066F1BE375D2115696C8A8B24DB6ED1FD60613086 -url http://platform.dev.local/unicorn.aspx
12. Create new IIS hostname winding for existing website
When installing Sitecore with SIF, it makes sense also to add all your additional custom domain names bindings into IIS website, that has been just created by SIF, ideally should be done for both HTTP on port 80 and HTTPS on 443. The last one also requires creating a self-signed certificate for given hostname. So you may create a step having this command at the very end of installation PowerShell script:
	$Hostname = "YourSiteCustomHostname.dev.local"
	$SiteNameHere = "$SolutionPrefix.$SitePostFix" # "Platform.dev.local"

        write-host "Adding IIS Hostname Binding for website (HTTP and HTTPS)"
        write-host "Site name: $SiteNameHere"
        write-host "Hostname: $Hostname"

	$cert=(Get-ChildItem cert:\LocalMachine\My | where-object { $_.Subject -match "CN=$Hostname" } | Select-Object -First 1)
	if ($cert  -eq $null) {
		$cert = New-SelfSignedCertificate -DnsName $Hostname -CertStoreLocation "Cert:\LocalMachine\My"
	}
	$binding = (Get-WebBinding -Name $SiteNameHere | where-object {$_.protocol -eq "https"})
	if($binding -ne $null) {
		try{
	     	Remove-WebBinding -Name $SiteNameHere -Port 80 -Protocol "http" -HostHeader $Hostname
	     	Remove-WebBinding -Name $SiteNameHere -Port 443 -Protocol "https" -HostHeader $Hostname
		}
		catch{
		     	write-host "$SiteNameHere yet does not have a binding for $Hostname"
		}
	}

	New-WebBinding -Name $SiteNameHere -IPAddress "*" -Port 80 -HostHeader $Hostname

	New-WebBinding -Name $SiteNameHere -Port 443 -Protocol https -HostHeader $Hostname
(Get-WebBinding -Name $SiteNameHere -Port 443 -Protocol "https" -HostHeader $Hostname).AddSslCertificate($cert.Thumbprint, "my")Annoyed of the necessity of creating packages with recent items in order to share that with your colleagues? Tired of items' versioning? Why not to version those items in source control then?

My favorite tool for achieving that is Unicorn. It does exactly what it suppose to - syncs certain Sitecore items (recursively with children) within a directory, as configured, so that you are able to check-in the folder with all serialized items, so that your colleagues can sync that changes into their database; that means new features / fixes deliver items deltas simultaneously with their code counterparts.
Here is the example of configuration, whatever sits under mentioned paths (recursively) will be serialized:
The greatest thing I love about Unicorn is simplicity - as simple as the following:
- It installs as NuGet package.
- Consists of 2 DLLs and a config patch file.
- Just one control page at the web root to perform sync / revert
- Simple configuration file.
From limitations I would only mention recursiveness - specifying an item in config processes it will all child items and that cannot be overridden. Of course, this is not a problem in more advanced solution - TDS, but are we here about simplicity?

Installation from NuGet Package Manager Console:
PM> Install-Package Unicorn
See also: GitHub source code
Update: now version 3 has been released with great, even revolutionary, changes and it became more friendly. So, please read:
Update (01 Aug 2015): Here is the alternative approach answer and the solution for blog post:

I was always wondering, why Sitecore yet hasn't hosted Sitecore.Kernel and Sitecore.MVC on the NuGet?
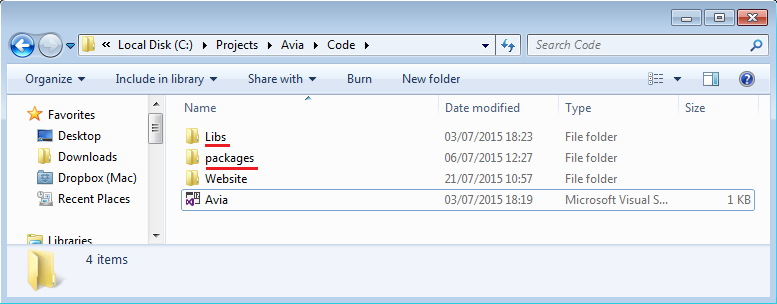
This would have simplified our (developers') life in some way, as for today, we have to keep an additional /Libs folder and reference those 2 DLLs out of it (but couple others will serve good as well, for instance Lucene DLLs etc.). That could also simplify versioning and dependencies issues for us as soon as we still are using NuGet package management, so we now have 2 folders for references, highlighted below:

If they avoid doing that for licensing purposes - that seems quite strange as mentioned libraries are very little part of what Sitecore is, plus they may just supply obfuscated DLLs via NuGet and normal reflection-friendly via standard platform installation.
Here is what I have in my Libs folder and that I use and reference in small proof-of-concept project:

Dear Sitecore, if you read me, please consider using NuGET - today's industry standard for packaging and resolving dependencies .