Experience Sitecore ! | All posts by martin

Experience Sitecore !

More than 200 articles about the best DXP by Martin Miles

I have been awarded the Sitecore Most Valuable Professional Technology Award in 2020

Great news for me!

Just got an email saying I was awarded Sitecore Most Valuable Professional Technology Award for the oncoming year.

I feel very excited and carry on plenty of brave plans for the 2020. My main efforts will be applied in two main areas: containers and JSS, at least as I see that now. Apart from will take all of my best to get selected as a speaker for a big audience conference and keep going developing Sifon, as it is quite promissing tool (unfortunately it is so tought with finding and allocation long timeslots for it).

In any case, I am pleased to stay as MVP and hope to meet you at the events later this year.


Welcome Sifon - a must-have tool for any Sitecore developer,to simplify most of you day-today DevOps activities

UPDATE 23/12/2019: There has much been done since this post originally, Sifon is now working on remote machines as well as it supports Sitecore Commerce. The main news, however, is that it now got a website with documentation, demos, roadmap, and other project-related items. Thus, it would be best to refer to it - https://Sifon.UK.


Do you love PowerShell as much as I do?

Along the time, Sitecore gains more and more new features, its architecture obtains some existing features split out into microservices. Maintenance becomes even more complicated and time-consuming. Just as an example, a few years back in time we had only 3 databases coming with the platform, while now there are more than 15. 

Luckily, PowerShell as a scripting technology comes us with assistance, providing the console-based API to most of the OS and platform management features. Now it becomes possible to automate quite complex procedures just by scripting them out. Take a look at Sitecore XP installer for example, or at even depicting the complexity - an installer script for Sitecore Commerce with almost a hundred steps. How long did it take you to run it all? That confirms the statement on how PowerShell became an inevitable part of developers' lives.

But here we come to another problem. The number of scripts we have grows quite quickly, as the number of standard tasks grows. And at some moment I start noticing that something goes wrong with it. Those who read my blog from time to time may have noticed, that I am kind of a productivity maniac, and being such a person, I start thinking and analyzing where the productivity bottlenecks are while working with PowerShell. What do you think they are?

Firstly, scripting means typing. Typing means typos. Typing means forgetting the syntax. Regardless of how one is perfect as a typist, interaction with a keyboard has its own expenses. The good news is that PowerShell addresses these issues by providing interactive help and autocompletion. But it still consumes your time, compared to the UI operations (of course, those with proper UX and well-designed).

Secondly, we have more ready-to-use scripts and we need them all to be stored somewhere. Somewhere on a filesystem, of course. Those smart and best use GitHub gists (they can be also secret, not only public), and since recent ones can have also private GitHub accounts, so what I know few people do is just create private repositories of their entire scripts libraries. The benefits are clear - if these libraries are well organized and properly structured - it gives immediate access to some specific script one may need to find and access. The principal criteria here is time-to-access and the GitHub repo provides that for sure, of course, you may use any other version control hosting providers, subject to velocity.

Thirdly, sensitive information. Scripts call, other scripts, that in turn call another script (modules) that in turn call APIs - that similar nesting we typically have with our OOP languages. The issue comes from those outer-level scripts that contain some sensitive parameters, such as usernames, passwords, secrets, tokens, and similar. You don't store all of the above at external source control hostings, even if that's a private repo, do you? If you do, I can recommend you a few really worthy courses on information security. Of course, a developer can parametrize all sensitive information and bubble it up to an external script, so that it comes to input parameters. But then we face a bottleneck issue I described first. Not just one has to provide parameters but need to type them manually and to store the values somewhere, which turns in a payload of accessing those values. Still not good. 

In any case, the reality is that plenty of such scripts are bloated across the hard drive, which still comes to all the issues described above.

Finally, when it comes to sharing those puter scripts, we meet the same story of separating sensitive data and environmental-specific values from pure business logic.

Of course, developers do value their time and try to find compromises. I am not exclusive and decided to go my own developer's way, which you may guess means developing something bespoke. So please welcome Sifon - a must-have tool for any Sitecore developer, to simplify most of your day-to-day DevOps activities.

But before going ahead - a bit of intro. Without a deep understanding of all the requirements, I still made an early prototype of a given tool to address some of my problems somewhere back in November 2018. Greatly impressed by Sitecore Instance Manager (also known as SIM) I decided to return a graphical installer to Sitecore, which was missing out by those days. That of course was achieved, however, the most valuable feature was the ability to back up the entire Sitecore instance state, clean up the web folder and databases and restore it back from a folder. All that in just a minute time, which seemed to be nothing comparing even to installation with SIF. Something extremely helpful, when you develop with Helix principles and often need to create rollback points before trying some complicated PoCs or for example to a clean just installed version of Sitecore, in order to perform deployment on a clean instance.

That software start saving my time significantly, right from the moment of its creation! Later I added a few more frequently used functions into it, such as installing modules, Solr, rebuilding indexes and full republish, adding HTTP bindings to an instance, and moving its SSL certificates into trusted storage. I shared this PoC with a few of my colleagues working on the same project saving their time as well. 

But I could not share it with the entire Sitecore community, to my regret. Firstly, due to unstable code coming out of PoC sitting on top of another PoC and so on, turning Proof of Concept into the Proof of Hell. Secondly not just a project architecture was put under a big question mark, but also the whole concept should be revised. 

I wanted it not just to be well maintainable, but extendable. Saying that I mean the ability of each individual working with this program to easily create their own plugins and extensions, addressing some specific task that is shareable or publically open-sourced. Multiplied by Sitecore community efforts that may become an unprecedently helpful tool for all of us, I know you folks are very creative!

So once again, please welcome Sifon. But first of all, what the word Sifon means? 


Sifon is a simplified casual term for a whipping siphon that is used to create carbonated water, often with some fancy tastes. It requires cartridges of gas, also known as chargers, to pressurize the chamber holding the liquid. That very roughly explains the architecture of Sifon tool I am presenting to you today.

In my case, Sifon is a nicely developed PowerShell host with numerous features that allow "playing" any custom PowerShell or C# code in form of plugins. That comes as a curious metaphor - the host itself serves as a siphon body, where plugins stand as an analog for charger cartridges. The main screen looks quite minimalistic:


Features:

  • stores credentials and environmental parameters in one place called profile, passing them as the parameters into the code
  • supports multiple profiles for many environments with immediate switching between them by one click
  • "backup-remove-restore" routine comes as built-in and is available immediately after setting up the first profile 
  • profile editor allows the testing connection few basic parameters auto detections but will be extended with more features
  • runs in multithread, responsively updating the progress along with the rest of the corresponding feedback


From the feature list, as for a user, it offers these benefits:

  • keep all your frequently used scripts at the same place, organizing them by nested folders as preferred
  • separate scripts from sensitive parameters, allowing sharing and publishing them open source
  • because of the above, one may create own repository and clone scripts directly into Sifon's plugins directory 


NOTE! Before going ahead, please keep in mind that currently that is just a demo beta, so everything may be subject to changes, especially when it comes to UI. Also, the entire validation layer is disconnected, so please submit data responsibly!

The first thing one needs to do after installation is to set up a profile. As I mentioned above, a profile is an easy-to-switch-between set of parameters applicable to a specific environment. As simple, these parameters from a currently selected profile will be passed over to any script executed, regardless of whether that passed into a built-in feature, PowerShell script, or DLL plugin. It is expected that both mentioned are accepting these parameters, so please refer to the provided example in order to build your own plugins. 

Important! In order for Sifon to function, you must create at least one profile that has a SQL Server connection set up. Otherwise, most of its functions will be greyed out, until required profile data is submitted.

Now, let's take a look at Sifon's built-in "backup - remove - restore" routine. Making backup comes as easy as:


All you need to do is specify the folder to put the backups into, select which instance to backup (you may have many) and decide whether you want to backup databases (select which exactly), web folder, or both.

As you might know, it is always better to deploy Helix-based solutions into a clean environment, so you may want to clean the existing webroot before restoring it into that folder. It is done in a similar manner - from dropdown select which instance to remove and it will prompt you with a webroot folder and installed databases. You just need to check/uncheck what you'd like to remove. Please note that databases can be deleted individually, and by selecting "manual entry" you can list all the databases from all the instances to be selected for removal.


Not to say that restoring looks and also works similar to mentioned above. Simply select a folder with a corresponding backup and select what to restore. If the folder contains only webroot or just databases, you'll be able to restore only what you've got. 


Creating a capsule plugin requires you to write PowerShell in a specific manner, but the two important points to mention are:

1. accepting parameters. Just attach this to the top of your script, and you'll get these parameters auto-provided

param(
    #Comes from profile
    [string]$ServerInstance,
    [string]$Username,
    [string]$Password,
    [string]$instanceName,
    [string]$instanceFolder,
)

2. reporting the progress by write-progress. This is done by the following syntax

Write-Progress -Activity "This is the name of current operation" -CurrentOperation "Step 1" -PercentComplete 10
start-sleep -milli 500
Write-Progress -Activity "This is the name of current operation" -CurrentOperation "Step 2" -PercentComplete 20

You may run test-progress.ps1 script and review its code as it demonstrates how progress output works with PowerShell


Have you ever noticed a light-blue progress bar when installing Sitecore with SIF (as below)?


That's it! It also means plenty of SIF functions can be converted to work with Sifon and will support displaying progress natively. Few of them will be provided upon the release.


List of plugins (capsules) that will be provided upon release through GitHub:

  • all types of package installation: traditional, update-packages and web deploy WDP modules
  • creating an SSL certificate and adding it to the trusted storage
  • enable SPE remoting for a selected instance and further execution of plugins in their context
  • install Solr service, both as single and in-parallel running to already existing service (ie. various versions)


This is the first publically released beta and it is downloadable from this blog post. In the future, it will be distributed from own website along with the documentation, but there will be an easier way of installing it:

choco install sifon


Future plans

  • execute PowerShell scripts in the context of a remote machine by WSMAN (that's already supported, but no UI for it yet)
  • add support microservices of Sitecore, such as xConnect, Identity Server, and Publishing Service
  • in addition to the above, add full support for Commerce, its microservices, and databases
  • be fully compliant with Sitecore 9.2, including official installer script (SIF script coming out of the box)
  • extend custom OutputFormatters to plugins, allowing presenting more friendly console output (currently works at Sifon itself)
  • community plugins available through the GitHub repository
  • once becomes matured, releasing Sifon itself open source


You can download the beta by clicking this link (please download from Sifon website instead). It will already be able to do backups and restore your instances. The samples of capsule plugins are also available through this GitHub. Just compile DLL or drop PowerShell into Scripts folder to get them available via the menu.

Hope you enjoy that and looking forward to your feedback.


Enhancing Treelist and Miltilist fields with a lookup feature for productivity. Two approaches, same goal: browser user script and serverside

brThis trick saves me lo-o-o-ot of time, especially working on large Helix/SXA solution.

Typically you have a treelist that looks like this:

Now tell me what actions do you take when there is a necessity to look up what are one or few of these templates? How you achieve that?

I assume you raw copy GUID, paste into search, inspect and then return back. Clumsy, isn't it?

Objective. My desire was to achieve a popup or new tab window by clicking ENTER hotkey once so that I immediately can look up this template for whatever interests me. I ended up not just achieving the goal but doing that in two opposite ways. Let's consider the pros and cons of each approach (they are almost opposite)


LET'S REVIEW THE OPTIONS

1. Browser user script. I recently wrote about implementing browser user script in order to enhance your productivity while working with Sitecore content management. This approach has

  • Pros:

    • leaves server untouched
    • user can easily adjust the flow right in the nice code editor provided by the extension
  • Cons:

    • applies only on a specific browser on your client machine
    • sometimes relies on browser extensions ie. TapmerMonkey


2. Serverside script alteration is an opposite option for achieving the goal. I recently blogged about developing Expand / Collapse all editor sections implementing this approach. In order to do so, I need to modify <web_root>\sitecore\shell\Applications\Content Manager\Content Editor.js file within my sitecore instance.

  • Pros:

    • applies to all users with all browsers using your Sitecore instance
  • Cons:

    • served by a back-end and risks interfering with other serverside code
    • business logic needs to be placed into Sitecore instance, whether by deployment or manually

Anyway, you may pick up either of the solutions depending on your preferences, it's better to have a choice. Let's turn to the implementation.


IMPLEMENTATION

1. Browser user script. The way Sitecore Desktop functions is dynamically loading iframes for specific features, so it is not as easy to use selectors with it due to not just elements but even documents not yet loaded into DOM. 

To address this implementation I picked Mutation. It allows you creating handlers for whatever mutation occurs in your DOM, one may also specify what types of events to handle:

// handing a mutation occured
var mutationObserver = new MutationObserver(function(mutations) {
  mutations.forEach(function(mutation) {
    console.log(mutation);
  });
});

// starts listening for changes in the root HTML element of the page.
mutationObserver.observe(document.documentElement, {
  attributes: true,
  characterData: true,
  childList: true,
  subtree: true,
  attributeOldValue: true,
  characterDataOldValue: true
});
I use nested MutationObserver approach where outer observer indirectly handles new documents appearing and once it happens - attaches the nested observer within a given iframe. So below is the entire code:
// ==UserScript==
// @name         Multilist and Treelist values lookup
// @namespace    http://tampermonkey.net/
// @version      0.1
// @description  When working with multilist / treelist items in Sitecore, simply hit ENTER on right-hand side selected item in order to preview it in new tab
// @author       Martin Miles
// @match        */sitecore/shell/default.aspx*
// @grant        none
// ==/UserScript==

(function () {
    'use strict';

    const settings = { mutation: { attributes: true, characterData: true, childList: true, subtree: true, attributeOldValue: true, characterDataOldValue: true } };

    var mutationObserver = new MutationObserver(function (mutations) {
        mutations.forEach(function (mutation) {

            if (mutation.type == "attributes" && mutation.target.id.startsWith("startbar_application_") && mutation.target.className == "scActiveApplication") {
                var iframe = getIframeFromActiveTab(mutation.target);
                if (iframe) {
                    internalMutationObserver(iframe);
                }
            }
        });
    });

    mutationObserver.observe(document.documentElement, settings.mutation);

    function internalMutationObserver(iframe) {
        var innerObserver = new MutationObserver(function (innerMutations) {
            innerMutations.forEach(function (m) {

                var _el = m.target;
                if (_el.className == 'scEditorFieldMarkerBarCell') {

                    var labels = _el.parentElement.querySelectorAll('.scContentControlMultilistCaption');
                    labels.forEach(function (label) {
                        if (label.innerHTML == 'Selected') {
                            label.innerHTML = label.innerHTML + ' (hit ENTER on selected item for preview in a new tab)';
                        }
                    });

                    var selects = _el.parentElement.querySelectorAll('select');
                    selects.forEach(function (select) {
                        select.addEventListener("keypress", keyPressed);
                    });
                }
            });
        });

        // wire up internal mutation
        innerObserver.observe(iframe.contentDocument, settings.mutation);
    }

    function getIframeFromActiveTab(element) {
        let frameName = element.id.replace('startbar_application_', '');
        let iframe = document.querySelectorAll('iframe#' + frameName);
        if (iframe.length > 0) {
            return iframe[0];
        }

        return null;
    }

    function keyPressed(e) {
        if (e.keyCode == 13) {

            var selsectedValue = e.target.options[e.target.selectedIndex].value;

            var url = getUrl(selsectedValue);
            if (url) {
                openInNewTab(url);
            }

            return false;
        }
    }

    function getUrl(selsectedValue) {

        let guid;
        var parts = selsectedValue.split("|");
        if (parts.length === 2) {
            guid = parts[1];
        }
        else if (isGuid(selsectedValue)) {
            guid = selsectedValue;
        }

        return !guid ? guid : '/sitecore/shell/Applications/Content Editor?id='
            + guid + '&amp;vs=1&amp;la=en&amp;sc_content=master&amp;fo='
            + guid + '&ic=People%2f16x16%2fcubes_blue.png&he=Content+Editor&cl=0';
    }

    function isGuid(stringToTest) {
        if (stringToTest[0] === "{") {
            stringToTest = stringToTest.substring(1, stringToTest.length - 1);
        }
        var regexGuid = /^(\{){0,1}[0-9a-fA-F]{8}\-[0-9a-fA-F]{4}\-[0-9a-fA-F]{4}\-[0-9a-fA-F]{4}\-[0-9a-fA-F]{12}(\}){0,1}$/gi;
        return regexGuid.test(stringToTest);
    }

    function openInNewTab(url) {
        var win = window.open(url, '_blank');
        win.focus();
    }
})();
To run this scrup add a new script from TamperMonkey's dashboard, paste the code, save and enable it. After refreshing Sitecore Desktop you'll be able to preview multiselect field values bu hitting ENTER button, just as on a demo below:

Ready-to-use script is available on GitHub: link

2. The serverside approach considers modifying some serverside component, in a given case, it is quite simple - just modifying <web_root>\sitecore\shell\Applications\Content Manager\Content Editor.js file by adding few functions at the bottom of it:

scContentEditor.prototype.onDomReady = function (evt) {
    this.registerJQueryExtensions(window.jQuery || window.$sc);
    this.addMultilistEnhancer(window.jQuery || window.$sc);
};

scContentEditor.prototype.addMultilistEnhancer = function ($) {
    $ = $ || window.jQuery || window.$sc;
    if (!$) { return; }

    $('#MainPopupIframe').load(function () {
        $(this).show();
        console.log('iframe loaded successfully')
    });

    $(document).on("keypress", "select.scContentControlMultilistBox", function (e) {
        if (e.keyCode == 13) {

            var selsectedValue = e.target.options[e.target.selectedIndex].value;

            var url = getUrl(selsectedValue);
            if (url) {
                openInNewTab(url);
            }

            return false;
        }
    });

    function getUrl(selsectedValue) {

        let guid;
        var parts = selsectedValue.split("|");
        if (parts.length === 2) {
            guid = parts[1];
        }
        else if (isGuid(selsectedValue)) {
            guid = selsectedValue;
        }

        return !guid ? guid : '/sitecore/shell/Applications/Content Editor?id='
            + guid + '&amp;vs=1&amp;la=en&amp;sc_content=master&amp;fo='
            + guid + '&ic=People%2f16x16%2fcubes_blue.png&he=Content+Editor&cl=0';
    }

    function isGuid(stringToTest) {
        if (stringToTest[0] === "{") {
            stringToTest = stringToTest.substring(1, stringToTest.length - 1);
        }
        var regexGuid = /^(\{){0,1}[0-9a-fA-F]{8}\-[0-9a-fA-F]{4}\-[0-9a-fA-F]{4}\-[0-9a-fA-F]{4}\-[0-9a-fA-F]{12}(\}){0,1}$/gi;
        return regexGuid.test(stringToTest);
    }

    function openInNewTab(url) {
        var win = window.open(url, '_blank');
        win.focus();
    }
};

Invalidate browser cache and refresh the page. I am not including a demo record as it works identical to the demo above for the first approach.

Note! if you also have Expand/Collapse script in place from previous blog post, then you need to share once handler for cboth calls since unlike in C# you may not have multi-delegate prototype handler:
// you cannot have multidelegate onDomReady here, so share all calls within one handler
scContentEditor.prototype.onDomReady = function (evt) {
    this.registerJQueryExtensions(window.jQuery || window.$sc);
    this.addMultilistEnhancer(window.jQuery || window.$sc);
    this.addCollapser(window.jQuery || window.$sc);
};

Result. Regardless of the approach taken, now you may look up Treelist selected items by selecting them and hitting the ENTER button. You may include this trick into your own Sitecore productivity pack (you have one already, don't you?) as it indeed helps so much.

Implementing blogs index page with filters and paging: SXA walkthrough

Objective.

Initially I've had a template called Blog, and several pages of it which are actual blog posts. Now I have created a page called Blog Index, implementing template, partial and page designs of the same name. The obvious purpose of given page is to show the list of blog posts, being able to filter this out by certain criteria, including a new custom one - series. Content authors want to group these blogs posts into series, so that's a grouping by a logical criteria. They also want to to display the most recent higher, but give readers an option to select an order, as well as page size.


Implementation plan

  1. Switch to SXA "Live mode" (optional)
  2. Create taxonomy categories
  3. Create Series interface template
  4. Use interface template and update blog posts
  5. Create search scope for page template
  6. Create computed field
  7. Publish, redeploy and re-build indexes
  8. Create facets
  9. Create filter datasources
  10. Make rendering variant for search filters
  11. Make rendering variant for search results
  12. Place component to partial design
  13. Configuring Search Results component
  14. Enjoy result!


IMPLEMENTATION

1. Before start, switch web to master, this can be done at /sitecore/content/Tenant/Platform/Settings/Site Grouping/Platform at Database field by setting it to master (dont't forget to publish that particulat item however). Once done, it will use not only master database at published site, but also master indexes.


2. Firstly, let's create Series taxonomy folder under Taxonomy (/sitecore/content/Tenant/Platform/Data/Taxonomy) and populate it with actual series-categories that will be used for filtering:


3. Now I can create interface template to implement series selection. This template will be later used with not just Blogs but also few other page types, that's why I make it an interface and put into shared - /sitecore/templates/Project/Tenant/Platform/Interfaces/Shared/_Series.

Make sure the Source column has correctly set datasource, so that you later will be able to pick up right category under site's Data/Taxonomy/Series folder, as on example below:

Datasource=query:$site/*[@@name='Data']/Taxonomy/Series&IncludeTemplatesForDisplay=Taxonomy folder,Category&IncludeTemplatesForSelection=Category


4. Once done, add _Series interface template to actual page template (Blog in my case). Then one can go to existing blog posts and assign them into series (best with Sitecore PowerShell):

$rootItem = Get-Item master:/sitecore/content/Tenant/Platform;
$sourceTemplate = Get-Item "/sitecore/templates/Project/Tenant/Platform/Pages/Blog";  
$selectedSeries = "{1072C536-0EC2-4EAB-8D98-DC9BF441F30A}";

Get-ChildItem $rootItem.FullPath -Recurse | Where-Object { $_.TemplateName -eq $sourceTemplate.Name } | ForEach-Object {  
        $_.Editing.BeginEdit()
        $_.Fields["Series"].Value = $selectedSeries;
$_.Editing.EndEdit() }

Now selecting an item displays which series it belongs to:


5. Create scope under /sitecore/content/Tenant/Platform/Settings/Scopes, call it Blogs and set its field Scope Query to filter out by Blog template ID:


6. Create computed field contentseries at you project to store actual name of Series into index that's in addition to another field in index called series so that automatically indexed by template and stores GUID for series. This is how I implemented it in Platform.Website.ContentSearch.config:

<configuration xmlns:patch="http://www.sitecore.net/xmlconfig/">
  <sitecore>
    <contentSearch>
      <indexConfigurations>
        <defaultSolrIndexConfiguration>
          <fieldMap>
            <fieldNames>
              <field fieldName="contentseries" returnType="stringCollection" patch:after="*[0]" />
            </fieldNames>
          </fieldMap>
          <documentOptions>
            <fields hint="raw:AddComputedIndexField">
              <field fieldId="{ID-of-Series-field-within-_Series_template}" fieldName="contentseries" returnType="stringCollection" patch:after="*[0]">
                Tenant.Site.Website.ComputedFields.CategoriesField,Tenant.Site.Website
              </field>
            </fields>
          </documentOptions>          
        </defaultSolrIndexConfiguration>
      </indexConfigurations>
    </contentSearch>
  </sitecore>
</configuration>


7. Publish this configuration into webfolder, then clean up (you can run PS script below) and rebuild indexes.

stop-service solrServiceName
get-childitem -path c:\PathTo\Solr\server\solr\Platform*\Data -recurse | remove-item -force -recurse
start-service solrServiceName
iisreset /stop
iisreset /start


8. When computed field comes into index, the next step sould be to create Series facets. Please note that facet name should be different from the field name as the one got by template and then facet overwrites it

  • For Series - under /sitecore/content/Tenant/Platform/Settings/Facets. The most important field here is Field Name, the value would be contentseries that matched name of field we've created at the previous step
  • Also create one for Published date that relies on already existing published_date_tdt field, which is a custom date field presenting in all of my content page templates.


9. Create new datasource items:

  • checklist filter called Series under /sitecore/content/Tenant/Platform/Data/Search/Checklist Filter folder and assign its first field to point Series facet created at previous step
  • an item for Publication Date under /sitecore/content/Tenant/Platform/Data/Search/Date Filter/Publication Date.


10. Implement Search Filter rendering variant that will contain actual filters. I create that under my custom component Search Content, make two columns and also component variant field into each of them. Assign Filter (Checklist) into first and Filter (Date) into second. Reference datasource items from previous step for each component correspondingly:


11. Implement Search Result rendering variant that will define presentation for each item shown/found:

Noticed Series reference field? That switches context to the item references by Series field, so that I can get a value of actual category under Taxonomy folder.


12. In partial design for Blog Index, drop the following renderings into the canvas: Search content, Sort Results, Page Size and Search Results.


13. Finally, for Search Results component, go to Edit component properties, under SearchCriteria section assign Search results signature to search-results and also select Search scope to match Blogs.

The result:

Boosting productivity with Sitecore by employing user scripts on an example of SXA activities

In one of my recent productivity blog posts, I wrote about an approach that saves me plenty of time - pre-opening numerous Content Editor on specific nodes so that I can switch between subnodes I am working with distributed across entire Sitecore tree almost immediately. This is especially helpful when working on SXA-based websites so that I will use it in the given example, however not limited to. Typically, when distributed SXA website, you'll need access to the following:

  1. Home page and all the children.
  2. Data folder for the site
  3. Rendering Parameters
  4. Renderings
  5. Site Media items
  6. Templates for site
All these are located under different paths, and I am still surprised meeting some folks who try to manipulate all of the above within single content tree of single Content Editor. I'd prefer spending time on something more productive rather than manipulating the content tree and have been previously pre-opening these items in individual Content Editor windows of Sitecore Desktop. As a hidden benefit, that approach raises a habit of having your stuff in persistent windows, for example, I got used to having Rendering Variants in the third tab. However, after each session reset or VM restart, I still had to re-open six editors and select items individually - that reduces the benefits of a given approach. Thus, let's fix this with automation.

In order to do that, I will employ such called User Scripts. But firstly, what are User Scripts? As per definition, a user script is programming that modifies the appearance or behavior of an application. A user script for a Web site, for example, can customize the way that content will display in the host browser. That's what we'll do with our beloved Sitecore. As for now, only Google Chrome supports these scripts out of the box and treats them as regular extensions. Opera browser also has support in some way, for the rest of browsers you may need to run an extension which will intermediate between the browser and Web servers. For Firefox, use the GreaseMonkey extension (it worked for me as well)

I am using TamperMonkey for Chrome as it gives additional benefits over OOB browser support, such as built-in editor with hotkeys and syntax highlighter, and more precise settings. 


First script

To start with lets practice on something very simple just to prove user script does work in principle. I decided to write a small script that after logging to Sitecore open Content Editor for you instead of the default behavior of showing LaunchPad. Here is its code:

// ==UserScript==
// @name         Launchpad redirects to shell
// @namespace    http://tampermonkey.net/
// @version      0.1
// @description  try to take over the world!
// @author       You
// @match        */sitecore/client/Applications/Launchpad*
// @grant        none
// ==/UserScript==

(function() {
    'use strict';

     window.location.href = "/sitecore/shell/default.aspx";
})();

The first nine commented rows at the beginning are specifying user script parameters and should not be removed. Please pay attention to @match parameter - it configures URL match where the script should run (however does not work with GreaseMonkey in FireFox). TamperMonkey also allows overriding this value.

After adding it to TamperMonkey, it looks like below:


Another simple example

I am quite often kicked-off into login screen due to session expiration or other reason that invalidate the current session. Even browser kindly stores last username and password for me, it takes some time to figure out what went on and use a mouse in order to click Submit button. If you opted out of browser remembering passwords for you and your password is smth. more complicated than b - then you'll likely to lose even more time. Let's fix that by writing auto-login script:

// ==UserScript==
// @name         Sitecore autologin
// @namespace    http://tampermonkey.net/
// @version      0.1
// @description  Automatically logs into Sitecore, especially helpful on session timeouts
// @author       Martin Miles
// @match        */sitecore/login*
// @grant        none
// ==/UserScript==

(function() {
    'use strict';

    var login = document.getElementById('UserName');
    var password = document.getElementById('Password');
    var submit = document.getElementById('LogInBtn');

    login.value = 'admin';
    password.value = 'b';
    submit.click();
})();

Works like a sharm - as soon as timeout brings you to Login screen, scrip does the rest! This of course is good to use on dev machines, but not qute suitable for production scenarios due to security concerns.


More advanced script

So now, after re-logging to Sitecore, you'll be redirected to Content Editor within Sitecore Desktop opened. It works!

Now I am going to write a more complicated script that will open 6 Content Editors and each of them will open its's predefined item.

The full code of this script can be obtained from my GitHub designated repository by this link: the code. Please keep in mind that this is a quick demo variant I have quickly created for the purpose of this blog post, so the code is quite minimal just to meet the objectives  Below I am showing how the execution looks like:

    start                        // click Sitecore Start button
        .then(loadContentEditor) // select Content Editor from start button menu
        .then(getContentEditor)  // gets iFrame handler in order to pass down the pipeline to furhter callers
        .then(clickId)           // expand Content node
        .then(clickId)           // expand tenant node
.then(clickId) // expand site node
.then(clickId) // expand Home page node
.then(selectItem) // click home item in order to select .then(startPromise) // a 'promise' version of clicking Sitecore Start button .then(loadContentEditor) // ... repeat the above actions for new Content Editor iframe .then(getContentEditor) .then(clickId) .then(clickId) .then(clickId) .then(clickId) .then(selectItem)
and parameters:
const items = {
    content: "{0DE95AE4-41AB-4D01-9EB0-67441B7C2450}",
    content_tenant: "{3E49489A-45F6-4FDC-BC53-CA40592AE944}",
    content_site: "{6B81532B-FCF4-461A-9964-C82980AE2933}",
    content_site_home: "{8CCB4C5D-B4A2-4476-91AA-275E9D1FB05B}",
    content_site_data: "{D1F7AC1A-9A4F-4009-A9F4-F8012C25FD9D}",
    content_site_presentation: "{2273EE5A-C314-4453-A2F4-69AD28B5B252}",
    content_site_presentation_renderingVariants: "{A9A0A0B7-C16F-49C9-BDBB-4CCFFC15124A}",

    layout: "{EB2E4FFD-2761-4653-B052-26A64D385227}",
    renderings: "{32566F0E-7686-45F1-A12F-D7260BD78BC3}",
    feature: "{DA61AD50-8FDB-4252-A68F-B4470B1C9FE8}",
    renderings_tenant: "{CD3E1C5B-DF68-439B-8AA3-055FE2FD7D42}",
    renderings_tenant_components: "{A69A614C-11BC-4052-949F-54978988F653}"
}
With that enabled, here's how the working result looks like: 
 

Future plans

I am thinking of wrapping more methods into a Selenium-like framework, so that one could chain any sequence of actions in an easy manner without the need of having any sort of dependencies, apart from framework script itself.

In general, this post demonstrates one of the thousands of possible use cases of User Scripts with Sitecore. Wise usage may save you and your content editors plenty of time by implementing reasonable automation. Hope this post helps.

Uploading scheduled auto-backups of editors content for your Helix / SXA website into Azure Blob storage

INTRODUCTION

I assume you are following good practices and develop Helix-powered websites (or SXA, that follows Helix by definition). In that case, you do separate actual user-generated content items from definition items, normally shipped along with each release and created by developers (if not, then please refer to an article I've previously written on that), so you end up having a Unicorn configuration that stores all of your author-edited content:

Will are going to split the process into 3 major steps

  1. Re-serialize Unicorn configuration for content items
  2. Archive serialized content
  3. Upload an archive into Azure Blob Storage

IMPLEMENTATION

1. Re-serialize Unicorn configuration for content items. Luckily, Unicorn provides us with MicroCHAP.dll library helping to automate the sync process as a part of your deployment process (note that the DLL and corresponding PowerShell module Unicorn.psm1  should be referenced from your code). The good news is that any verb can be passed to it, not just sync, so one can use 'Reserialize'. That call will look like:

$ErrorActionPreference = 'Stop'
$ScriptPath = Split-Path $MyInvocation.MyCommand.Path

Import-Module $ScriptPath\Unicorn.psm1
Sync-Unicorn -Verb 'Reserialize' -Configurations @('Platform.Website.Content') -ControlPanelUrl 'https://platform.dev.local/unicorn.aspx' -SharedSecret '$ecReT!'

2. Archiving serialized content would be the next step. If you click Show Config button for Platform.Website.Content configuration in Unicorn configuration page, you may find all the relevant information about it, including the physical folder where items are serialized. We need this folder to be archived. The step comes as:

$resource = "Content_$(get-date -f yyyy.MM.dd)"
$archiveFile = "d:\$resource.7z"
$contentFolder = "C:\inetpub\wwwroot\Platform.dev.local\App_Data\serialization\Project\serialization\Content"

7z a -t7z -m0=lzma -mx=9 -mfb=64 -md=32m -ms=on $archiveFile $contentFolder
I am using 7zip as an archiver, as my content is slightly more than 4GBs and traditional zip cannot handle that. As a hidden bonus, I am getting the best compression ratio coming with 7zip. Also, It would be worth checking if a file with such name exists at target and deleting it before archiving, especially if you run the script more often than daily.

3. Uploading to Azure Blob Storage concludes given routine. To make this happen you should have a subscription, and ideally a connection string to your Storage account. Then you may use the following code to achieve the result:
$containerName = "qa-serialization"
$ctx = New-AzureStorageContext -ConnectionString "DefaultEndpointsProtocol=https;AccountName=lab1234;AccountKey=y9CFAKE6PQYYf/vVDSFAKEzxOgl/RFv03PwAgcj8K80mSfQFDojdnKfakeaLMva0S9DbrQTzNjDMdGCp7rseRw==;EndpointSuffix=core.windows.net"

Set-AzureStorageBlobContent -File $archiveFile -Container $containerName -Blob $resource -Force -Context $ctx

Also, it is assumed you already have blob container created, if not you need to create it upfront:
New-AzureStorageContainer -Name $containerName -Context $ctx -Permission blob
Optionally, you may want to delete the temporal archive, once it's uploaded to blob storage.


RUNNING

Here's an entire code that works for me:
# Step 1: re-serialize user-generated content
$ErrorActionPreference = 'Stop'
$ScriptPath = Split-Path $MyInvocation.MyCommand.Path

Import-Module $ScriptPath\Unicorn.psm1
Sync-Unicorn -ControlPanelUrl 'https://platform.dev.local/unicorn.aspx' -Configurations @('Platform.Website.Content') -Verb 'Reserialize' -SharedSecret '$ecReT!'
# Step 2: archive serialized user-generated content with 7zip using best compression $resource = "Content_$(get-date -f yyyy.MM.dd)" $archiveFile = "d:\$resource.7z" $contentFolder = "C:\inetpub\wwwroot\Platform.dev.local\App_Data\serialization\Project\serialization\Content" 7z a -t7z -m0=lzma -mx=9 -mfb=64 -md=32m -ms=on $archiveFile $contentFolder # Step 3: upload generated content into Azure Blob Storage $containerName = "qa-serialization" $ctx = New-AzureStorageContext -ConnectionString "DefaultEndpointsProtocol=https;AccountName=lab1234;AccountKey=y9CFAKE6PQYYf/vVDSFAKEzxOgl/RFv03PwAgcj8K80mSfQFDojdnKfakeaLMva0S9DbrQTzNjDMdGCp7rseRw==;EndpointSuffix=core.windows.net"
Set-AzureStorageBlobContent -File $archiveFile -Container $containerName -Blob $resource -Force -Context $ctx #Step 4: clean-up after yourself Remove-Item $archiveFile -Force
I run it on a daily basis by Windows Task Scheduler in order to get a daily snapshot of editors' activity. The script produces the following output:


As a result of running script, I get an archive appearing in the Azure Blob Storage:


RESTORING

There's no sense in making backups unless you confirm restoring the data out of it works well. For content items, download an archive, restore and substitute content serialization folder with what you've extracted, then sync content configuration. As simple as that!

Note that your content should be aligned with the definition items, or it may not work well!

Hope this post helps!

SUGCON 2019 Takeaways

SUGCON 2019 was a blast! 

More and more of thrilling changes are coming into our beloved platform, you find them out below. Also, it was a pleasure to receive a physical trophy of my Sitecore MVP award!

With this post, I am not going to do what everyone else does, like generously describing sessions attended. Instead, I'd share a brief bullet list of my own takeaways from this important event. Please forgive me my memory - not everything is covered below, but the most important is. Let me know if I've missed something. So, here we go:


General takeaways

  • Sitecore 9.1.1 has been released - this release is mostly focused on bugfixes and stability
  • Sitecore 9.2 is coming shortly
  • JSS becomes a massive game-changer for Sitecore
  • Docker will soon be in high demand for DevOps (XM and XP 9.1.1 images are already available)
  • Helix principles got updated with guidance for Commerce and xConnect, simpler VS project structure, new samples, some UX.


Sitecore XP 9.1.1 features

  • other templates now possible to run before the ARM templates (useful when installing Solr and others)
  • logging of xConnect connections errors improved
  • plenty other fixes covering:
    • EXM
    • Experience Editor
    • Experience Optimization
    • Sitecore Forms
    • Security
    • Marketing Foundation
    • Marketing Automation
    • Sitecore Services Client
    • etc.

Sitecore XP 9.2 expected to feature

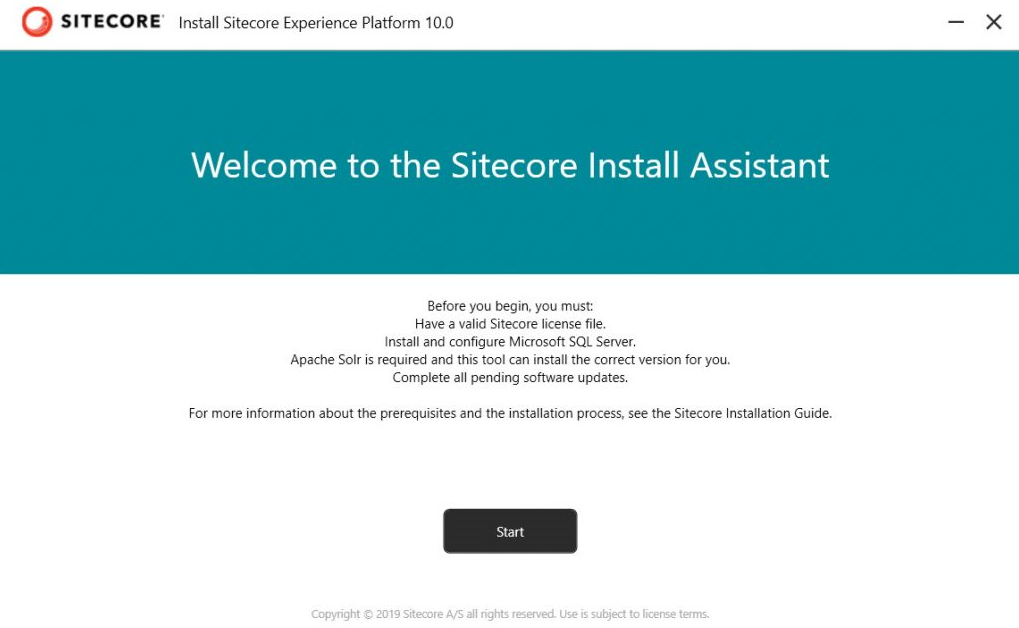
  • graphical installer assistant is coming back - a simple GUI over SIF installer
  • Rainbow library will be used for serialization in Sitecore 9.2 OOB and also TDS is moving to YAML
  • better robot detection
  • new Active Personalization Report - a well-in-demand tool that we should have got earlier 
  • publishing services with Sitecore Host support
  • reworked Links Database tool:
    • it will work in batches, works way quicker
    • lowers impact on xConnect
  • improvements to Universal Tracker:
    • reduced number of requests to xConnect
    • session:end improvements
    • server role assignment
  • search improvements:
    • new Sitecore search role
    • Lucene becomes obsolete
    • better control on fields indexing in Azure Search

Sitecore Commerce

  • Commerce 9.1 released out very shortly after SUGCON
  • version numbers and runtime aligned with compatible XM / XP products
  • could be used in conjunction with JSS (calling commerce API through a proxy)

SXA

  • creating Sitecore JSS site with SXA, including full separation presentation from content (with partial and page designs)
  • improvements with background images
  • plenty of minor improvements coming with version 1.8.1

 JSS

  • basic SXA support
  • full support for Sitecore Forms fully working with JSS client site, also for multistep and validations
  • introduced JSS Rendering Host to offload server-side rendering
  • no requirements for Windows for local development

Sitecore Host

  • upgraded to the latest .NET Core version
  • architecture changes for scalability and maintainability
  • in addition to Identity Server already using Sitecore Host, we now expect Publishing Service to move there
  • a NuGet package to help build Sitecore Host plugins is available for download

Is anything missing from the list, anything got forgotten? Of course - it's Horizon

Since it was not mentioned, I assume it will later become part of the platform, not in 9.2. It was previously announced at the Sitecore Symposium and currently, only Sitecore MVPs have access to Horizon previews in order to provide feedback with the development team. Maybe It might get available with Sitecore 9.2 as a separate add-on (as Sitecore normally does with their new features before actually integrating them into XP/XM platform, but yet no news on that). Let's keep fingers crossed!

And finally, if you missed any of the presentations, you can get slides and videos from the official SUGCON Video Download page.

Running IIS on local Windows Nano Server in Hyper-V rather than in docker

I've been enjoying Docker for a while, its flexibility and optimized images. However, there are two things, in general, I'd like to improve with the ops process:

  1. getting more control over the containers
  2. obtaining even more persistence, like the ability to create snapshots, switching between them, and few more features very common for traditional VMs

I have a host machine running Windows 10 x64 Professional, that's why I benefit from Hyper-V coming out-of-the-box with this OS. Saying that I mean creating a chain of checkpoints, switching between them, backing up and restoring images as well as other traditional ops activities - that all happens nicely and rapidly! Not to say that VMs work as effective, as the host does - at least I do not feel any difference.

The downside, however, is an extreme size of VMs - some are taking 50+ gigs of drive space!  That's due to Windows 10 running inside, so obviously looking at docker windows systems I felt quite jealous since Windows Server Core takes about 4 gigs and Nano Server is only half a gig! That's still 100 times more than smallest Alpine image, but still the smallest windows unit option possible.

So wondered if that's possible to have Nano Server, but hosted at local Hyper-V in Windows 10, so that I can not just cluster them as many as I may need without any host machine performance impact, but also mix them with other OS VMs sharing the same network and resources. And of course, get the ability to do checkpoints and remote management (PowerShell in that case since Nano does not have any UI). Going ahead, I confirm that all of the above was achieved, and this article explains how.


Content

  1. Defining objectives
  2. Preparing virtual drive
  3. Setting up a VM
  4. Running Nano Server
  5. Remote administration
  6. The result


1. Defining objectives

Achievables for this exercise are listed below:
  
  • Running Nano Server as a guest OS from Hyper-V manager using UI.
  • Being able to utilize all Hyper-V features, such as checkpoints, backups and restore
  • Run several machines in the same stable and configurable virtual network
  • Mixing various types of containers, such as bot GUI and non-GUI Windows OS along with Linux
  • Get the minimal Windows-based OS with IIS running
  • Being able to manage that OS remotely (with PowerShell since that OS does not have UI)

2. Preparing a virtual drive


While you can manually create Nano server virtual hard drive with a (long) PowerShell command, there is a nice tool that allows you to define what you'd like to get as the result. Here's this tool - NanoServerImageBuilder.msi (2.6MB). Once run it will look up for the prerequisites.

If you miss any of the dependencies, Nano Server Image Builder will identify them, download and install:


After installation, you'll have two options, and since we are going to build a virtual hard drive for VM - select the top one:


At this stage, you need to provide Windows Server 2016 installation ISO.


As the dialogue box kindly advises, the server OS image should contain the NanoServer folder at the root of ISO image:

When choosing an edition - pick up Datacenter as it is the smallest one. From optional packages make sure you check IIS as that's among out achievable lisе:

Give a machine name and admin password:

If you intend to manage your VM from a Hyper-V virtual subnet only (and not from outside networks), leave this unchecked:

As for IP address - we'll use DHCP client, but having static IP is an optional benefit - feel free to choose if you need that.

And that's it! As you see, this tool is just a GUI wrapper over a PowerShell command extracting necessary components and generating a Nano Server virtual hard drive out of traditional Windows Server 2016 ISO image. That actual command is listed below as well:

The tool ends up with creating a VHD-file which is a virtual hard drive containing our Nano Server (and yes, it is half-a-gig in size!), but at the next stage we need to create a new VM and attach created drive to it in order to run a VM:


3. Setting up a VM

As usual, create a new Virtual Machine. Once done, attach the drive and complete the wizard:


4. Running Nano Server

In Hyper-V Manager you are now able to run Nano Sever:


That's the only UI you may be able to see from your image. Enter the Administrator password you provided upon image creation:


The choice of available options with UI is not as impressive at all:


Networking is probably the only useful configuration screen here. Obviously, that's where you configure network parameters such as IP addresses, network mask, DHCP and the rest of them - use it not configured network correctly at the stage of preparing a virtual hard drive.

Done and let's finally turn to the most interesting part - remote management!


5. Remote administration

Just before you start, run the command below in order to find out if WSMan in enabled. The WSMan provider is a set of tools for PowerShell that lets you add, change, clear, and delete WS-Management configuration data on local or remote computers. 
The screenshot below tells me it is up and running there at Nano Server:
Test-WsMan IP_ADDRESS


At the next step, you may need to run these two commands: first enables PowerShell Remoting and the second creates a rule of treating everything as a trusted host (it is safer to use exact IP address instead of *-asterisk wildcard).

Enable-PSRemoting           #     we need to enable PowerShell remoting first
Set-Item WSMan:\localhost\Client\TrustedHosts *        #     adding hosts to trusted

Now let's try to execute PowerShell command remotely (within a context of given Nano Server). This command runs code within curly braces on Nano Server - an example below shows root level of remote C-drive:

Invoke-Command -ComputerName 192.168.181.136 -ScriptBlock { Get-ChildItem C:\ } -credential Administrator


Alternatively, you may "enter" an interactive mode (same that you get by using -it with Docker), and run commands one by one, all in the context of remote Nano Server. Let's, for example, navigate into IIS directory and check what is there:

Enter-PSSession -ComputerName 192.168.181.136 -Credential Administrator


6. The result

You might have seen those default HTM and PNG files, coming with IIS by default at the previous remote output. When starting correctly prepared Nano Server, IIS is also up and running showing the default website. 


From now on I can backup, restore and duplicate the instance that has IIS running straight away and is remotely manageable via PowerShell. I can use it as a base image for further experiments without an impact on the performance of a host machine.

Please bear in mind that Nano Server does not support full .NET Framework, so you can only run .NET Core and static websites from such IIS instance. If you need full .NET Framework - use a similar approach with Windows Server Core.

Hope you find this useful!

Starting with Docker and Sitecore

There was much of recent buzz around containers as technology and Docker in particular, especially now where more and more community efforts focused at Docker in conjunction with Sitecore. Plenty of articles do explain how it works on the very top level, what the benefits are but very rare do precise guidance. As for an ultimate beginner - I know how it is important to get a quick start, the minimal positive experience as a further point of development. This blog exactly about how to achieve the bare minimal Sitecore running in Docker.

Content


1. Terminology

  • Docker images - a blueprint for creating containers, is what you pull from remote registry
  • Docker container - an implementation of a specific image, you run and work with containers, not images
  • Docker repository - a logical unit containing one or many built images (specified by tags)
  • Docker registry - works like a remote git repo, it's a hosted solution to you push your built images into

There are plenty more of terminology, but these are the essentials for a demo below

2. Installing Docker

If you have it up and running, you may skip to the next part.

In order to operate the repository for given walk-through, you need to have Windows 10 x64 with at least build 1809.

The simplest way is to install it from Chocolatey gallery:

cinst docker-desktop

Missing something from your host OS installation? Docker will manage that itself!

Once done, you'll need to switch a mode. Docker for Windows can work in either Windows or Linux mode at the same time - which means you cannot mix types of containers.

One of the biggest issues at the moment is the size of Windows base images - the minimal Nano Server with almost everything cut off is already 0.5Gb and Server Core (this one either does not have UI - just a console) goes to 4Gb. That's too much comparing to minimal Linux images starting from as little as 5 megs. That's why it may seem very attractive to run Solr from Linux image (as both Solr and Java it requires are cross-platform and there are ready-to-use images there), same for Ms SQL Server which also has been ported on Linux and its images are also available.

Until the very-very recent the short answer was no - one could manage only single type of container at a time (while already running Linux container will keep up running unmanageable, there are also few workarounds how to make them work in parallel, but that's out of scope for now), but as from April 2019 it is doable (from Linux mode on Windows), I managed to combine NGINX on Linux with IIS on Windows.

Switching mode from UI is done by right-clicking Docker icon context menu from a system tray:


3. Docker registry

What you should do next is to provide a docker registry. Docker Hub is probably the first option for any docker beginner.

Docker Hub however allows only one private repository for free. You need to ensure sure all your repositories are private. Images you're building will contain your license file, having them in a public access will also be treated as sharing Sitecore binaries on your own, which you're not allowed - only Sitecore can distribute that publicly.

Alternatively, you may consider Canister project, they give up to 20 private repositories for free.

Pluralsight has a course on how to implement your own self-hosted docker registry.

But what is even more surprising, Docker itself provides a docker image with Docker Registry for storing and distributing Docker images.


4. Preparing images

Now let's clone Sitecore images repository from GitHub - https://github.com/sitecoreops/sitecore-images

If you don't have git installed - use Chocolatey tool already familiar from previous steps: cinst git (once complete - you'll need to reopen console window so that PATH variable gets updated).

To keep things minimal, I go to sitecore-images\images folder and delete everything unwanted - as for this demo, I keep only 9.1.1 images, removing the rest. So, I left only 9.1.1 images and sitecore-openjdk required for Solr:

Images folder contains instructions on how to build you new Sitecore images. As input data they require Sitecore installers and license file, so put them into this folder:

And the last but not the least, create build.ps1 PowerShell script.

Important: do not use an email as the username, it's not your email (in my case username is martinmiles), and from what I've heard many people find this confusing and were wondering why getting some errors.

This is my build script, replace usernames and password and you're good to go:

"YOUR_DOCKER_REGISTRY_PASSWORD" | docker login --username martinmiles --password-stdin

# Load module
Import-Module (Join-Path $PSScriptRoot "\modules\SitecoreImageBuilder") -Force

# Build and push
SitecoreImageBuilder\Invoke-Build `
    -Path (Join-Path $PSScriptRoot "\images") `
    -InstallSourcePath "c:\Docker\Install\9.1.1" `
    -Registry "martinmiles" `
    -Tags "*" `
    -PushMode "WhenChanged"


5. Building images

Run the build script. If receiving security errors, you may also be required to change execution policy prior to running build:

set-executionpolicy unrestricted
Finally you get your base images downloading and build process working:

As I said, the script pulls all the base images and builds, as scripted. Please be patient as it may take a while. Once built, your images will be pushed to the registry. Here's what I finally got - 15 images built and pushed to Docker Hub. Again, please pay attention to Private badge next to each repository:

Docker Hub has a corresponding setting for defining privacy defaults:


6. Running containers

Images are built and pushed to registry, so we are OK to run them now. Navigate to tests\9.1.1 rev. 002459\ltsc2019 folder where you see two docker-compose files - one for XM topology and another for XP. If simplified, docker compose is a configuration for running multiple containers together defining common virtual infrastructure, it is written in YAML format.

Since we are going the simplest route - we keep with XM topology, but that same principle works well for anything else.

Rename docker-compose.xm.yml to docker-compose.yml and open it in the editor. What you see is a declarative YAML syntax of how containers will start and interact with each other.

version: '2.4'

services:

  sql:
    image: sitecore-xm1-sqldev:9.1.1-windowsservercore-ltsc2019
    volumes:
      - .\data\sql:C:\Data
    mem_limit: 2GB
    isolation: hyperv
    ports:
      - "44010:1433"

  solr:
    image: sitecore-xm1-solr:9.1.1-nanoserver-1809
    volumes:
      - .\data\solr:C:\Data
    mem_limit: 1GB
    isolation: hyperv
    ports:
      - "44011:8983"

  cd:
    image: sitecore-xm1-cd:9.1.1-windowsservercore-ltsc2019
    volumes:
      - .\data\cd:C:\inetpub\sc\App_Data\logs
    isolation: hyperv
    ports:
      - "44002:80"
    links:
      - sql
      - solr

  cm:
    image: sitecore-xm1-cm:9.1.1-windowsservercore-ltsc2019
    volumes:
      - .\data\cm:C:\inetpub\sc\App_Data\logs
    isolation: hyperv
    ports:
      - "44001:80"
    links:
      - sql
      - solr

If your docker-compose has isolation set to process, please change it to hyperv (this is mandatory hosts on Windows 10, while on Windows Server docker can also run its process natively). In that case, processes will run in a hypervisor and is not a naked process next to native windows processes, that prevents you from memory allocations errors such as PAGE_FAULT_IN_NONPAGED_AREA and TERMINAL_SERVER_DRIVER_MADE_INCORRECT_MEMORY_REFERENCE

Notice data folder? This is how volumes work in docker. All these folders within data are created on your host OS file system - upon creation, a folder from container is mapped to a folder on a host system, and once container terminates, data still remains persistent on a host drive.

For example, one running SQL Server in docker can place and reference SQL database files (*.mdf and *.ldf files) on a volume externally in such a manner so that databases actually exist on a host OS and will not be re-created on each container run.

My data folder already has data folders mapped to data folders from all the various roles' containers run on previous executions (yours will be blank at that moment before the first run):

Just for a curiosity, below is an example of what you can find within cm folder, looks familiar, right?


Anyway, we are ready to run docker-compose:

docker-compose up

You'll then see 4 containers being created, then Solr container starts making its job, providing plenty of output:

In a minute you'll be able to use these containers. In order to log into Sitecore, one needs to know an IP address of a container running a particular role - so need to refer to a cm container. Every container has its hash value which serves as an identifier, so with docker ps command you can list all docker containers currently running, get hash of cm and execute ipconfig command within a context of that cm container (so that ipconfig runs inside of it internally):

Now I can call 172.22.32.254/sitecore in order to login to CMS:

What else can you do?

With docker you may also execute commands in interactive mode (sample) with -it switch, so you may do all the things such as deploying your code there (it is always good to deploy on top of clean Sitecore instance). That's how to enter an interactive session with remote command prompt:

docker exec -it CONTAINER_HASH cmd

You may go with more folder mappings using volume. Running XP topology offers even more interesting but safe playground for experiments.

Building other versions of Sitecore allows regression testing your code against legacy systems - always quick manner and always on clean! Going ahead you may use it for the development having only Visual Studio running on a host machine, with no IIS and no SQL server installed, publishing from VS directly in docker. Plenty other scenarios possible - it's only for you to choose from.


7. Stopping and clean-up

Stopping containers occurs in a similar way:

docker-compose down
After finished, you won't see any of the containers running by executing
docker ps
You'll be still able to see existing images on a system and their size occupied:
docker image ls

So if finally, after playing it over and want to clean-up you drive a noticed there's way less free disk space now. I want to beware you from doing one more common mistake - don't delete containers data manually! If you navigate to c:\ProgramData\Docker\windowsfilter folder, one can see plenty of them:

These are not container folders, they are symlinks (references) to windows system resources folders - deleting data from these symlinks actually deleted you resources from your host OS bringing you to a sorry state. Instead, use the command:

docker prune -a

This gets rid of all the images and containers from your host system correctly and safely.


8. Afterthoughts

Docker is a very strong and flexible tool, it is great for devops purposes. I personally find questionable using it for production purposes. That may be fine with Linux containers, but as for Windows... I'd rather opt out, for now, however I am aware of people doing that.

Proper use docker will definitely improve your processes, especially combining it with other means of virtualisation. Containers may take you a while to get properly into, but after getting your hands on you'll have your cookbook of docker recipes for plenty of day-to-day tasks.

As for Sitecore world, I do understand it is all only starting yet, but docker with Sitecore becomes more inevitable, as Sitecore drills deeper into microservices. Replacing Solr and SQL Server with Linux-powered images is only a matter of time, and what I am anticipating so much is XP and XC finally running together in Docker, facaded by IDS (ideally also on Linux) just in fractions after calling docker-compose. Fingers crossed for that.

Hope this material serves you as a great starting point for containers and Docker!