Note! This is a second walkthrough explaining an implementation of real-life scenario with Sitecore SXA.
It reveals best practices and several powerful techniques, such as:
- structuring data for complex components to be both easy to maintain and editors-friendly
- referencing other renderings using Component field, setting datasource and rendering variant
- reusing existing built components and their templates by Clone rendering PowerShell script
- nesting rendering variants and looping through them
- using Query Variant field for accessing child items
- restricting rendering variants by certain page templates
When starting working with SXA I faced some lack of good guidance and walkthrough (with an exception of excellent series by Adam Najmanowicz). Today I am going to eliminate this gap by adding my own walkthrough of implementing a footer, what could be simpler, I thought. After reading some official tutorials I expected it to be an exercise of dropping structure components (ie. splitters with rows and columns) and assigning link lists into them so that it could be later styled by front-end team. Wrong! Things appeared to be not as easy.
To start with, my strict front-end team came to me with quite a precise requirement for a footer, and below is they demand from me.
Requirements
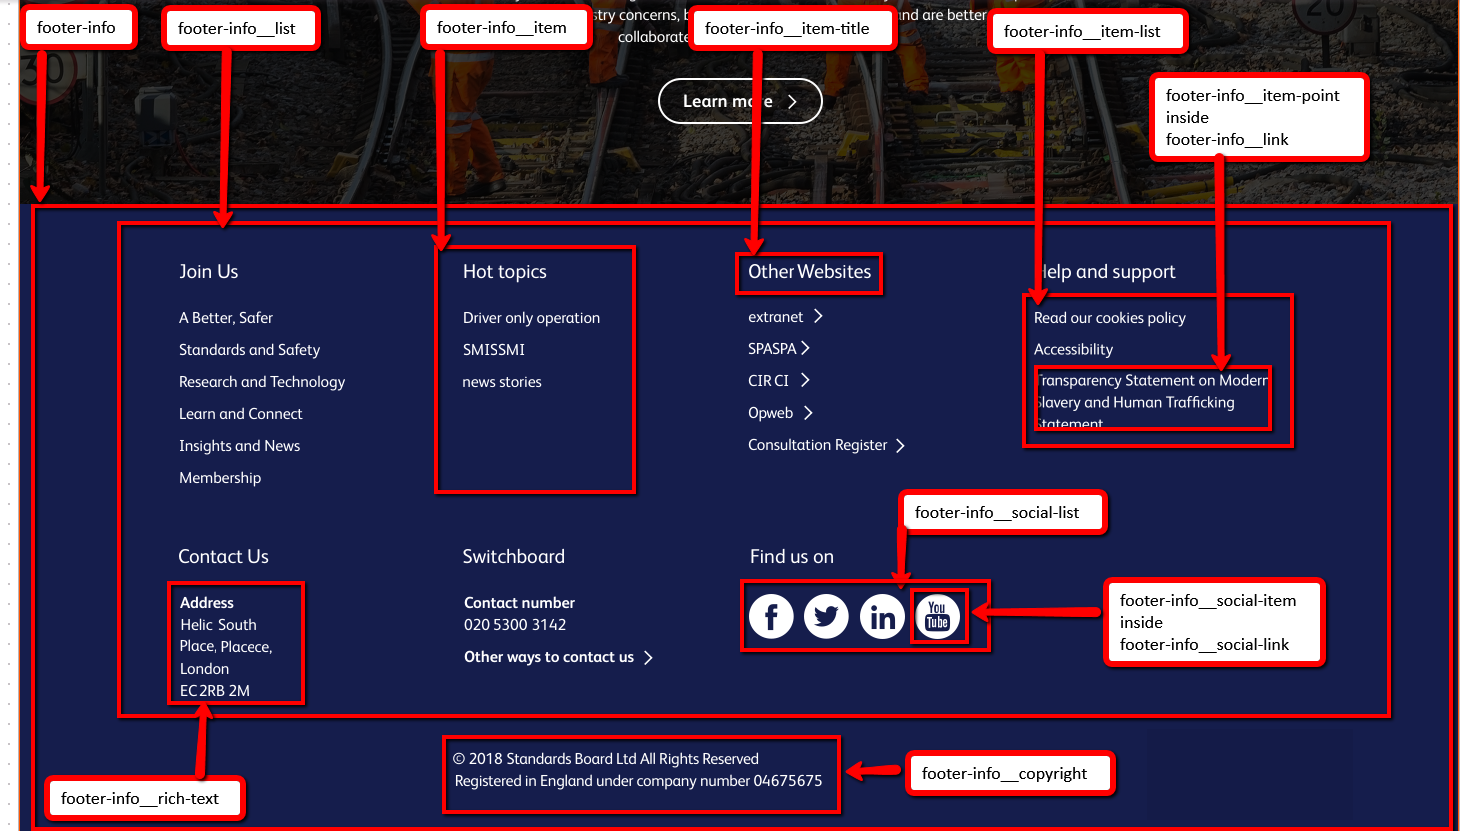
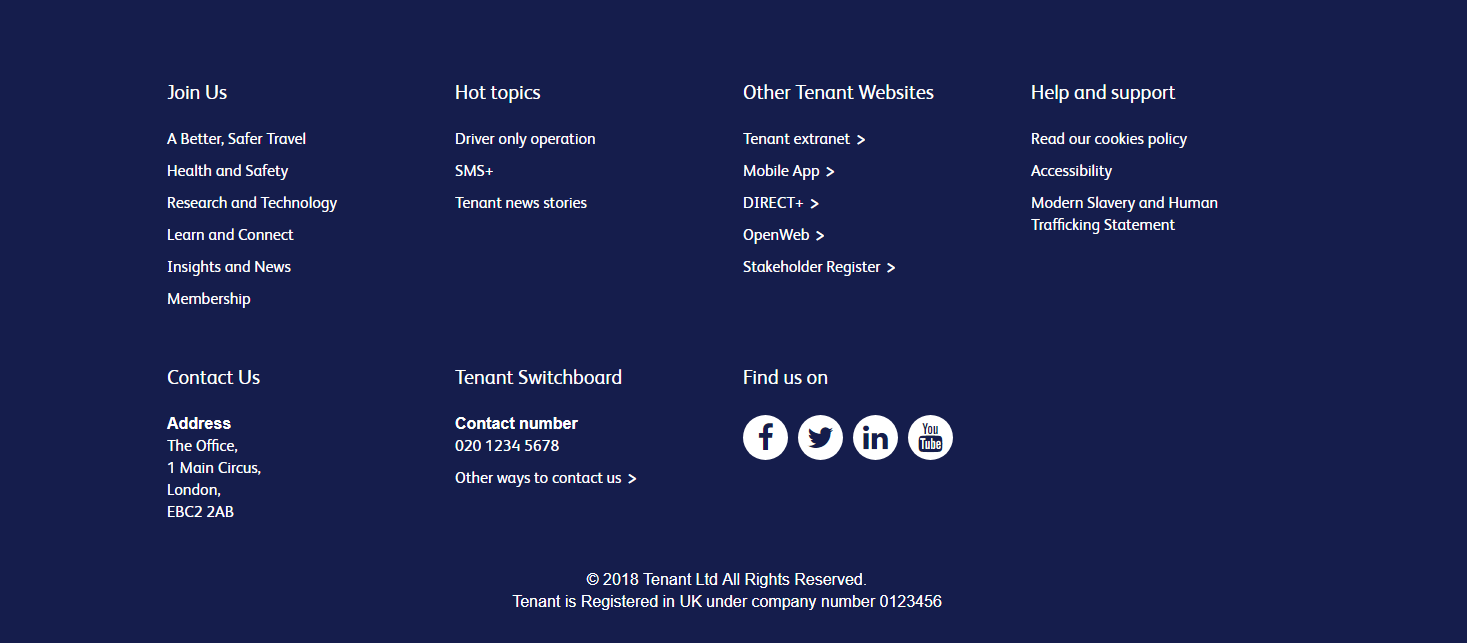
They send me an image with all the blocks assigned:
It was accompanied by the HTML output expected for me to achieve:
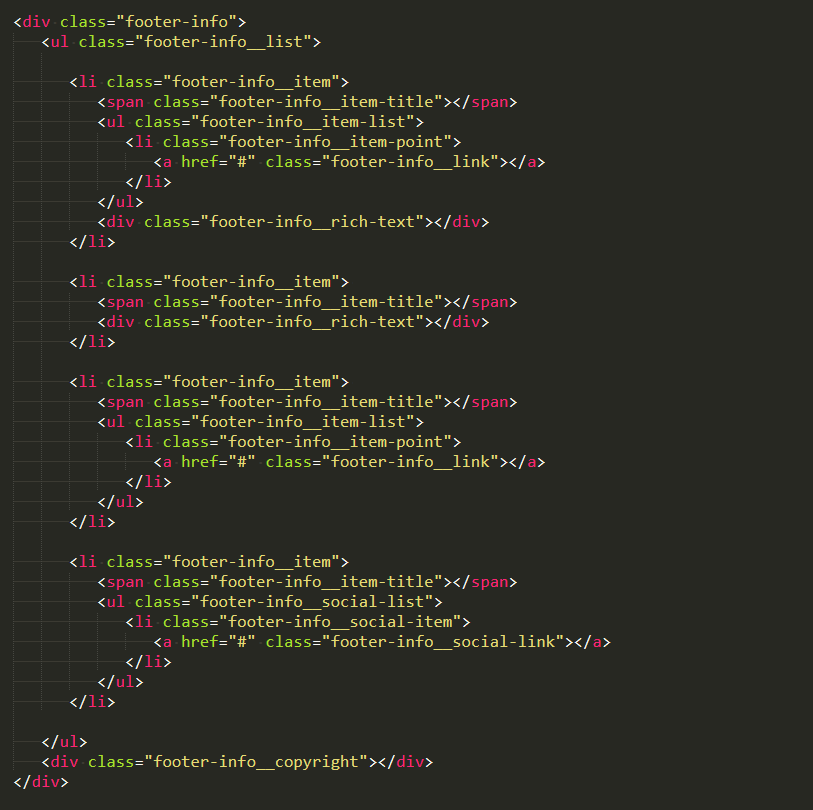
Minimal and effective, nice job, front-enders! Now the ball is on my side in order to get all that implemented.
Implementation
1. As per Sitecore SXA recommendations, I create Footer partial design and open it in Experience Editor for editing. Footer component will be created for that partial design, which itself will be used to construct a resulting page.
2. Not to mess with any OOB components, I create Footer rendering by cloning one of the existing renderings with datasource, so that I ensured a copy of datasource template and folder created. Also make sure this rendering stays outside of Experience Accelerator folder, but on feature layer where serialization enabled.
3. Assign new rendering to Available Renderings (/sitecore/content/Tenant/Site/Presentation/Available Renderings/Module) so that it appears in my custom components sectionand also in Toolbox
4. Now it is a good time to adjust a Template for Footer,it was created automatically by cloning, but this is how I defined it:
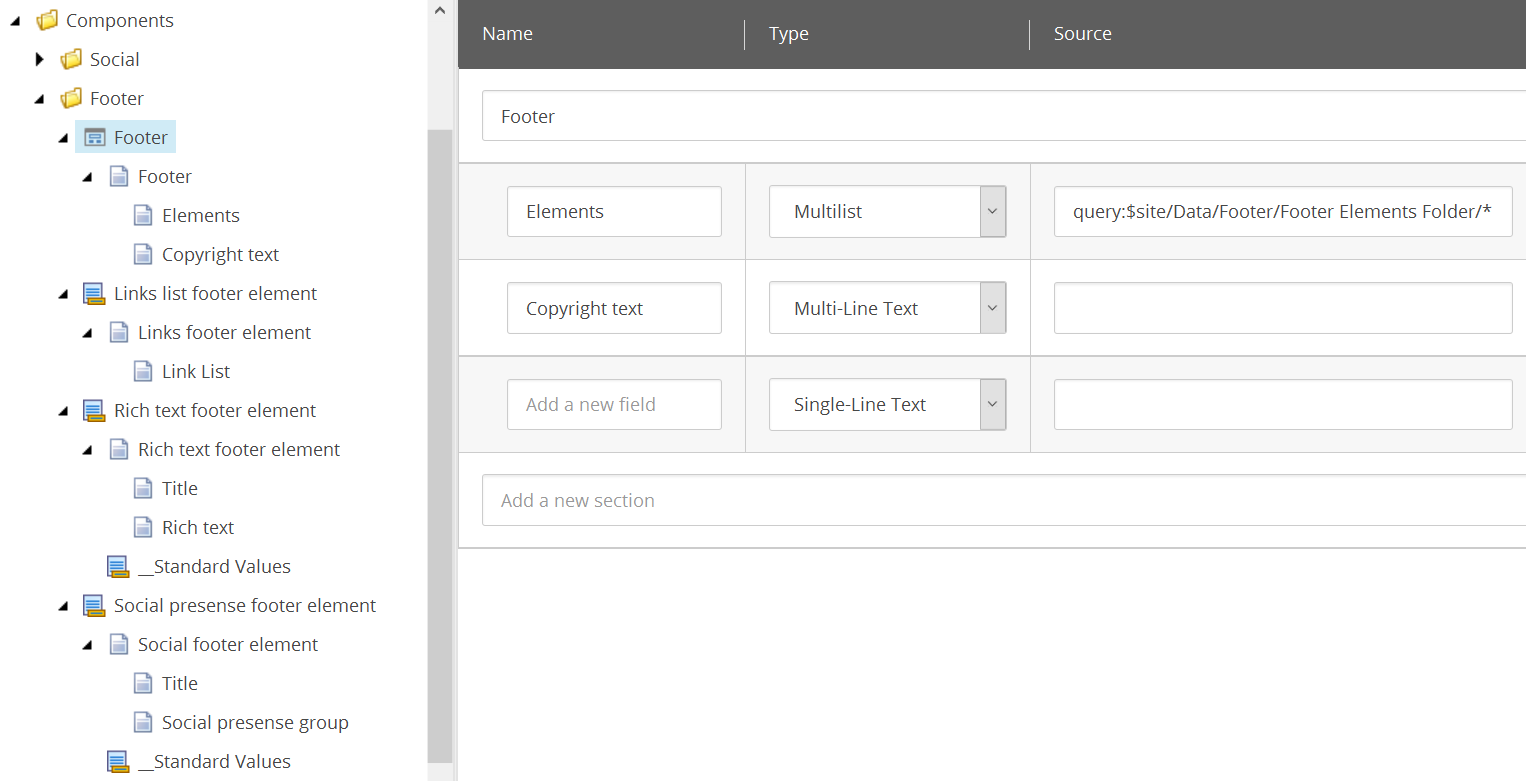
What is important to explain here - Elements field is pointing to Footer Elements Folder. At a first glance, that folder contains just a collection of link lists. But that's not right! There are at least 3 types of footer blocks: first four blocks are indeed Link List blocks,however,followed by Rich Text blocks, and finally, there is Social Presence block and all three can be added intoFooter Elements Folder. These three types are defined along with Footer template, you may see on the screenshots below.
5. Elements templates. This is how I defined them, Link ist footer element:
Rich text footer element:
Social presence footer element:
6. Insert Options to be configured for Footer folder to accept both Footer items and Footer Elements Folder. Configure Footer Elements Folder to accept these 3 types. Now one can insert the data. Once done, that will be how the data folder looks like:
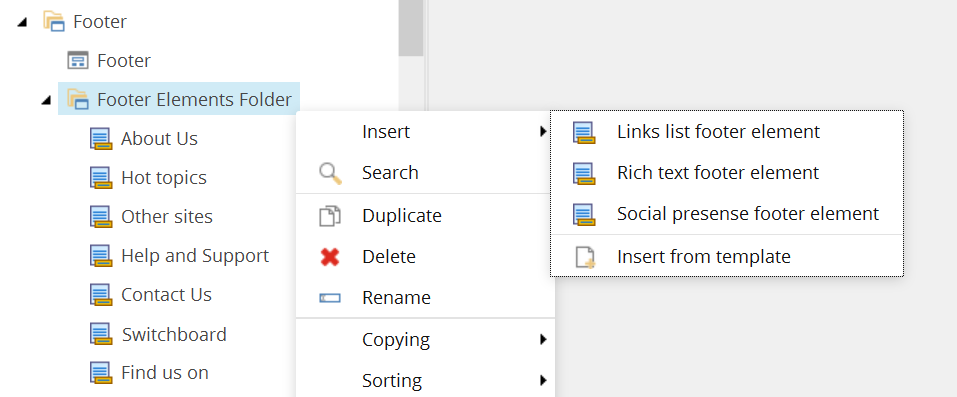
First 4 items (About Us, Hot topics, Other sites, Help and Support) reference corresponding Link Lists as defined as below:
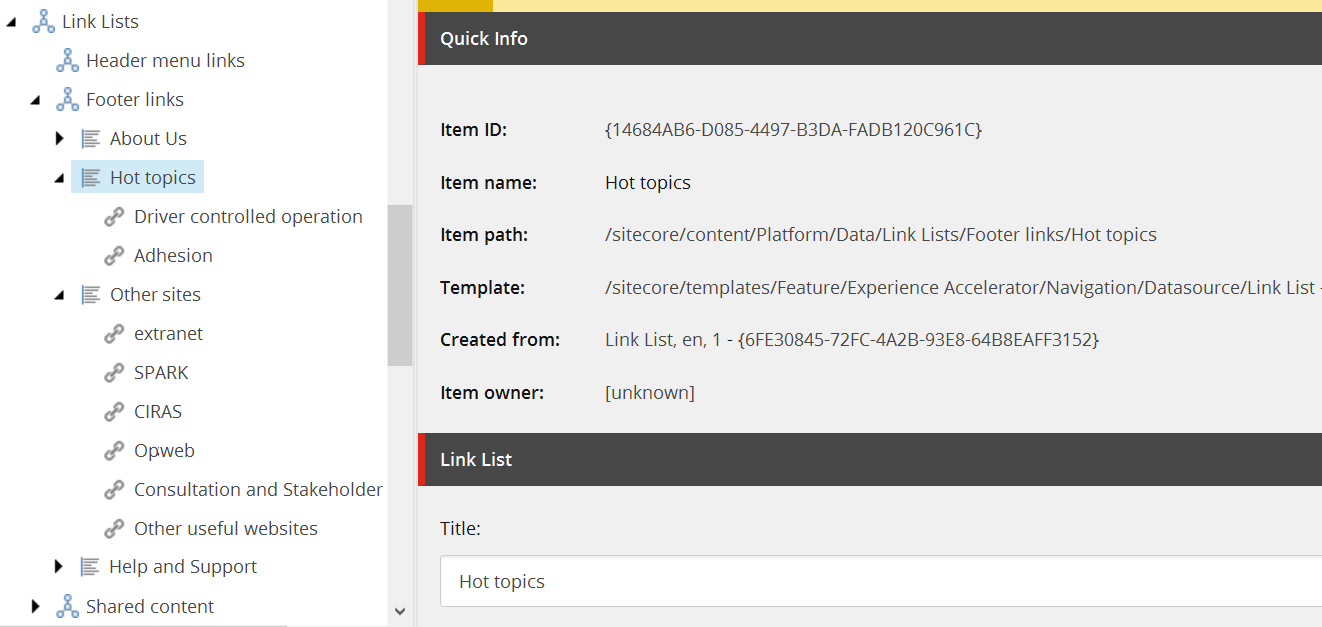
Next two items point to reusable Rich Text items under /Data folder. And the last one is a reference to a Social Presence I have implemented previously.
After items of all three types are created, we can assign them into footer datasource item itself:
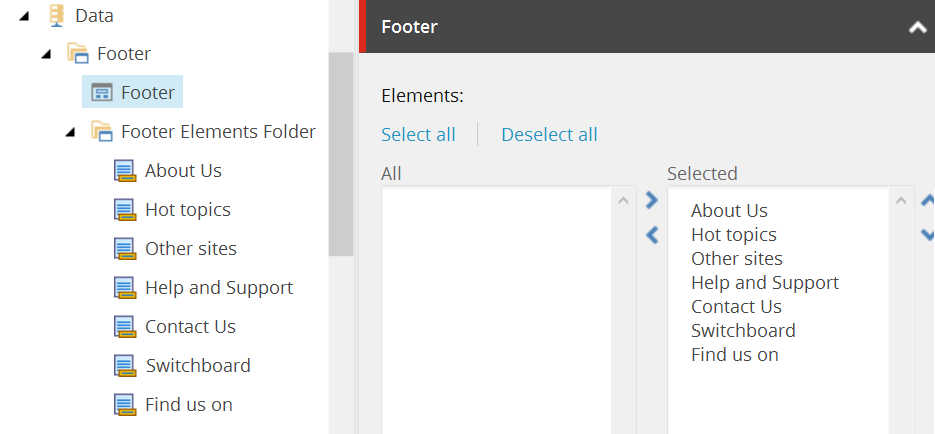
7. Rendering variants. In the previous steps, we have defined rendering, templates, folders and actual data. Now it is time to make it all together work to produce the output by creating rendering variants. This is the most tricky part of the current walkthrough
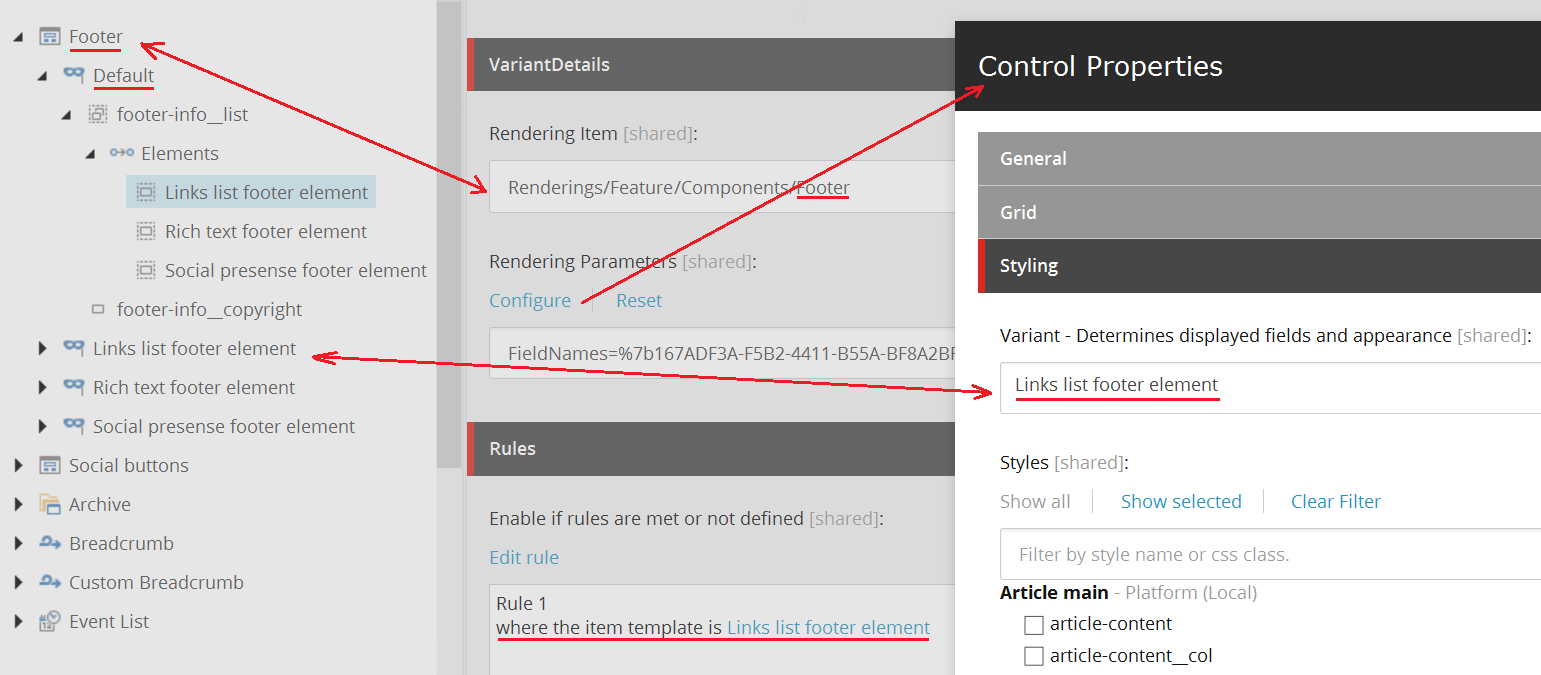
Default is the main and only rendering variant to be called or footer. Other three variants are "service" variants and designed to be called from Defaultinternally in a loop, being assigned to a component rendering field with personalisation applied (see image above).
Here's how these three other variants look like:
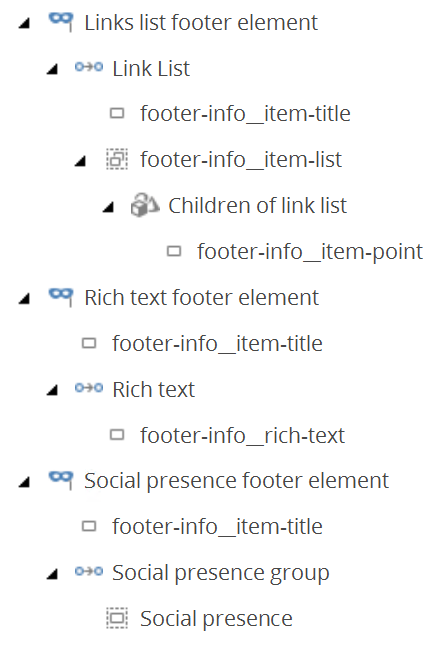
Link list footer element switches to a referenced Link List item and uses Query variant field to iterate its children.
Rich Text footer element simply references to a Rich Text (reusable) item under /Data folder in the same manner.
As for Social presence footer element rendering variant, it defines a component that references Social buttons rendering with Social presence rendering variant, that I have described in one of my previous posts.
Lastly, footer-info__copyright field renders copyright lines at the very bottom.
8. In order to avoid confusion for your editors, it makes sense to restrict rendering variant by selecting Allowed in templates field leaving only Default variant since other three variants are internally called from Default using Component variant field.
9. Apply new rendering to a Partial Design it in Experience Editor. Do not forget to configure footer placeholder to accept only Footer component by creating a placeholder setting,
Result
Save the page and enjoy the result:
No single line of back-end code!