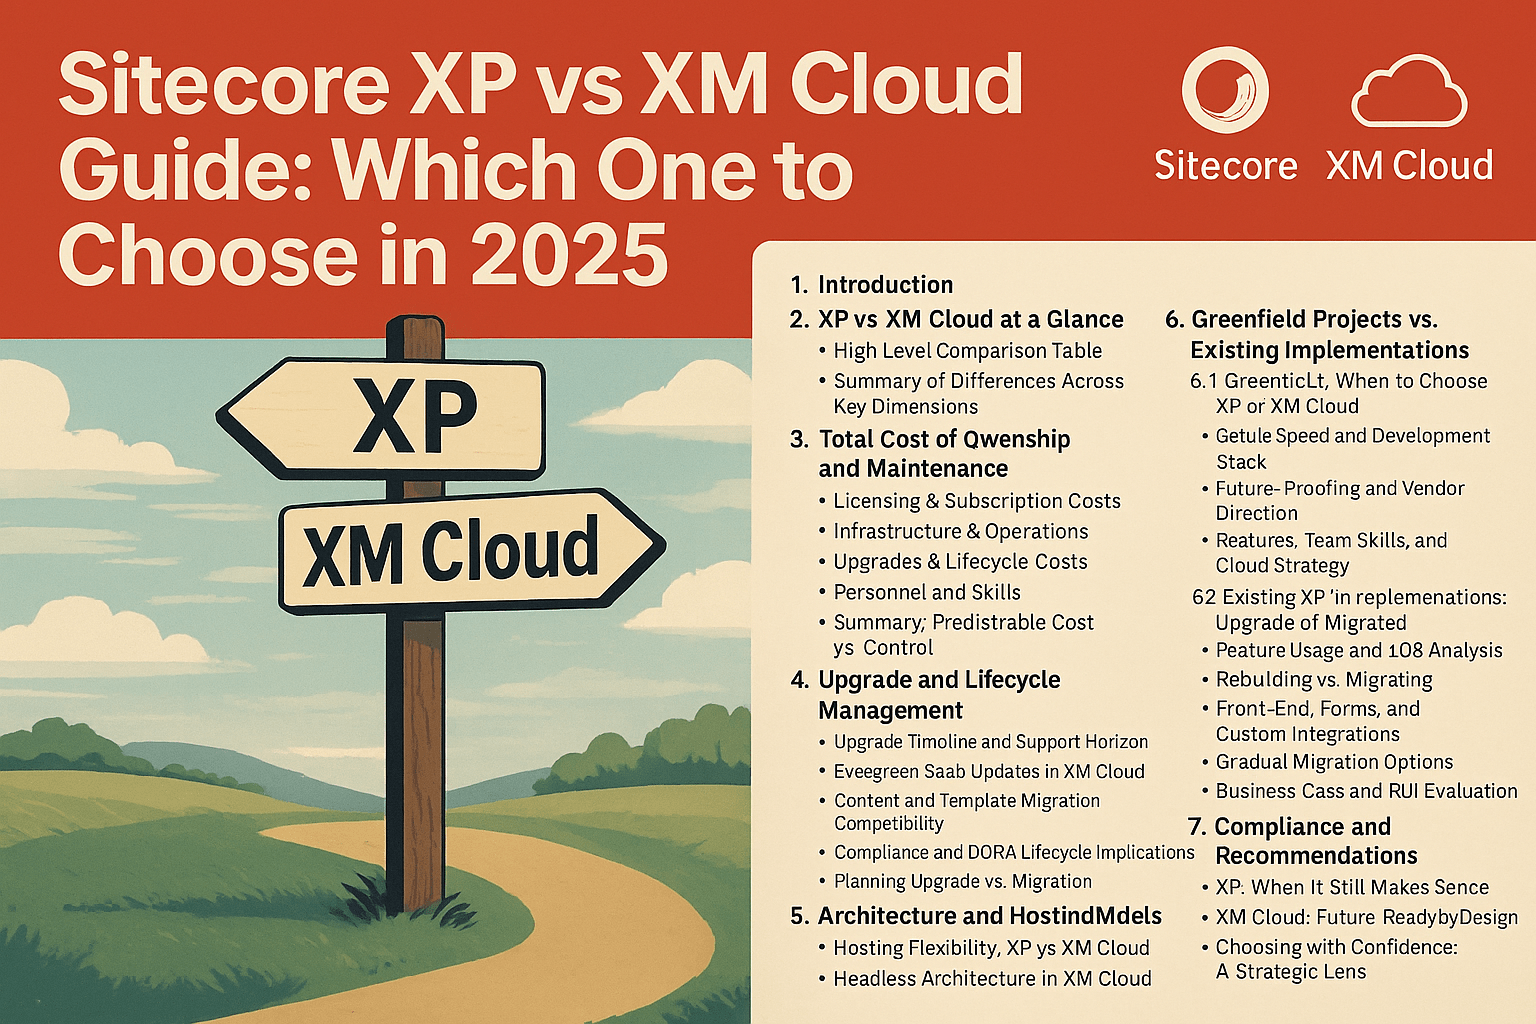
Index of Content
- Introduction
- XP vs. XM Cloud differences at a glance
- Total Cost of Ownership and Maintenance
- Upgrade and Lifecycle Management
- Architecture and Hosting Models
-
Greenfield Projects vs. Existing Implementations
- Compliance and Geographic Hosting Considerations
- Performance and Optimization Strategies
- Conclusion and Recommendations
1. Introduction
In the Sitecore world 2025, organizations face a pivotal choice between the Sitecore Experience Platform (XP) - the traditional all-in-one digital experience platform – and Sitecore XM Cloud, Sitecore's modern cloud-native SaaS CMS. This guide provides an expert breakdown of how these options compare across cost, maintenance, architecture, and capabilities, helping CTOs, architects, marketers, and senior developers make an informed decision. I aim to explain the total cost of ownership, hosting models, upgrade implications, development considerations, and special scenarios (such as greenfield vs. existing implementations, compliance needs, performance tuning, etc.) to cut through marketing fluff and fully evaluate trade-offs.
2. XP vs. XM Cloud differences at a glance
Let's start with the table below that summarizes key differences between Sitecore XP and Sitecore XM Cloud:
Table: High-level comparison of Sitecore XP vs. Sitecore XM Cloud in 2025.
As the table suggests, XM Cloud represents a shift to a cloud-native, headless, and service-based paradigm. Meanwhile, XP offers a do-it-yourself, all-in-one environment with maximal control and integrated features (at the cost of complexity). The following sections dive deeper into specific considerations: cost of ownership, greenfield vs. migration scenarios, compliance constraints, and optimization strategies for performance and deployment.
3. Total cost of ownership and maintenance
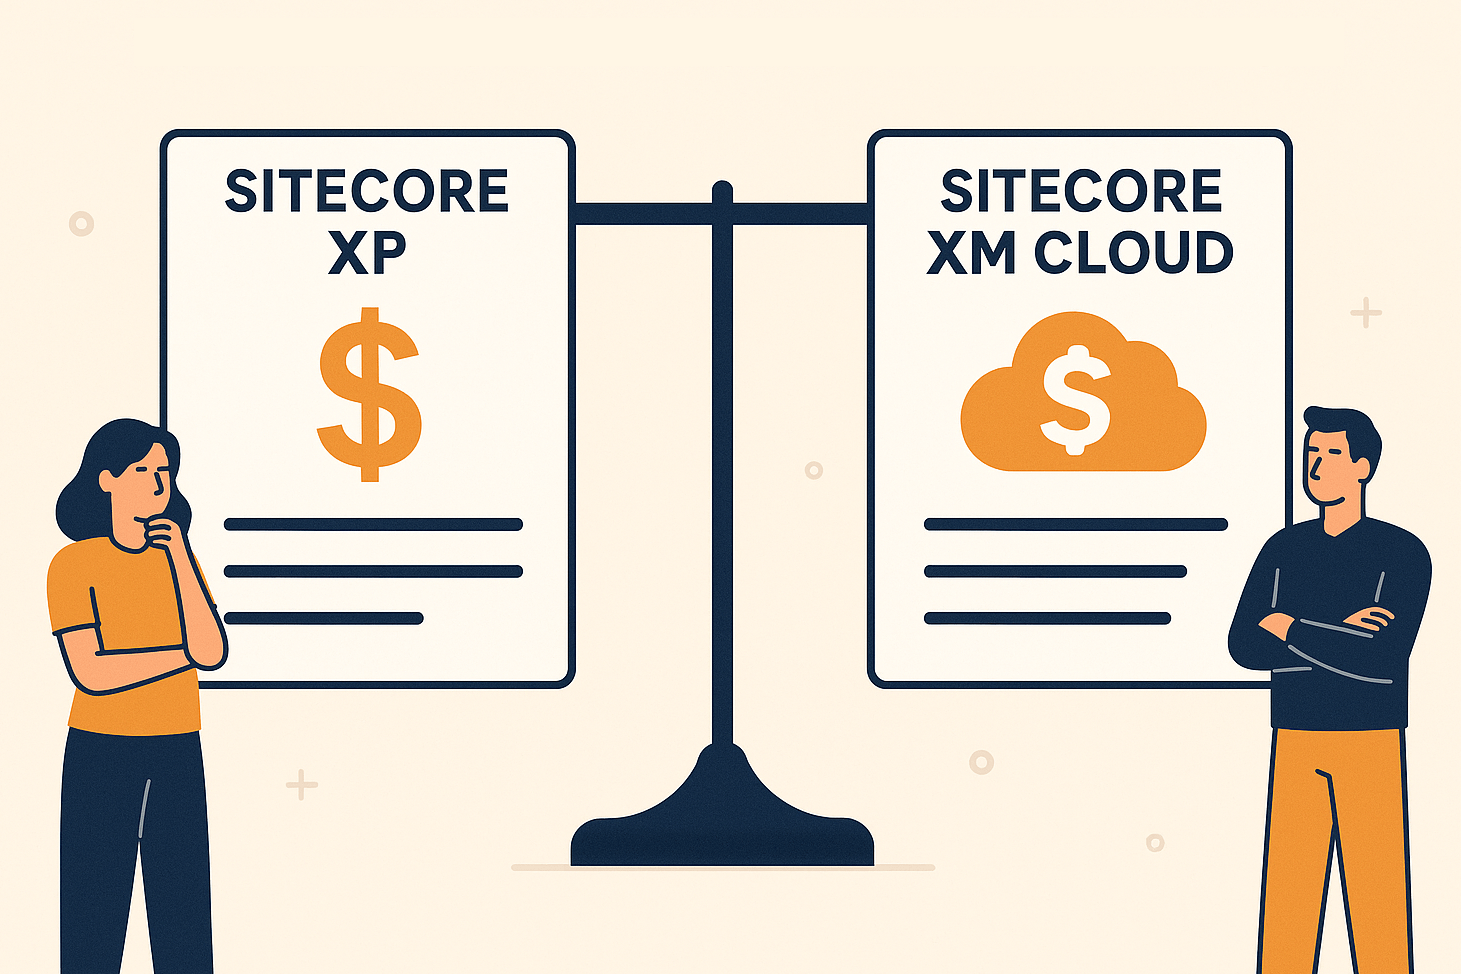
Licensing & Subscription Costs: One of the first factors to evaluate is cost. Sitecore XP traditionally involves a sizeable license fee, often perpetual or long-term, plus annual maintenance fees. If you already own an XP license, you might only be paying maintenance annually. In contrast, Sitecore XM Cloud is sold as a subscription SaaS product - you essentially pay for a recurring subscription that includes the software and its managed hosting. The XM Cloud subscription cost is generally usage-based, simplified to factor in traffic, number of Content Management environments, etc., which can be a double-edged sword: if your sites see very high traffic, the SaaS fees might scale up, but for moderate usage, you pay only for what you need. XP’s costs, on the other hand, are more fixed in terms of licensing, but infrastructure costs are on you - cloud VMs, SQL licenses, content delivery servers, etc., all that adds to the TCO.
Infrastructure & Operations: With XP, you bear the cost of infrastructure and IT operations. This means provisioning servers (or Azure App Services), managing SQL databases, search servers (Solr), CD servers behind load balancers, plus the manpower to monitor and support them. You might need skilled infrastructure/DevOps personnel or a managed cloud contract. By contrast, XM Cloud shifts most of that burden to Sitecore. The subscription includes the managed Sitecore Cloud portal and hosting of the core CMs and Experience Edge. You don’t pay separately for SQL or Solr – those are hidden behind the actual SaaS product. Operational tasks like OS patches, security updates, scaling infrastructure, and performance tuning at the server level are handled by Sitecore. This can dramatically reduce the maintenance labor on your side and thus lower the operational cost by eliminating the need to manage and maintain your own infrastructure.
However, note that XM Cloud doesn’t include the front-end delivery environment – you still need to host the actual website application (the “head”) on a platform of your choice. For example, if you build a Next.js site, you might host it on Vercel, Netlify, etc. That hosting cost is separate and must be added to your TCO calculations. In an XP scenario, your "front-end" and content delivery are part of the same hosting cost for your CD servers. In XM Cloud, the CMS is hosted by Sitecore within an included subscription, but the rendering host is not. The upside is that front-end hosting, especially static/JAMstack (SSG) apps, can be very cheap and scales with usage. Many find the cost of Vercel to be relatively low compared to keeping multiple high-spec Sitecore CD servers running 24/7.
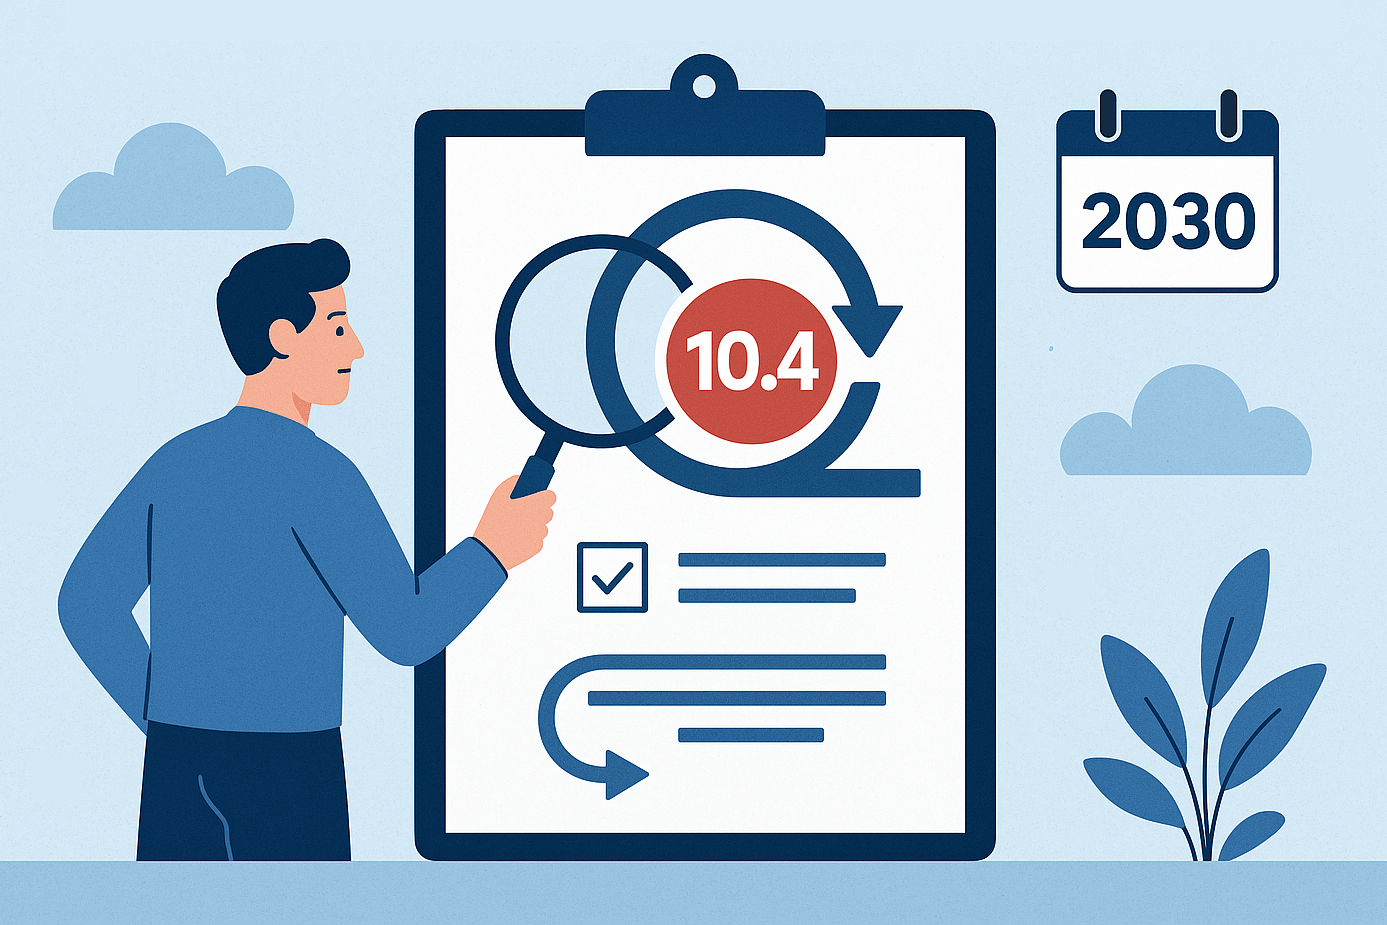
Upgrades & Lifecycle Costs: Perhaps the biggest cost saver for XM Cloud is the elimination of version upgrade effort. With XP, every few years you face a significant upgrade effort – planning, regression testing, updating custom code, and sometimes content migrations – just to stay on a supported version. These projects incur not only services cost but also opportunity costs - time that could be spent building new features. As an example, a typical enterprise XP upgrade (say from 9.x to 10.x) could take months of work. XM Cloud goes away with this - Sitecore handles all upgrades in the background, delivering improvements continuously. For the customer, this simply means "no more Sitecore upgrades", which brings huge savings in money and time. You’ll always say on the latest version without dedicating effort and budget to get there.
From a lifecycle perspective, Sitecore has committed to supporting XP for several more years - XP 10.4 mainstream support until the end of 2027, and extended to 2030. So you won’t be forced off XP immediately. However, continuing to use XP means you likely will need to upgrade to 10.4 if you haven’t yet, to enjoy that support window, which itself is a near-term cost if you are on an older version. In contrast, XM Cloud’s evergreen nature means the concept of end-of-life is moot – you’re always current. The cost implication is that while you save on periodic upgrade projects, you do need to invest continuously in keeping your solution compatible by testing your integration and front-end when Sitecore updates the backend. Fortunately, backward compatibility in XM Cloud is maintained carefully, and changes are incremental.
Personnel and Skills: Cost of ownership also ties to the team required. Running XP often demands Sitecore-specialized developers, DevOps, server admins, and possibly managed services contracts, which can be costly. XM Cloud shifts the required skill profile: you’ll need front-end developers and perhaps cloud architects familiar with modern deployment, but you might reduce the need for full-time Sitecore ops experts. As noted earlier, the pool of JavaScript/Next.js developers is way larger and often less expensive than the niche pool of Sitecore backend developers. This can lower staffing costs or allow your existing team to focus on front-end innovation rather than low-level CMS tweaks.
In summary, XM Cloud tends to have a lower operational cost and a more predictable subscription model, whereas XP might have a lower software cost if you already own licenses but will incur higher maintenance effort. When calculating TCO, consider a multi-year horizon: XM Cloud’s subscription plus front-end hosting vs. XP’s license and maintenance plus the cumulative cost of VMs, support contracts, and an eventual upgrade. Many organizations find that when factoring in the soft costs (downtime, upgrade labor, performance tuning), XM Cloud delivers savings. But every case is unique – if your XP environment is stable, paid for, and lightly maintained, and your organization isn’t in a position to invest in re-development, the pure dollar savings of XM Cloud might not be realized until further down the road.
4. Upgrade and Lifecycle Management
Upgrades have been the pain for many Sitecore teams historically. With XP, you control if and when to upgrade, but you must upgrade eventually to stay supported, and those projects can be major undertakings. Sitecore XP/XM platforms 10.4 are the "last" of on-prem releases as of today, and Sitecore has pledged continued support, up to 2030, with extended support, which means orgs can comfortably stay on XP 10.4 for the next few years with regular support. If you’re on an earlier version (e.g., 9.3 or 10.1), you will have to upgrade to at least 10.4 to stay within that window, which means a near-term effort anyway. Some companies are choosing to do that upgrade, then evaluate moving to XM Cloud later, while others are considering leaping straight to XM Cloud instead of executing another on-prem upgrade.
XM Cloud’s model is a huge change - you avoid the cycle of "wait for new version -> plan upgrade -> execute -> troubleshoot". From a lifecycle management standpoint, this is a relief: your platform is always current and fully supported. Sitecore delivers updates in a backward-compatible way and typically provides notice of any breaking changes. As a customer, you’ll want to have a process to validate your solution against new releases, but you won’t need to allocate large budgets for these updates.
One thing to consider is data and content migration in the context of moving to XM Cloud. If you are currently on XP and decide to replatform to XM Cloud, that migration project essentially stands in place of an upgrade project. Content can be serialized and migrated, and most customers can bring over all their content, media, and templates into XM Cloud relatively intact, meaning Sitecore has ensured backward compatibility in the content schema. But as we’ll discuss below, your custom code and front-end are not portable as-is. This is less about the platform upgrade and more about rebuilding on a new architecture.
Another lifecycle aspect is vendor support and roadmap. Sitecore’s roadmap for on-prem XP beyond version 10.4 is expected to be mostly maintenance and minor improvements, whereas XM Cloud and the composable SaaS products will get the bulk of innovation - AI-driven authoring assistance, new integrations, etc. If having the latest and greatest features is important, XM Cloud aligns with that path. If your priority is a stable, unchanging platform, XP can offer that at the cost of eventually aging technology.
Finally, consider how compliance regulations like DORA impact the lifecycle. For financial services in the EU, DORA requires that ICT providers (like Sitecore, if you use XM Cloud) adhere to strong resilience and incident reporting. Sitecore is not directly under DORA as a non-financial entity, but they have updated agreements to help customers comply. For an XP on-prem installation, you, as the operator, would bear the burden of meeting operational resilience standards. That includes doing regular disaster recovery drills, ensuring you can recover from incidents, etc. In a sense, letting Sitecore handle that via XM Cloud could simplify compliance - they state they offer "robust security measures to ensure resilience and availability" and will support customers’ DORA obligations. However, some organizations may prefer the control of managing their environment to meet specific internal policies. It’s a trade-off between trusting the vendor’s managed service vs. doing it yourself under your own compliance regime.
Bottom line on upgrades: If you are tired of the upgrade treadmill, XM Cloud is extremely attractive – it ends the cycle of expensive upgrades and ensures you’re always up-to-date. If, on the other hand, you like having full control of when to change your system (like some enterprises freeze tech changes for long periods), XP allows you to stay static despite being unsupported after a point. Many see the writing on the wall that by 2025 and beyond, continuously updated SaaS is the norm, and planning for that model (with proper testing processes) is wiser than clinging to a static version. Sitecore has given XP a generous support timeline, so there’s no immediate panic to switch, but the advantages of not having to plan another upgrade are compelling to most.
5. Architecture and Hosting Models
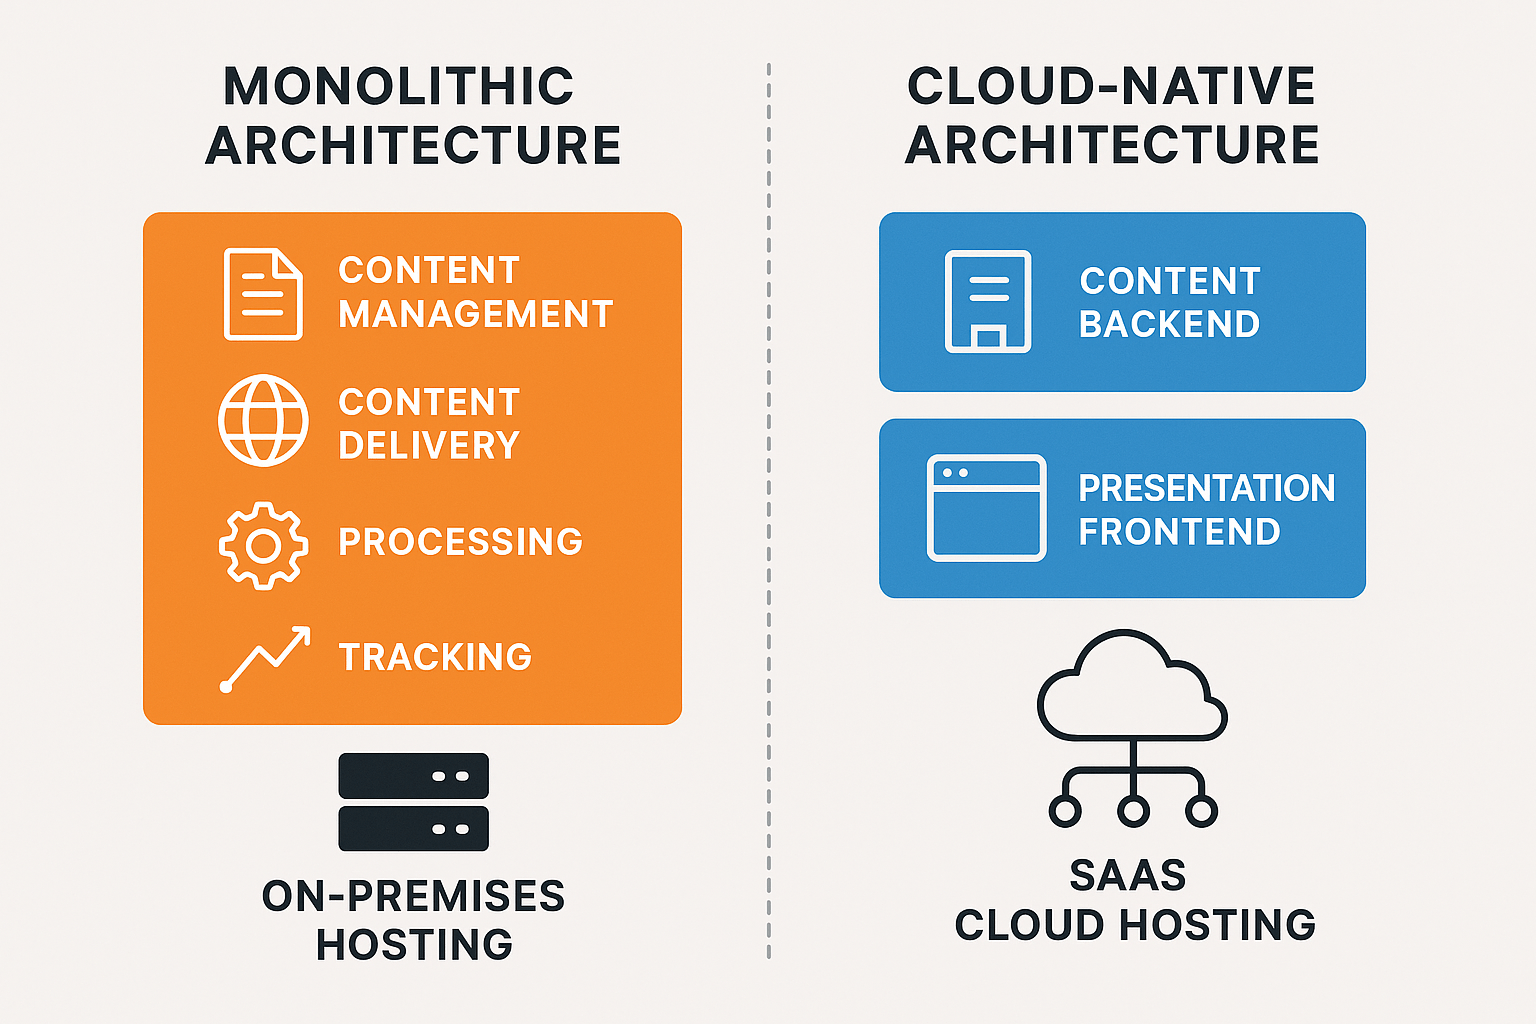
The architectural differences between XP and XM Cloud are fundamental. Sitecore XP is a monolithic application in the sense that all its services - content management, content delivery, processing, tracking - work together as a single product suite running in a single environment. They can certainly be scaled out individually (multiple CD servers, separate roles), but it remains one big platform under your control. Sitecore XM Cloud is a cloud-native SaaS that embraces a decoupled architecture: the content backend and the presentation frontend are completely separate by design.
Hosting Flexibility (XP): With XP, you have numerous hosting options. You can deploy on-premises on your own hardware, in a private cloud, or on public cloud IaaS. Some run XP on Azure PaaS with Sitecore Managed Cloud platform-as-a-service hosting of XP, or even containerize it on Kubernetes. Single-tenant is the norm – your Sitecore installation is dedicated to you, even if managed by a third party. This flexibility is a double-edged sword: you can satisfy unique requirements (custom networking, specific region, or even specific servers for compliance, integration with legacy systems, etc.), but you also have to manage all the complexity that comes with it. If you need to, for example, deploy a content delivery instance in China or in a DMZ environment, XP lets you do that.
Hosting Model (XM Cloud): XM Cloud is only offered as SaaS by Sitecore – you cannot host XM Cloud yourself. It runs in the Sitecore cloud environment, leveraging Azure and AWS under the hood. It’s a multi-tenant (many customers on the same SaaS platform, logically separated). You get an organization and project space in the Sitecore Cloud Portal where you can create environments, typically production, staging, and development. Sitecore handles provisioning those, and you simply deploy your code and content. There is no concept of installing Sitecore on your server - instead, you deploy your serialization packages and front-end builds to their service. The front-end rendering host, however, is your responsibility to host. The typical pattern is to use a JAMstack approach: for example, host the Next.js app on a platform like Vercel. In fact, Sitecore specifically encourages using Vercel or Netlify for XM Cloud front-ends, noting that these platforms are specifically designed for high-performance websites and integrate very well. Some companies choose to host the front-end themselves, for example, on an internal Kubernetes cluster or Azure App Service, but Sitecore guidance is to leverage modern cloud hosting for that purpose, achieving the best results.
Implications for Cloud-Native Services: Because XM Cloud decouples the roles, you gain the ability to use cloud-native edge networks out of the box. With XP, if you wanted to use an edge CDN or a service like Vercel’s edge functions, you had to configure that on top of Sitecore, often in a limited way. In XM Cloud, the Sitecore Experience Edge service gives globally replicated content APIs, and your front-end can be deployed globally as well. This means things like SSR (Server-Side Rendering) can happen at edge nodes close to users, and static content can be cached on CDNs easily. In XP’s traditional model, the content delivery server itself often lived in one region, or a couple of regional data centers you set up, so global users might have higher latency unless you implemented your own CDN caching layer. XM Cloud largely solves global delivery by design.
Content Delivery Differences: In XP, content delivery is handled by Sitecore’s own ASP.NET application at the CD server running the site. In XM Cloud, content delivery is headless - the CMS does not directly serve end-user pages. Instead, it exposes content via GraphQL APIs, and a separate rendering host application generates the pages. This means if you choose XM Cloud, you are committing to a headless architecture for your sites. The benefit here is flexibility and performance. The trade-off is that assembly effort is required - you have to build a front-end application to consume the content. In XP, if you used something like Sitecore SXA or MVC, a lot of the presentation came out of the box. In XM Cloud, Sitecore provides starter kits for Next.js and other systems, but you will be building the presentation layer with a front-end framework, not with Sitecore’s layout engine. This is a key consideration: organizations comfortable with modern front-end development will see this as liberating; organizations that liked Sitecore’s all-in-one approach to layout and rendering will have to adapt.
DevOps and Environment Management: In XP, you might have multiple environments (dev, QA, prod), each as separate Sitecore instances you manage. With XM Cloud, Sitecore provides environment slots for you. For example, a typical XM Cloud subscription might include 3 environments (production, and two non-prod like UAT and integration). These are easily spun up via the portal. The deployment process is built-in: you connect a source repository (GitHub or Azure DevOps) to the Sitecore Deploy App, and it can automatically build and deploy your code to the XM Cloud environments. This is a more streamlined DevOps experience compared to manually deploying items and code to an XP server. It even de facto supports blue-green deployments for zero-downtime releases when the platform can keep the previous instance running while swapping in the new one.
For a technical team, this means less time setting up build/release pipelines from scratch - Sitecore provides a lot of that out of the box in XM Cloud. For XP, you typically need to create CI/CD scripts or use tools like Octopus Deploy to deploy Sitecore packages, and coordinate things like content serialization, etc., which is more effort.
Extensibility and Customization: In a traditional XP solution, developers can deeply customize the system – pipeline processors, custom Sitecore jobs, and low-level tweaks to how the CMS behaves. With XM Cloud, because it’s a managed SaaS, you should not modify core pipeline code on the server. Customization is achieved either through high-level configuration or by writing code in the front-end or external services. For example, if you had a complex content cleansing pipeline on item save in XP, in XM Cloud, you might implement that via a webhook or by a scheduled external function that uses the GraphQL content API to enforce rules. You also currently cannot use some XP modules or custom Solr indexes in XM Cloud. This means heavy customizations might need re-architecture. The advantage is that you are constrained to more upgrade-safe approaches, but the disadvantage is less freedom to bend the platform to unique needs. This is an architectural philosophy shift: XM Cloud aims for configuration over customization to maintain stability in a multi-tenant cloud.
Hybrid Possibilities: It’s worth noting that some organizations consider a hybrid approach - keeping an on-prem XP for certain sites or functions while starting to progressively build new experiences on XM Cloud. Sitecore's composable lineup is designed to allow mixing: for instance, you could continue using XP for its xDB-driven personalization on an existing site, but launch a new microsite on XM Cloud + Sitecore Personalize and perhaps have both share the same Sitecore CDP for customer data. This is complex, but it highlights that choosing XM Cloud doesn’t necessarily mean abandoning everything at once. That said, running two parallel CMS platforms has its own cost and is usually a temporary state.
In summary, architecturally, XM Cloud is aligned with modern cloud architecture principles - multi-tenant SaaS, globally distributed delivery, microservices, content as a service, personalization as a separate service, etc., whereas XP is a single-tenant application architecture that you tailor to your environment. If your organization values complete control over the hosting environment and data flow, XP offers that, you can even access the database directly, etc., which you absolutely cannot do with XM Cloud. If instead you value simplicity, scalability, and cloud-first design, XM Cloud clearly leads. One key question: Do you require on-premises or specific-region hosting that Sitecore doesn’t support? If yes, that’s a strong case for XP, or at least XM on Managed Cloud, which still gives region control. For example, if you need to host in mainland China for a China site (due to ICP license rules), XM Cloud hosted on Western infrastructure will face significant performance challenges in China and potentially legal barriers, whereas XP could be stood up in China for example on Azure China or Alibaba, to comply. I will talk you through compliance and geographic requirements below.
Choose XM Cloud when you want to offload ops, speed launches, and lock in predictable costs and continuous updates. Stay on XP or self-hosted XM if you need full control over data residency due to the specific compliance/regulations requirements for your organization, have heavy legacy code, or require advanced multi-session personalization today. Either way, your path should match your team’s skills, your compliance needs, and your growth plans.
6. Greenfield Projects vs. Existing Implementations
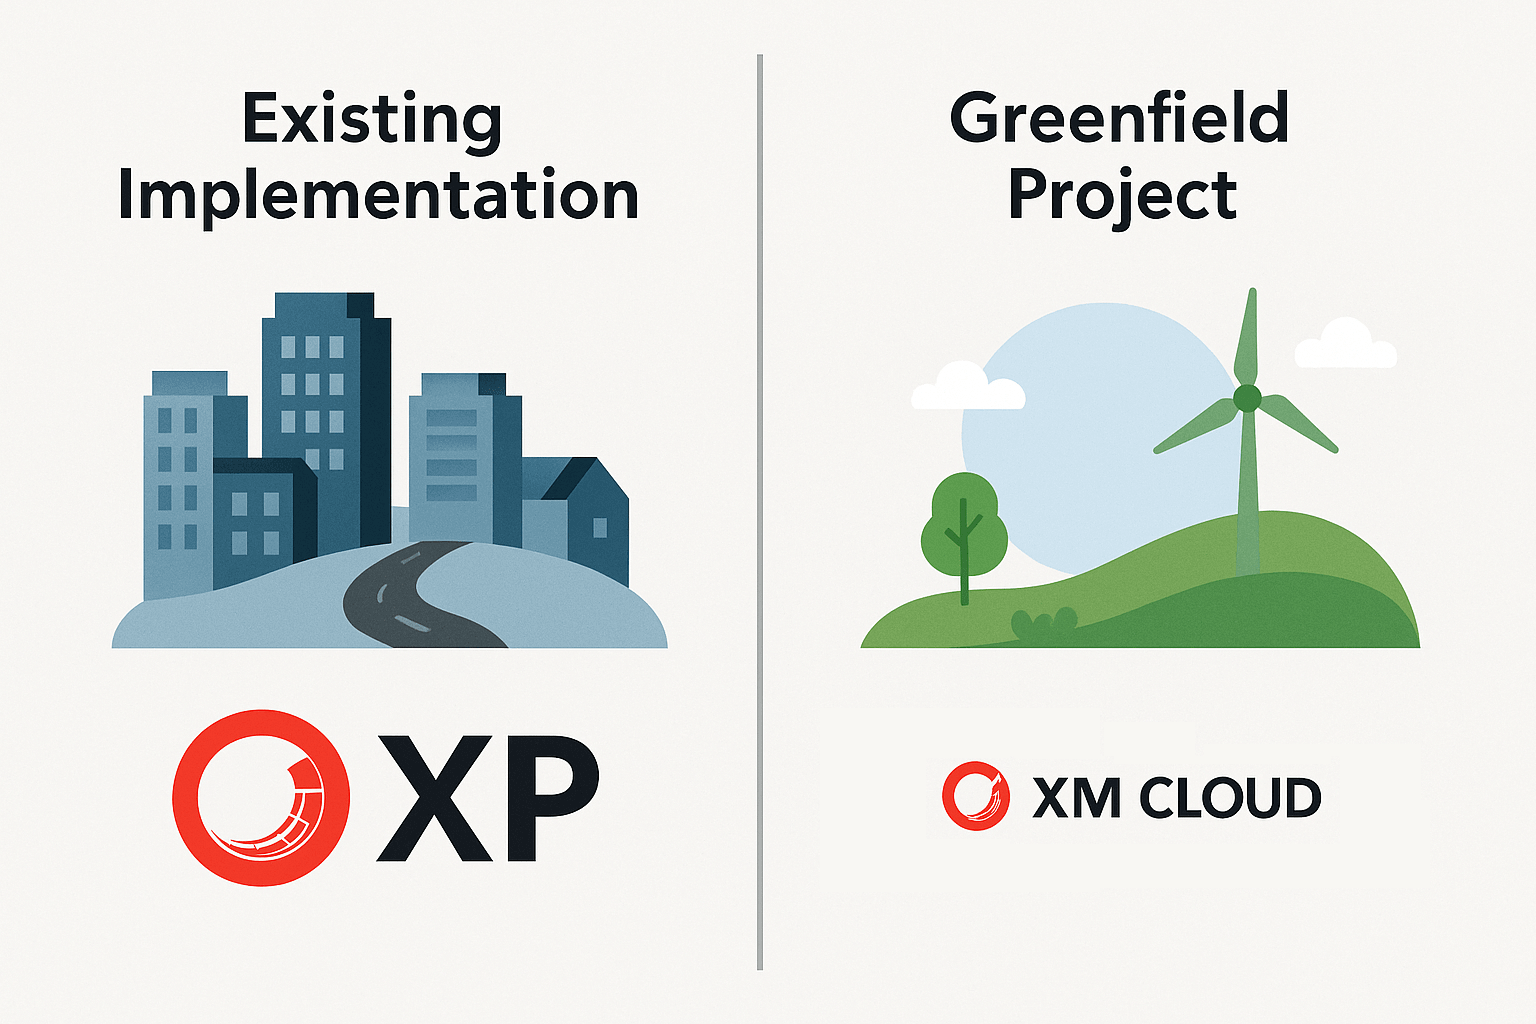
The decision process can differ significantly if you’re starting a brand-new project (aka greenfield) versus if you have an existing Sitecore XP solution. Let’s address both scenarios:
6.1 Greenfield Projects – When to Choose XM Cloud or XP?
For new digital experience initiatives, the general industry momentum and Sitecore’s own strategy favor XM Cloud. If you are not weighed down by legacy, XM Cloud often makes sense because you can architect from scratch with modern best practices and won’t have to redo things later to keep up with Sitecore’s cloud direction. Key considerations:
-
Time to Market & Initial Setup: XM Cloud can be provisioned quickly due to no need to install Sitecore or set up servers. For a new project, this means you get a working CMS environment in days, not weeks. You can also leverage starter templates, such as Sitecore’s Next.js starter kit, to jumpstart development. If speed is critical, this agility is valuable. XP, by contrast, would require setting up at least a CMS and CD server, installing the software, configuring scaling, etc. - a slower ramp-up.
-
Future-Proofing: A new project built on XP in 2025 might risk becoming technical debt sooner. Sitecore’s major innovations (e.g., new AI content features, deeper integration of Content Hub, etc.) will likely be cloud-first. Adopting XM Cloud means you’ll automatically get those enhancements. With XP, you might find in a couple of years that the capabilities lag behind unless you integrate additional SaaS components anyway. Starting on XM Cloud sets you on the vendor’s forward-looking path from day one.
-
Team Skill Set: Starting a greenfield on XM Cloud is ideal if your development team (or your implementation partner) has strong React/Next.js skills and is comfortable with headless CMS concepts. Many agencies and new developers prefer working with the JAMstack approach as it aligns with modern development practices. If, hypothetically, your team were mostly back-end .NET developers with no modern front-end experience, they might have a learning curve. However, given industry trends, most teams have adapted or can pick up Next.js fairly quickly. Sitecore XP development with MVC and Razor might actually be harder to ramp up for new developers who lack a Sitecore background, whereas XM Cloud development can be more approachable since it uses familiar web tech and just calls an API for content. So, for new projects, assessing your technology comfort is important. In almost all cases, though, I would advocate building new experiences with headless architecture to avoid being stuck in older paradigms.
-
Organization Strategy: If your organization has a cloud-first mandate or is embracing SaaS for other systems (CRM, commerce, etc.), starting on XM Cloud fits well. If, instead, there is still a preference for on-prem control (some government or defense projects, for example, might not be ready to put content in a SaaS), then XP could be chosen to satisfy that policy. But in 2025, even regulated industries are increasingly allowing SaaS for CMS after due diligence, because CMS content is often not highly sensitive data (with exceptions). It’s more common to see resistance to cloud for things like customer data, but note, XP itself stores customer data (xDB), whereas XM Cloud (without CDP) does not store much personal data by default. In a way, XM Cloud can be easier to get through security review than XP because it’s mostly content-focused (pages, text, media) rather than PII.
In summary, for new projects, XM Cloud is usually the recommended choice unless you have a very unique reason to deploy and manage everything yourself. It offers faster setup, easier scaling as you grow, and avoids locking you into legacy architecture. One might still choose XP for greenfield if, for example, the project is an internal application that must run on an internal network with no external cloud dependencies, or if the feature set of XP aligns perfectly without needing any of Sitecore’s composable add-ons, and you want to avoid a multi-system solution. But those cases are increasingly rare. Most new digital experience builds want a modern, performant, and low-maintenance foundation, which XM Cloud provides.
6.2 Existing Sitecore Implementations – Stay on XP or Move to XM Cloud?
If you already have a Sitecore XP or XM solution running, the question becomes when or whether to migrate to XM Cloud. This is a complex decision with technical and business angles:
Assess Feature Usage: A critical first step is to determine how much of the XP platform you are actually using. Many Sitecore XP customers purchased the platform for its potential (personalization, xDB analytics, etc.), but over time, ended up using it mostly as a robust CMS, with minimal use of the fancy marketing features. It’s noted that very few organizations have the operational capacity to make full use of XP’s personalization capabilities, not to mention marketing automation. If you find that you are not leveraging xConnect/xDB (no custom profiles, no multi-session personalization rules, no marketing automation campaigns running), effectively, you might be using the XM subset of features already. In that case, moving to XM Cloud will not strip your solution of capabilities you actually use - it will likely be a smoother transition functionally. On the other hand, if you heavily depend on, say, Sitecore Marketing Automation for personalized email campaigns, or you have dozens of personas with tailored experiences on the site based on past behavior, you need to plan how those will be re-implemented. XM Cloud alone won’t provide those; you’d need to bring in Sitecore CDP & Personalize, Sitecore Send (for email), etc., as part of the migration. That introduces additional cost for separate subscriptions and effort to integrate. The upside is that those composable tools are more advanced in their domains, for instance, Sitecore Personalize can do real-time, AI-driven personalization across channels, which could outperform what you built on XP, but it takes work to configure.
Migration Effort – Front-end Rebuild: It must be stated plainly: moving from XP to XM Cloud is not an in-place upgrade; it is essentially a re-implementation: a whole new frontend must be established on a new technology. This is crucial to set expectations with stakeholders. If your existing site was built with MVC and Razor views in Sitecore, those renderings will not run on XM Cloud’s Next.js front-end. You will need to rewrite the presentation layer. Content can be migrated, and your content and templates are intact on the new side, which is a relief, but all the code that rendered that content in XP (layouts, rendering, controllers, etc.) must be redone in the new stack. If you have a large, complex site, this is a non-trivial effort.
On the bright side, you can reuse assets: HTML markup and CSS can largely be carried over into the new front-end, also any client-side JS logic can often be reused. It’s the server-side C# logic that must be translated into the React/Next.js world. Many find that this is an opportunity to clean up and modernize. Maybe your site’s UI could benefit from a refresh - some clients time the migration with a minor redesign so that rewriting the front-end yields a better UX as well. If you recently did a heavy investment in a new XP-based site (e.g., a big redesign last year on XP), the thought of rebuilding it so soon may be unwelcome. In that case, sticking with XP a bit longer to get the value out of that investment is understandable. If your site is due for a redesign or technology refresh anyway, that’s an ideal time to combine it with a move to XM Cloud.
What if you already built your XP site in a headless/hybrid way? For example, some XP projects in recent years used Sitecore JSS with React, essentially treating XP as a headless content source. Such a project is much easier to migrate - in fact, your front-end code (React app) could probably connect to XM Cloud with minimal changes. Just point to the new GraphQL endpoint and adjust API keys. If you’re in that fortunate situation, the migration becomes more about moving content and testing rather than rewriting everything. Essentially, you’d be swapping the content backend from XP to XM Cloud and perhaps replacing XP-specific services (like if you used xDB data, you’d swap to CDP).
Integration and Customization Migration: Look at any integrations your XP solution has - say, CRM integration, eCommerce integration, search providers, etc. If those were done via direct access to XP databases or internal APIs, they’ll all need to be redone to use XM Cloud’s APIs. If you used something like Sitecore xConnect to push data to CRM, in XM Cloud, you might instead use a combination of Sitecore Connect or direct API calls to CDP. Also, any custom modules (perhaps you built custom workflow actions, or you extended the Experience Editor with custom buttons) must be evaluated. Some may not be possible in XM Cloud yet. For instance, Sitecore Forms were not initially supported in XM Cloud - a workaround was required for forms in headless apps. These gaps are closing as Sitecore invests in XM Cloud, for example, forms support was added later, but it underscores that a migration requires a thorough gap analysis.
Cost-Benefit Analysis: From a business perspective, you must weigh the cost of staying on XP vs. migrating to XM Cloud. Staying on XP is not "free" - you will likely need to upgrade to keep support (cost), you continue to run servers (cost), and you may be missing out on performance or productivity gains (opportunity cost). Migrating has an upfront cost of rebuilding and retraining, but promises savings and improvements after. One recommended approach is to build a business case enumerating these factors. For example, if moving to XM Cloud will eliminate $X of hosting costs annually and $Y of upgrade costs every few years, and perhaps increase conversion by Z% due to better performance, can those justify the migration project expense in ROI terms? Often, after a few years, the migration pays for itself just in savings. It’s not always purely financial; agility and future readiness are part of the value.
Organizational Readiness: Change management is also important. Your content authors will have a new interface (though not drastically different, and likely more user-friendly). Your IT team’s responsibilities shift - some roles (server admin) might be less needed, while others (front-end DevOps) become key. You may need to train developers on Next.js and familiarize them with XM Cloud tooling (CLI, serialization via Git, etc.). If your team is not ready, consider investing in training or engaging with a Sitecore partner who has done XM Cloud projects. Some organizations pilot XM Cloud on a smaller project first (migrate a microsite or lesser-trafficked site) to build experience, then tackle the main site. This can de-risk the process.
Gradual Migration vs. Big Bang: You do have the option to move in phases. You could start by downgrading XP to XM, turning off xConnect on your existing instance, and essentially running XP as if it were XM with only in-session personalization. This could simplify your current environment (no xDB) and get authors used to less personalization. Then you could move that to XM Cloud. Or, you could migrate one site at a time if your XP instance hosts multiple sites. In some cases, organizations keep XP running for a period for certain functions (like serving personalization to known users) while launching a new site on XM Cloud for anonymous or new audiences, and then gradually phase out XP. These approaches add complexity but reduce risk by avoiding an all-or-nothing switch on day one.
When does it make sense to stay on XP? After all this, there are valid reasons some will stay on XP in 2025:
-
Regulatory Constraints: If you absolutely cannot use a SaaS for CMS due to data control requirements, say for some government agencies or in highly sensitive content scenarios, then XP or perhaps XM in a self-managed mode is the way to go. You maintain full control and can deploy in hardened environments as needed.
-
Full Use of XP Features: If you are one of the few that deeply use XP’s marketing suite and it’s running well, you might not want to break what's working. For example, if you have a mature personalization program leveraging historical profiles and automated campaigns that drive real ROI, you might decide to stick with XP until Sitecore’s composable equivalents prove they can meet or exceed that functionality with acceptable cost. In parallel, you might start testing Personalize or CDP to see if a switch is feasible later.
-
Short-term Horizon or Alternative Plans: If your organization is, say, 1-2 years away from a broader digital transformation or considering alternate platforms, you might not undertake a migration to XM Cloud now. For instance, some companies on XP are evaluating not just XM Cloud but also competitors or more lightweight CMS options. If you haven’t decided on the long-term platform, you may prefer to keep XP running "as-is" (with maybe a minimal upgrade) as a stop-gap until a larger replatform decision is made. XM Cloud is one path, but some XP customers could even decide to move to a completely different CMS, though that also is a rebuild. It’s outside our scope, but it’s worth acknowledging that XP customers should evaluate all options – in other words, moving off XP doesn’t only mean XM Cloud; it could mean a competitor’s SaaS. Of course, as a Sitecore guide, we focus on XM Cloud as the intended upgrade path.
-
Budget Constraints in the Near Term: If the migration cost cannot be justified or funded this year, you might delay until budget allows. In the meantime, ensuring you’re on a supported XP version and maybe optimizing that environment is reasonable.
When does it make sense to move to XM Cloud from XP? Generally:
-
When you realize your team is spending more time "keeping the lights on" with XP (patches, Azure costs, troubleshooting scaling issues, etc.) than on building new digital value. XM Cloud frees you from a lot of that maintenance toil.
-
When site performance or deployment pain is holding back your digital efforts, and you see that a headless, cloud-native architecture will alleviate those, which it often does, as we’ll cover in optimization.
-
When the cost of Sitecore XP (license + infra) compared to the value you get is being questioned, and moving to XM Cloud either reduces cost or increases value (for example, giving marketers a faster way to launch pages, which can translate to business revenue gains).
-
If your organization has adopted a composable stack approach – for instance, you already use a separate commerce engine, a separate DAM (Content Hub or others), maybe a separate analytics tool – then XP’s all-in-one value is less important, and XM Cloud will integrate better with a composable ecosystem.
-
If you’re looking to modernize the solution, maybe your XP implementation is 5-6 years old, design is stale, and technical debt is high; it might be easier to start fresh on XM Cloud than to upgrade and refactor an aging XP codebase.
One more angle: XM Cloud vs. XP "as XM". Some customers on XP have the option to downgrade their license to XM (content-only) and possibly stick with self-managed XM, which is XP without xDB. This can save license costs while still running the instance yourself. However, that approach gives up the tracking features but keeps the hosting burden. It’s a half-measure that some use if they want to stop running xDB but aren’t ready to go SaaS. In deciding XM Cloud vs staying on XP, consider if running XP just as a CMS is worth it compared to XM Cloud – likely not, because all the maintenance remains, but you’re not leveraging XP’s unique features. In such a scenario, XM Cloud is a better target to eliminate the maintenance as well.
Conclusion for existing implementations: Evaluate what you use, what you gain, and what you’ll spend in a migration. If your XP implementation is underused (typical case: using it as an expensive CMS), the argument to migrate is strong – you can likely cut costs and improve performance by shedding the xDB weight and moving to XM Cloud. If your XP implementation is delivering on its promise and deeply embedded in your marketing operations, plan a migration more cautiously - perhaps wait until Sitecore’s composable tools mature further or do a pilot. But keep an eye on the support timeline; even the best XP 10.4 implementation will face end of mainstream support by 2027. For many, the question is not if to move to XM Cloud or a similar SaaS model, but when - doing it proactively, on your terms, is better than being forced later under time pressure.
7. Compliance and Geographic Hosting Considerations
Every organization must consider regulatory requirements, and the CMS platform choice can be influenced by how well XP or XM Cloud meets those needs. I have discussed several common compliance and localization factors in a separate blog post.
8. Performance and Optimization Strategies on XP vs. XM Cloud
One of the most tangible differences teams experience is in site performance, scalability, and the effort needed to optimize each platform. Both XP and XM Cloud can deliver high-performance experiences, but the approaches differ.
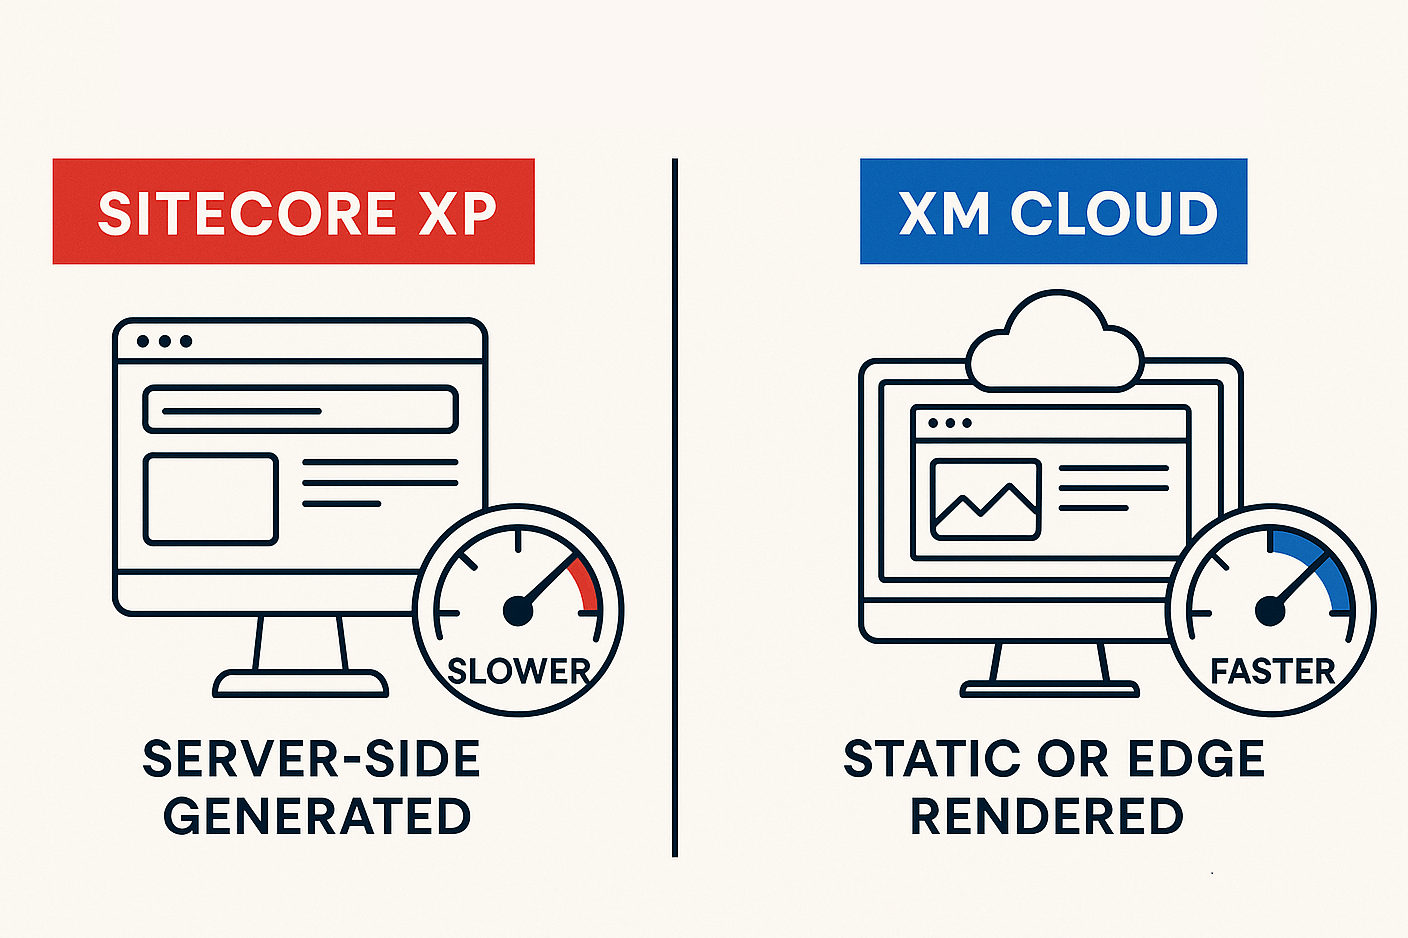
Out-of-the-Box Performance
Sitecore XP: In its traditional mode, XP generates pages server-side for each request unless heavily cached. The performance of your site is tied to the power of your content delivery servers and how well the code and caching are implemented. XP sites can be optimized to be fast, but it requires tuning: item caching, output caching for components, preloading data, etc. Even then, achieving near-instant page loads globally is challenging because the content has to be fetched from the server, which might be far from the user. Many XP implementations struggled to achieve top-tier Google Lighthouse or Core Web Vitals scores due to the inherent overhead of server-side assembly and the weight of the Sitecore rendering pipeline. Getting legacy architectures to match the performance of static sites is extremely difficult.
Sitecore XM Cloud: Performance is a strong point here because of the headless JAMstack approach. Websites built on XM Cloud are typically either static, pre-generated, or server-side rendered at Edge, both of which can drastically reduce latency to users. For example, with Next.js, you can pre-build pages (Static Site Generation) so that they are just HTML files served via CDN, yielding extremely fast first-byte times. Or you use Incremental Static Regeneration (ISR) to update content periodically while still serving cached pages. Even for dynamic content, SSR on a platform like Vercel runs on a global edge network. The result is that an XM Cloud-based site can be as snappy as a static website for most users. It’s common to see improved performance and scalability immediately by moving to a headless architecture - many teams report that after moving to a Next.js + XM Cloud setup, page load times and Lighthouse scores improve dramatically.
Caching and Content Delivery Networks (CDN)
XP Caching: XP supports output caching at the Sitecore rendering level where you can cache renderings by varying criteria, and has a robust object caching for items, media, etc. Using a CDN like Cloudflare/Akamai in front of XP can offload static assets (images, CSS, JS), but caching full HTML pages on the CDN is harder if personalization or login-specific content is involved since pages aren’t one-size-fits-all). Some XP deployments did set up whole-page CDN caching for public pages and used cache-busting or short TTLs to balance freshness. But doing so requires careful configuration to avoid serving the wrong personalized content to users.
XM Cloud + CDN: Here, the CDN (or edge) is integral. When you deploy your front-end on, say, Vercel, it automatically serves content via their CDN nodes around the world. If you pre-render pages, they are essentially static and cached indefinitely until revalidated. Out-of-the-box personalization in XM Cloud is largely in-session, meaning a cached page can be the same for all users, and then personalized bits can be swapped in after load (for instance, via client-side rendering of a personalized component). This strategy means you don’t forego caching for personalization – you just handle it differently with either edge logic or client logic. Additionally, XM Cloud’s Experience Edge caches content data globally, so the API calls themselves are fast. The result: high cache hit ratios and use of edge computing are standard with XM Cloud solutions. You might still fine-tune cache headers and revalidation logic (Next.js provides good controls for ISR and stale-while-revalidate patterns), but overall, achieving global low-latency delivery is simpler.
Scalability
XP Scalability: XP typically scales vertically or horizontally by adding more CD instances behind load balancers. It can handle a high load if properly scaled out, but it requires you to provision enough servers for peak load or use auto-scaling on cloud VMs. There’s also the scaling of the xConnect collection role to consider if you track many interactions – the xDB processing can become a bottleneck under heavy traffic with personalization. Many XP users have experienced that to handle spike traffic for a big one-off event or campaign, they need to spin up additional CD servers and ensure the caching is warmed, etc. That incurs cost for those peak times. Also, session state management and such need to be configured (sticky sessions or a distributed session state server) if using personalization per session.
XM Cloud Scalability: The content management and Edge APIs of XM Cloud are scaled by Sitecore automatically – they run in a cloud that can scale out to meet API demand, and Sitecore handles this as part of the service. Your front-end on Vercel or Netlify scales virtually infinitely - these services deploy your site across countless edge nodes. The result is that handling a spike in traffic is usually seamless: the CDN serves most content without hitting the origin; if many users hit uncached pages, the edge functions scale out. You don’t wake up at 2 am to add servers – it’s handled. There are limits (like API rate limits), but they are quite high, and you can engage Sitecore if you expect an extraordinary load, as they can provision accordingly. In short, scalability is a solved problem in the XM Cloud model: you pay for what you use, but you rarely worry about collapsing under load. Anecdotally, if a marketing team does a huge product launch, an XP setup might require careful load testing and pre-scaling; an XM Cloud setup, if built right, just flows that traffic through global CDNs.
One consideration: in XM Cloud, if you have heavy server-side compute logic in the rendering (like complex data mashups in getServerSideProps in Next), you’ll want to ensure your hosting platform can handle it. But generally, those computations are lightweight compared to what XP’s server did, generating full pages with personalization rules.
Personalization and Performance Trade-offs
XP Personalization: In XP, the more you personalize, the more cache fragmentation you get - every unique combination of personalization rules can cause a cache miss and trigger fresh page generation. This often forced teams to limit personalization to small regions or use "don’t vary by user" on most components. Also, tracking every visitor interaction had a performance cost on the xConnect/shard databases. Many XP sites for performance reasons ended up turning off or limiting xDB tracking on high-traffic pages, or doing personalization only on a subset of pages.
XM Cloud Personalization: With XM Cloud’s embedded in-session personalization, which, under the hood, leverages a lightweight CDP edge instance, personalization is applied at request time but for that session only. For example, you can have a component that shows one variant for visitors coming from Google Ads vs another variant for others - this check can be done on the server (Next middleware or Sitecore’s Edge returns the variant), but the result can still be edge-cached for that session. If using Static Generation, personalization might be applied client-side. Sitecore provides a Personalize JS SDK for XM Cloud that can swap components after page load based on session rules. This means you don’t bust the CDN cache for every user scenario - you might serve the general page and then immediately personalize it in the browser. The result is you keep the fast delivery for everyone, with a slight delay for personalized content loading asynchronously.
If you integrate the full Sitecore Personalize (the SaaS), personalization runs via client-side or edge decision-making, separate from page generation. That tool is built for scale; it can handle high volumes of events and decisions at the cost of some complexity. The user experience can still be very performant because Personalize can respond in tens of milliseconds with a decision, which can be done at Edge or client. Plus, Personalize allows experimenting with different performance vs. personalization trade-offs, like using web experiments that load after initial page vs. pre-personalizing content.
In short, XM Cloud allows high performance and personalization, but requires a different implementation approach (client/edge dynamic behavior vs. server-side rendering per user). XP allowed convenient server-side conditional rendering, but beyond simple rules, it could slow things down or reduce caching.
It’s telling that many XP customers never fully used the multi-session personalization because of the operational overhead; they effectively treated XP like XM. Now with XM Cloud plus Sitecore Personalize, those who truly need advanced personalization can have it without burdening the content delivery pipeline for every request – it’s offloaded to a specialized service optimized for that, leaving the main site free to be cached.
One must plan this carefully, though: initial implementations of XM Cloud might just use in-session rules and feel less powerful than XP’s historical personalization. To exceed XP, you’d include Sitecore Personalize, which opens up things like AI-driven segments, but you have to wire it up (the tracker snippet, etc.). From a performance standpoint, the best practice is to keep personalized content lean and use asynchronous loading for heavy personalization where possible so that the baseline site performance remains great.
Deployment, CI/CD, and Reliability
XP Deployments: In XP, deploying code or items could be stressful. Typically, you’d have maintenance windows for deploying new code, especially if it involved database changes. Content freezes often occurred during deployments to avoid conflicts. Some organizations achieved continuous deployment with XP via techniques like slot swaps if on Azure PaaS or by spinning up parallel environments, but it’s not trivial. Often, deployments incurred some downtime or at least required cache warming after, causing a slow response for a period. Also, a failed deployment could require rollback scripts, adding to the risk. DevOps for XP is doable, especially with containers and scripted pipelines introduced in later versions, but it’s a heavy application to deploy - a full XM/XP instance has many services (IDs, reporting DB, etc.) that all have to be in the correct state.
XM Cloud Deployments: XM Cloud was built with modern DevOps in mind. As mentioned, it supports Blue/Green deployment – you can deploy your new code to a staging slot while production keeps running, then switch traffic over when ready. This achieves zero downtime releases, a big win for marketing teams that demand high uptime. The deployment of content changes (like template changes or new items) is done via Sitecore Content Serialization and source control, which can be automated. Many XM Cloud users set up continuous integration such that any commit triggers a build and deploy to a test environment, etc. Sitecore’s built-in pipeline means you don’t have to script the entire release yourself - it will handle packaging the content and code. Additionally, since the front-end is separate, you often deploy that even more frequently, and those deploys are typically instantaneous to end-users because static files get versioned and are atomically published on CDNs.
Reliability: Outages can happen on any platform, but XM Cloud’s architecture and Sitecore’s SLA are geared to high availability. Your content authors work on an Editing host, which is separate from Edge delivery. If Edge were to have an issue, worst case, your site’s content API is down, Sitecore would work to restore it quickly under their SLA, but your editing might still be okay, or vice versa. In XP, if your server goes down, both editing and delivery could be offline unless you built redundancy. With XM Cloud, redundancy is built into the service (multiple instances, failovers, etc.). Also, backups are handled by Sitecore with geo-redundancy as mentioned. On XP, you have to ensure your backup/restore strategy is solid. Many XP incidents have been due to things like a deploy glitch or a missed config causing a site outage – those are less likely on XM Cloud, where infrastructure is consistent and deploys are tested via automation.
One factor is content delivery of XM Cloud is read-only from the perspective of content: authors publish to Edge, but end-users don’t change content on Edge. This separation of concerns increases reliability - the delivery endpoints aren’t doing heavy transactions or content writes, they are mostly serving cached data. XP content delivery sometimes had to handle things like writing personalization data or form submits into xDB, which could impact performance and reliability if xDB had issues. In XM Cloud, if you collect user data, it likely goes to an external system like a separate API or CDP, isolating any issues.
Monitoring and Debugging: With XP, you’d monitor via tools like Application Insights, custom logs, etc., in your own environment. With XM Cloud, Sitecore provides in-app logging and monitoring tools accessible from the portal. You can see logs of your CM instance easily. And for front-end, services like Vercel give real-time logs and metrics. So you get a good view of system health across the stack. Sitecore’s Ops team is also watching the infrastructure. This means you potentially catch issues faster, or Sitecore might alert you to anomalies. To contrast: on XP, if a search indexing service stopped, your team had to notice and fix it; on XM Cloud, if something in the managed service fails, Sitecore will be working to fix it often before you even notice, as part of their service reliability obligations.
Specific Optimization Techniques
To give concrete examples, here are some optimization strategies side-by-side:
-
Use of CDN: XP - use a CDN for media and set caching headers for static files; consider HTML caching for anonymous pages with short TTL. XM Cloud - CDN is inherent. Make sure to enable HTTP/2 or HTTP/3, and utilize image optimization on the front-end. Next.js has Image Optimization, which works great with Vercel’s CDN and leverages global edge caching for all content.
-
Caching strategy: XP – tune Sitecore’s output cache on renderings (e.g., cache renderings that don’t need to vary per user, use Sitecore’s cache clearing events on publish), increase item cache sizes for heavy traffic, maybe use a cache aside for expensive data (like results of a complex search query). Possibly pre-render some pages to static files if extreme performance is needed, as some have scripted Sitecore to output flat HTML for certain pages. XM Cloud - use Next.js incremental static regeneration for pages that can be cached, which automatically handles revalidating content after publish. Use Next’s API routes or middleware to handle any dynamic segments at Edge. If personalization rules are simple (by geolocation, login status), consider using edge middleware to modify responses on the fly without hitting the origin.
-
Scaling for peak: XP - pre-scale by adding CDs and enabling autoscale rules, warm up caches, maybe shorten cache expiration so content updates propagate, but be careful not to overload DB. XM Cloud - mostly auto. If expecting a viral spike, you could increase concurrency limits via Sitecore support or ensure the Edge is primed (perhaps pre-fetch or run a script to hit important pages so they’re cached globally). And ensure your front-end hosting plan supports concurrency. Enterprise tiers of Vercel handle massive concurrency, for example.
-
Database performance: XP - ensure SQL is on high-performance tier, maintain indexes, clean up analytics db to keep it slim if you don’t use historical data. Possibly offload analytics to xConnect Cloud or a data warehouse if needed. XM Cloud - the database is managed by Sitecore (in fact, Azure SQL). Not much you do directly, but since XM Cloud doesn’t accumulate interaction data by default, the DB load is mainly content reads/writes, which scale well. You still should organize content well (very large content trees can slow queries in either platform).
-
Personalization & Testing: XP - limit number of personalized components per page for performance, batch changes to profile scores to reduce overhead, use content profiling sparingly. Maybe run personalization rules on the CD server that has more resources, not on the edge, if you had multiple regions (with XP, if you deployed separate instances per region, each runs personalization independently). XM Cloud – take advantage of Sitecore Personalize’s ability to do heavy lifting outside the page request. For example, run segmentation nightly in CDP rather than computing on the fly. Use client-side experiment scripts for A/B tests, which utilize CDN edge networks to distribute variants quickly. Essentially, shift intensive personalization computations to pre-compute or client side, keeping the initial page load path as light as possible.
In terms of real-world outcomes, expect that an XM Cloud solution can achieve sub-second time-to-first-byte globally, very high throughput because most hits don’t touch the origin CMS, and handle usage spikes without breaking a sweat. In contrast, an XP solution might handle typical loads fine but needs careful babysitting to ensure similar metrics under duress, and often falls back to degraded mode (e.g., turning off personalization during high load, or relying on CDN cached pages that might not reflect the latest content if publishing frequently).
Cost of Optimization
It’s worth noting the cost implications of these performance strategies:
-
With XP, scaling up for performance means more servers or higher Azure bills. Idle capacity can cost you in slow periods. Also, high performance might demand a CDN subscription and possibly third-party monitoring tools, extra costs.
-
With XM Cloud, performance is largely built-in. You might pay a higher tier on Vercel for more edge function memory or a larger CDN usage, but you’re paying for actual usage (which corresponds with benefiting from that usage). The cost scales more directly with traffic. And you typically won’t need to invest in as much custom optimization labor. Development on Next.js is impressively fast compared to pure .NET development in terms of delivering features. That agility includes performance improvements - implementing a lazy-loading image or code-splitting in Next.js is straightforward and yields immediate performance gains, whereas optimizing an MVC site might involve more custom work.
Reliability and uptime are also part of performance. XM Cloud’s reliable deployment and infrastructure reduce the chance of outages from deployments. In XP, some teams schedule deployments at midnight Sunday and hope nothing goes wrong to avoid impacting users, as that is a performance consideration too. If you have to deploy during off-hours only, your ability to fix issues or update content quickly is hampered. XM Cloud’s zero-downtime deploys mean you can push improvements any time, which can be critical if there’s a high-priority content or code change.
9. Conclusion and Recommendations
Choosing between Sitecore XP and Sitecore XM Cloud in 2025 ultimately comes down to aligning the platform with your business priorities, technical requirements, and long-term digital strategy. Both options can deliver world-class digital experiences, but they do so in very different ways:
-
Sitecore XP offers full control, a rich integrated feature set, and proven capabilities as an all-in-one DXP – at the cost of higher maintenance, heavier infrastructure, and a more monolithic approach. It shines in scenarios where you need to retain data/control on-premises, or where you are leveraging all of its built-in marketing features under one roof. If you have an established XP solution that meets your needs and you can manage the upkeep and upcoming upgrades, XP remains a viable choice in the near term, especially given continued support until 2027+. Certain regulatory or localization needs may necessitate XP, for example, in China deployment or an isolated network. Just keep in mind that sticking with XP means accepting periodic upgrades and that new Sitecore innovations will be slower to reach you.
-
Sitecore XM Cloud represents the modern, cloud-first direction – reducing total cost of ownership through managed services, boosting agility with continuous updates, and enabling top-notch performance via headless architecture. It is best for organizations that want to focus on delivering content and customer experiences rather than managing servers. If you are starting fresh, XM Cloud is likely the better investment for the future. If you are on XP and finding that infrastructure and upgrades are eating into your budget or slowing you down, moving to XM Cloud can refocus your efforts on actual customer-facing improvements. For businesses that prioritize speed, scalability, and the ability to integrate best-of-breed services, XM Cloud is an excellent fit. It does require accepting a SaaS model and building up modern development skills, but the payoff is a more nimble digital platform.
When to choose XP:
-
You require a self-hosted environment for compliance or policy reasons that XM Cloud cannot meet, like specific in-country hosting or no external cloud allowed.
-
You extensively use XP’s multi-session personalization, marketing automation, and other xConnect-driven features, and transitioning those to composable alternatives is not feasible in the short term.
-
Your team and infrastructure are already optimized for XP, and the system is stable, with an upgrade to 10.4 planned and no major growth challenges – essentially, "if it isn’t broken" and you don’t urgently need what XM Cloud offers, you may continue with XP while planning for the longer-term future.
-
You need unlimited customization of the CMS core - for example, you have deep custom integrations that hook into Sitecore pipelines or data layers that would be hard to re-implement with XM Cloud’s constraints.
When to choose XM Cloud:
-
You want to minimize infrastructure and upgrade overhead – say you have a small IT team or want to reallocate your developers from maintenance to innovation. The automatic upgrades and managed hosting will benefit you greatly.
-
Site performance, global reach, and rapid deployment are top priorities – for instance, if your marketing team is pushing daily updates or campaign launches across regions, XM Cloud’s architecture will support that with fewer hiccups.
-
You are undertaking a major redesign or replatform anyway – an ideal time to switch to XM Cloud and build with the latest tech rather than refactoring an older XP solution.
-
Your digital strategy is “composable” – you might already be using or plan to use products like Sitecore Content Hub, Sitecore Personalize, or even non-Sitecore services. XM Cloud will integrate smoothly via APIs, whereas XP might feel comparatively siloed or require connectors.
-
You have a greenfield project and want to start on the right footing for the next 5-10 years. Adopting XM Cloud ensures the platform itself won’t become outdated in that period, and you’ll get continuous improvements.
A balanced, experience-driven perspective: Many seasoned Sitecore architects or Sitecore MVPs like myself advise evaluating how much "platform" you really need. In the past, some chose XP for safety since it had everything out of the box, but ended up not using half of it. With budgets tighter and digital experience needs evolving faster, it often makes sense to choose a leaner, more flexible setup, which is XM Cloud plus only the additional services you truly need. As one real-world consideration, if you can count the number of XP features you actively use on one hand, it’s a strong signal that XM Cloud or even XM on-prem would be more cost-effective. Sitecore itself notes that without xConnect, XM has a smaller footprint and TCO than XP. That logic extends to XM Cloud, which is essentially XM plus the SaaS benefits.
On the other hand, if your organization has squeezed substantial value from XP’s integrated suite – say you have marketing teams running automated campaigns and personalization that directly drive revenue – then you shouldn’t jump off XP until you’re confident you can reproduce or enhance that capability in the new model. It might mean a phase where you introduce Sitecore CDP/Personalize alongside XP (that is possible) to gradually transition without losing functionality.
Prepare for change: If you do decide to move to XM Cloud, approach it methodically. Plan the migration or build with a clear scope, engage experienced Sitecore partners or experts who have done it, and consider doing a pilot or proof-of-concept first. This will surface any challenges early (like missing features or integration points) and allow your team to learn XM Cloud’s nuances. Also, budget for the learning curve – maybe get training for your developers on Next.js and Sitecore Headless. The good news is that many have done this before, and the community has produced guidance and tools such as scripts to migrate content or patterns to implement common XP features in XM Cloud. Leverage those resources to avoid reinventing the wheel.
Final thought: The direction of the market is clear - cloud-native, composable DXP is the future, and Sitecore XM Cloud is a centerpiece of that strategy. However, Sitecore acknowledges that each customer’s journey is unique. They are supporting XP for years to come precisely because they know a forced march to the cloud is not feasible for everyone overnight. So, evaluate your own readiness and needs. You might choose to run XP and XM Cloud in parallel for a time, or move fully to XM Cloud now, or stay on XP a bit longer, but with a roadmap to evolve. What’s important is to make an informed, conscious choice rather than simply defaulting to one or the other. Hopefully, this guide has illuminated the concrete differences in costs, effort, capabilities, and optimizations so you can make that choice with clarity.
No matter which path you choose, success will hinge on execution: an optimally tuned XP can still deliver excellent experiences, and a poorly implemented XM Cloud site could underwhelm. The platform is an enabler, but the vision and strategy you apply are what create standout digital experiences. Align the choice to your strategy: if agility, scalability, and continuous improvement are paramount, XM Cloud aligns well; if complete control and one-stop capabilities are paramount, XP can still serve. Either way, ensure you have the right skills and partners to get the most out of the platform.
In closing, for most organizations in 2025, Sitecore XM Cloud will be the logical choice moving forward, with Sitecore XP remaining a reliable but eventually legacy option. Adopting XM Cloud sets you on a course to leverage Sitecore’s evolving innovations without the operational drag – an appealing proposition for those looking to accelerate their digital maturity. Evaluate carefully, plan thoughtfully, and you’ll make the choice that best empowers your digital experience goals.