As you might have already heard, Sitecore has just released a new major version of its product Sitecore 10, the one initially supposed to be numbered as Sitecore 9.4. Let's take a look at what does it have to offer to better understand why Sitecore decided to "release it louder" by giving a major version number.

During the course of this post I will be writing about:
- Overview
- Installation
- Containers
- ASP.NET Core
- CLI with Serialization
- Horizon
- Search
- XM / CMS-Only
- JSS and SXA
- Data Exchange and Connectors
- Privacy options
- Analytics
- EXM
- Marketing Automation
- Experience Editor
- Content Hub
- Other changes
- Further
1. Overview
Finally, Sitecore 10 has been released. With the release of Sitecore 10, a new era of Sitecore development has started, the mostly anticipated approaches becoming an official part of the platform. This version focuses on product updates and enhancements that provide more development and deployment options, increase usability and improve overall performance – all centered around enabling both Marketing and IT teams equally, thus making it easier and faster to launch and evolve digital customer experiences.
2. Installation
From now on, there are 3 option you may choose from in order to get Sitecore 10 up and running.
Historically, there was an MSI installer to install Sitecore as well as a ZIP archive to handle things manually. With version 8 comes a third-party Sitecore Instance Manager to simplify the installation along with some housekeeping tasks. It is no longer with us.
1. From Sitecore version 9.0 there was one and only official way to install Sitecore - SIF. A bit complicated for newbies and those who aren't familiar with PowerShell and JSON configurations.
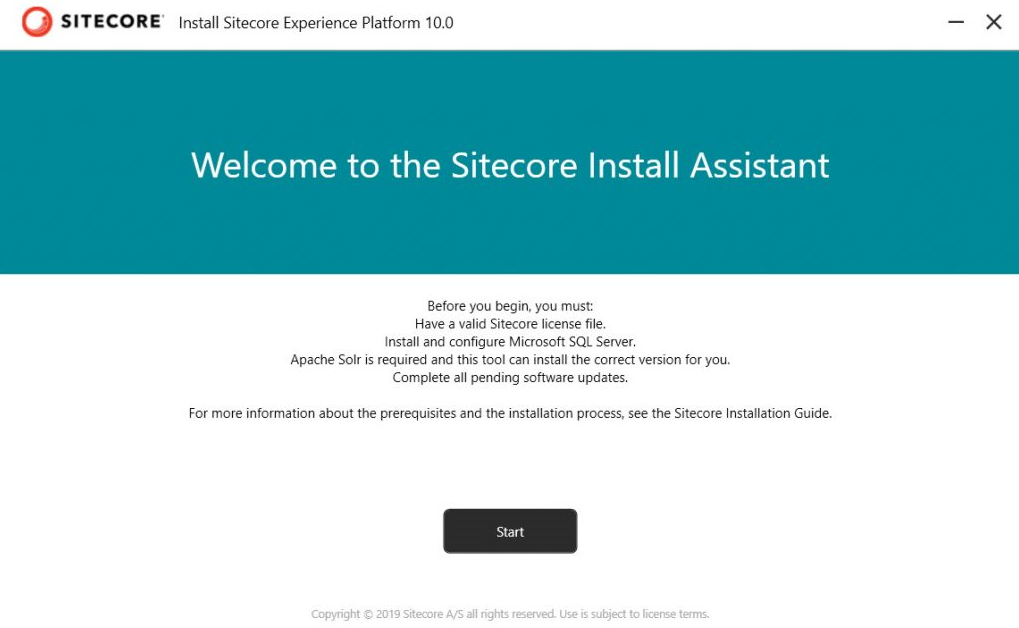
2. Later on with Sitecore 9.2, we got one more option for that - SIA with its GUI. With every next release SIA became more mature and offered more option. As for now, SIA allows to install Solr on your behalf together with few more things, such as extra validations:
- validates Solr connectivity
- validates SQL Server connectivity
- validates the Sitecore license file
- displays a progress spinner during the installation process
- supports the installation of Sitecore Experience Commerce
3. Since version 10.0, Sitecore now officially has support for Docker, Kubernetes and image repositories. Sitecore community has been around containers for a while and we made much commitment to make things happen - you may see my older posts on that. This for sure will help delivery teams move to now famous continuous delivery model, making infrastructure-as-code deployments for Sitecore smoother.

Of course, SIF is still available as the default option for local installation, for example on VMs or when your team is not yet ready for containers.
Register-PSRepository -Name SitecoreGallery -SourceLocation https://sitecore.myget.org/F/sc-powershell/api/v2
Install-Module SitecoreInstallFramework -Force
The actual SIF version for Sitecore 10.0 is 2.3.0, to ensure you've got it right type in:
Get-Module SitecoreInstallFramework –ListAvailable
Check if you have got 2.3.0 along with 2.3.0 folder as well in WindowsPowershell folder - then you're ready to install Sitecore 10 using SIF.
You may be interested in reading:
3. Containers
Firstly announced as supported in Sitecore 9.3, Sitecore released version 10.0 out-of-the-box support for containers - now it is an official option to develop or instantiate Sitecore and other services with containers. To help Sitecore developers learn, use, and get started quickly with Docker, there is comprehensive documentation available on developing with Sitecore on containers.
Sitecore has docker container images for Sitecore XP and XM along with non-prod images for MSSQL, Solr and Redis for developers, publicly available from Sitecore image repository. In this initial version, SXA is supported. Now you don't need to build images yourself. There are also liveness and readiness health check endpoints which are especially useful with containers.

1. Sitecore Experience Platform 10.0.0 uses Docker Compose as the container orchestrator on developer workstations. Docker Compose is a simple container deployment tool that is bundled with Docker for Windows. Sitecore container images can be deployed with other tools but we recommend that you use Docker Compose to deploy the containers that form the Sitecore Experience Platform.
2. Sitecore Experience Platform 10.0.0 uses Kubernetes (K8s) as the default orchestrator for deploying production environments. The Sitecore XP Kubernetes specification files that are used to map the minimum required configuration parameters between the Sitecore software containers are provided as a reference.
Sitecore customers are expected to extend these specifications to support their own requirements. It is the responsibility of each Sitecore customer to ensure that their production deployments meet the standards for stability and security set by their organization.
Why are containers important? In general, if you’ve been doing your development with virtual machines or local installations, moving to a Docker-driven development and infrastructure flow will be highly beneficial for you. In general, you can address four major areas:
- No more need for a long onboarding process for new team members
- Eliminates pain of having several Sitecore instances especially of various versions in parallel
- No more "works on my machine" errors
- Improved operational capabilities with new monitoring and security support
- Better computer resources management due to process isolation opposing running full OS VM
- Much more reliable continuous delivery model
- No need to "install" Sitecore - images are already pre-built for you
- Infrastructure-as-code approach (IaC) has proven its efficiency and finally landed the world of Sitecore
Adopting Docker and Kubernetes into your workflow will let your team focus on actual development rather than wasting time on repetitive ops, providing standard tooling they need to work on those changes.
4. ASP.NET Core

I don't think anyone missed out all the noise around ASP.NET Core which is an open-source, cross-platform framework for building fast, cloud-based web apps on Windows, macOS, or Linux. Some of Sitecore features prior to version 10 are already based on ASP.NET Core - Publishing Service, Identity Service, Sitecore Commerce websites, not to mention Sitecore Host to support many features like that. However, the core rendering of pages and components still remains dependent on the legacy of .NET Framework - which terminates at version 4.8 and won't go ahead. With .NET 5 release by the end of 2020, Sitecore has a long term strategy with Sitecore Host and the rest of development moving to .Net Core.
.NET Framework is still there in Sitecore 10 for legacy rendering, but since now we've got a Headless development option allows teams to build applications faster on the latest .NET Core technology. It is really cool especially for those pure back-end developers who just don't want to learn JavaScript and those customers who don't need fully javascripted SPA-like application.
Headless development with ASP.NET Core brings developers same JSS-like advantages, development and runtime isolation for a site, delivering a better development experience. There is a new SDK for headless ASP.NET Core rendering in Sitecore 10.
Using the same headless services that power JSS, you deliver experiences that work in Experience Editor, track and provide marketing capabilities, but work faster. You can use placeholders, field renderings, model bindings in ASP.NET Core as normal:
- faster and lighter
- run headless via the ASP.NET Rendering SDK
- works in Experience Editor
- supports routing
- compiling your rendering code won't cause an app pool recycle in the platform
- only connect to Sitecore when need to: making changes to the presentation layer, pushing them, debugging in a seconds
- remote rendering host - developers can build straight from VS into the rendering host and test changes without recycling all of Sitecore every time.
And a cherry on a cake - there's a Getting Started Template that demonstrates all the features for the release all together. Not to say that works well with your development version running in Docker containers. The code is
available on GitHub. To install latest template type:
dotnet new -i Sitecore.DevEx.Templates --nuget-source https://sitecore.myget.org/F/sc-packages/api/v3/index.json
Looking forward to see full support for ASP.NET Core 5 in the next releases of Sitecore.
5. CLI with Serialization
As we've been shown at Sitecore MVP Summit last year, Sitecore developed Command Line Interface (CLI) to interact with a Sitecore instance. The expectation is to be able doing pretty much everything from command line and in that sense it will intersect (or may even absorb) PowerShell Extensions. In order to attract developers to CLI - they decided to start with serialization.

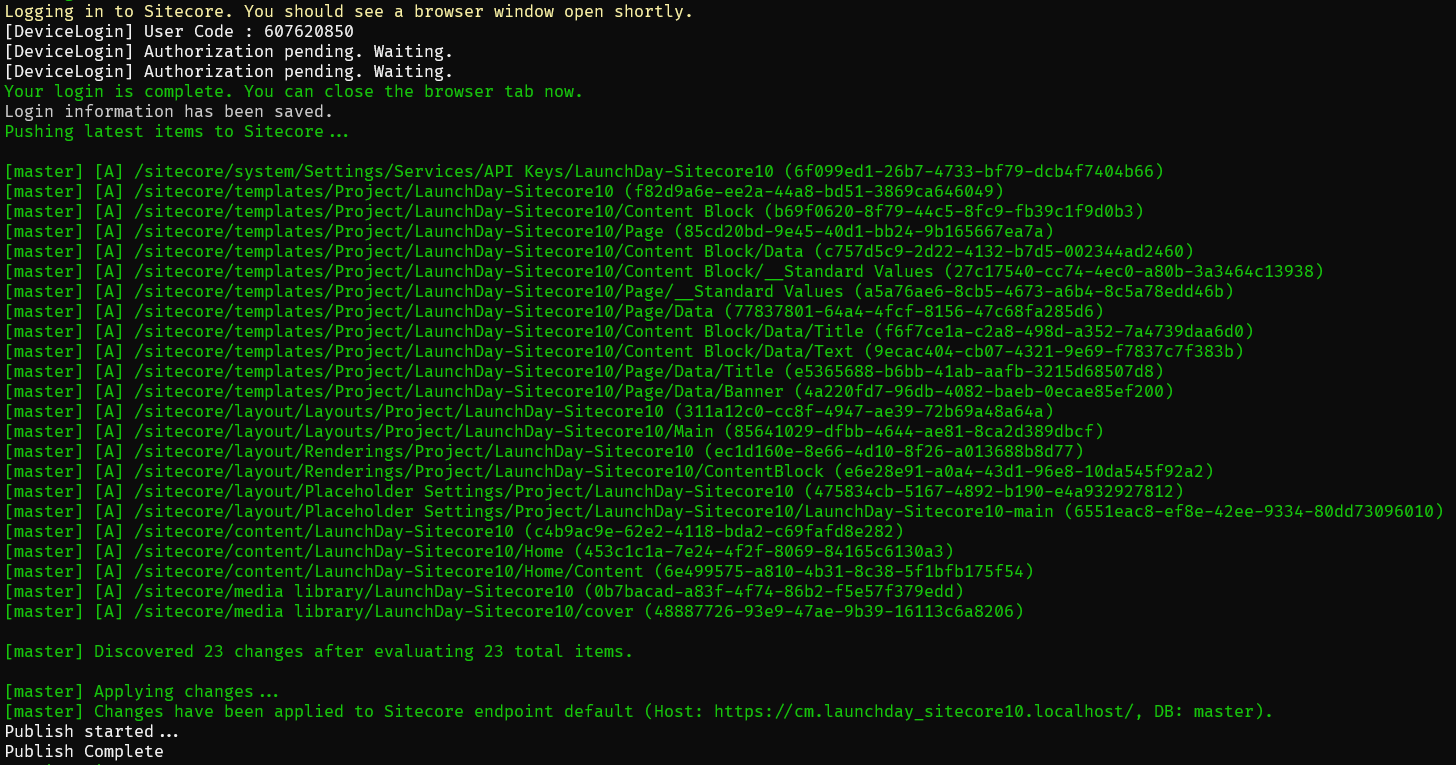
It was quite a surprise that Sitecore got to proper built-in way to serialize items from or deploy items into Sitecore - only using third-party tooling. Now this release of the CLI Sitecore is standardizing the tooling and approaches for serialization. Its initial release allows you serializing, pushing items with further publishing, by combining the best of TDS and Unicorn.
To support the security one need to login in via interactive or automated authentication flows, integrated with Identity Server.
With next releases, CLI will add more functionality, but what is even more thrilling, a plugin system for adding new commands via NuGet is also expected. And since it will cover all the aspects of creating and managing content, one can even create a wrapper over it implementing own version of Content Editor with any set of features (in fact, there's no need to since we've got Horizon, keep reading below).

For those who prefer GUI over command line, there is also a wrapper available over existing set of serialization CLI-features of Sitecore for Visual Studio, a new member of the Sitecore Developer Collection that does Sitecore Content Serialization from a GUI within Visual Studio - similar to TDS did before.
More reading:
6. Horizon
The first version of the new content editing experience called Horizon has been released with Sitecore 9.3 and there has been a lot of buzz around new editing interface since then. That first version was quite limited with supported functionalities.

Now with the second release of Sitecore, it supports more functionalities:
- Multi-site and multi-lingual are now supported and added to the user interface
- Drag & drop support in the page tree to organize your site’s structure
- Content Hub integration
- Keyboard shortcuts
- SXA sites are also supported with all the above
Horizon Content is a content manager that you use to manage content without a presentation layer. In Content you can see meta data for each field and you can edit content that is not accessible in Pages
Speaking of SXA sites, the integration to SXA has been improved to support editing directly on the page for all supported field types and also do site-specific images and datasources. A tighter integration between SXA and Horizon editing will be coming over the course of the Sitecore 10 series.
A new dedicated field editor experience allows you to edit page metadata that is not directly editable on the page. This allows you to edit other types of fields without the WYSIWYG interface. This is also useful for editing ‘headless’ content that is not intended for a page. Using the new Content view allows you to see all the content items, not just the pages, and edit your data in the Horizon field editor.
Extending Horizon with plugins is not yet available, however is expected with oncoming releases.
With assets in Sitecore Content Hub DAM, you can now leverage that rich media in the Horizon editor instead of only using the native Sitecore Experience Platform media library. This allows your marketing team to have a better flow from Content Hub to your web channel.
7. Search

Sooner or later this should have happened - Sitecore XP 10.0.0 deprecates Azure Search and it will be completely removed in a future release. If you are starting a new Sitecore project, please use Solr as your search engine.
What I especially love with Sitecore over the years, they do admit and fix previously done mistakes. Azure Search was not fully compatible since day one, I personally struggles so much with it. Finally it will leave Sitecore.
Sitecore XP no longer from passes malformed content to Solr -it now filters and validates content prior sending it to Solr.
Last but not the least, Sitecore 10 now requires Solr version 8.4.0 to work with.
8. XM / CMS-Only
Few version ago, Sitecore came up with a lightweight and very fast CMS-only version of its product, opposing full XP with full-powered analytics and much more things around it. However for some reason there was not rule engine personalization coming with XM topology which was not right: for those not needing the full xConnect, still want get use use of some basic personalization or implementing custom conditions, especially valuable for SXA websites. Finally that got fixed and one can now run simple personalization on lightweight XM installations. This functionality contains session-based and device rules that do not depend on tracker or marketing definitions available in the XM package.
Please refer to the list of personalization conditions available for XM to find out more.
9. JSS 14.0 and SXA version 10.0

There are not much of new JSS features with this release, the changes are mostly relate to the stability improvements and support for new platform features. Thus, new JSS can now successfully handle forwarded deployment requests when it is installed behind a reverse proxy as it is in Docker. Exactly the same applies to SXA.
SXA keeps having its versions aligned to the platform release, in order to avoid the confusion.
For more details on what's new, please read the following:
10. Data Exchange and Connectors
Changes in Data Exchange Framework (DEF):
- Additional field types added to CMP Connector
- You can now sync a single contact
- Respond to live events on the site
Sitecore Connect for Salesforce Marketing Cloud allows teams to work in Salesforce Marketing Cloud and leverage the rich visitor analytics data stored in xDB. Now, with the latest release, xDB information can be more easily sent to SalesForce. You can make use of this connection in real-time, no need to wait for a nightly batch. A new Sitecore Marketing automation activity, specifically for Salesforce Marketing Cloud, allows marketers to configure a realtime event to integrate with SFMC.

By connecting directly to the Salesforce Marketing Cloud, marketing teams can respond to events in Sitecore and immediately send information about the current visitor over to Salesforce Marketing Cloud and place visitors into Journey Builder marketing automation plans. This means that you can respond across all your channels to events, in real-time, in the marketing automation tool that you use.
Please read
this link for more details on SalesForce Connector.
11. Privacy options
Previous releases of the platform have progressively been improving the privacy tools available to teams looking to meet with regulatory needs and customer privacy demands. In Sitecore 10, new support has been added to help you on your journey. Sitecore 10.0 and later provides API calls and configuration options that makes it easier to enforce explicit consent for tracking a contact's activity on your websites.“Update consent settings” now allows you to remove contacts from marketing messages or all messages. In general, there are two new "rights":
1. Right to be forgotten. With this release, Sitecore Forms makes it easier for you to support erasing this personal identifiable data that is saved via the out-of-the-box Save data submit action. This includes redacting submission values, removing any associations to xDB Contacts, and deleting any files uploaded by the visitor. At the same time this approach still allows marketing teams to see reporting data, despite being anonymized.
2. Right to object. A second change in this release regards making it easier to enforce and manage consent choices. Visitor tracking now requires that giving explicit consent.and marketing teams need to respect and store these choices and make decisions on them. The new consent management tools available in the platform allow for implementation teams to configure sites to require explicit consent before the Sitecore tracking will begin. The tracker is now able to be disabled based on the consent settings stored for the user, and xDB supports the ability to store these consent settings and persist it across visits for the contact.
This allows marketing teams to add additional consent requirements for specific sites that need to meet stricter privacy guidelines.
12. Analytics
Getting insights from Sitecore’s analytics reports is great, but previously one could not filter on specific segments. Now, there is a new filtering functionality available in all reports!
This means that you can use Segments created from List Manager based on all sorts of segmentation rules as filters on your analytics. In the past when the “Use as analytics filter” was enabled in a Segment, you needed to apply some extra configuration to have this filter available in your reports. Now, this filter is available in the analytics reports without any extra configuration:
- Target segments of contacts via predefined rules and then report based on that segment
- Report on the performance of key audience groups
- Push an email to a segmented list and then see the impact across the site
This is great, because with the extensive set of available segmentation rules, it’s very easy to zoom into the analytics for these specific segments focusing on a group of contacts.
13. EXM
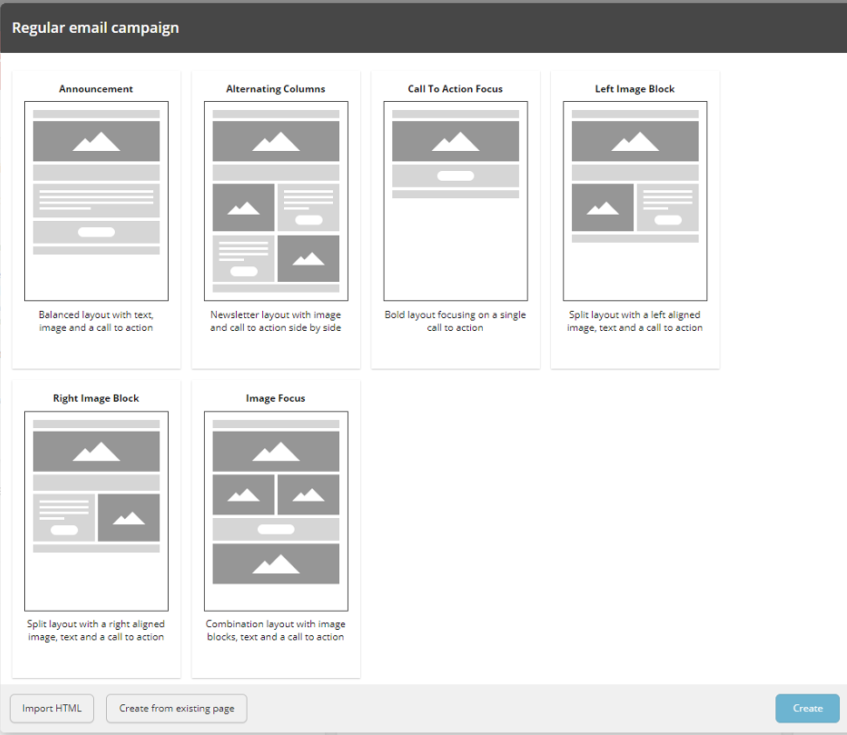
Before Sitecore 9.2, there were no standard templates available OOB at all. Now, with Sitecore 10 we've got even more new additional templates added to the product:
- Left Image Block
- Right Image Block
- Image Focus

This saves much time for the customers using EXM from developing such email templates from scratch, as these templates can become a great starting point at the cost of a single click. But what is really great - these templates are completely customizable to using Scriban, similar to editing rendering variants in SXA.
14. Marketing Automation
Firstly, Marketing Automation has been reworked to allow for more efficient loading of xConnect data, there are performance improvements in XConnect for customers who do not use Marketing Automation. It does not load contacts and interactions unless there is an inactive or active plan.
Secondly, there are new rules around birthdays added to engage with contacts around their birth date. You can now do things like:
- sending offers X days in advance of their birthday
- sending greetings on their birthday
- sending reminders and follow-up with your customer some number of days after their birthday
Thirdly, usability improved by rephrasing and redefining rules and settings, as well as security changes.
15. Experience Editor
Ladies and gentlemen, let me introduce the feature mostly wanted and requested by marketers which we finally got! The feature which on its own may save hundreds of hours for you content or marketing teams. And here is it:
All content pasted from Word into Rich Text Field is cleaned. Therefore no more Ms Word styling coming into a field, just pure content.

This might look as a minor improvement, but a lot of authors have been waiting for easier workflow going from their Ms Word documents into Sitecore rich text fields. Previously, authors often broke the styling on a site as their copy-pasted content included extra unwanted markup from their documents that conflicted with the styles already on a site. With the new changes, clean source HTML is created that preserves the content and the styling especially for those customers who aren't using Content Hub.
16. Content Hub

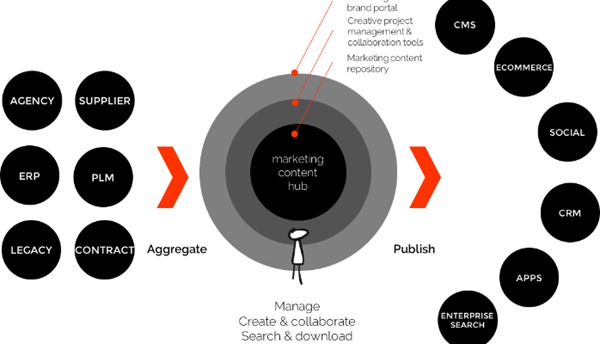
Once again I want to clarify very common confusion. Content Hub isn't just a replacement for Media Library. Quite opposite - Sitecore Content Hub is now the central hub for all media content in their DAM, but also content models defined in CMP. And Sitecore is just only one of the channels of content publishing with the web channel is only one channel consuming this content. Current release expands how much content can be managed in CMP and then integrated to the Sitecore Experience Platform. With support for additional field types, this allows marketing teams to centralize more of their content creation into Content Hub and still leverage this with their web teams. With the addition of a taxonomy import, marketing teams can also make sure that the taxonomy associations they make in Content Hub will persist into the content items in Sitecore.
17. Other changes
Just go through them in a form of a bullet list:
- Sitecore PowerShell Extensions version 6.1.1 is accompanying this platform release.
- With Sitecore 9.2 we've got Active Personalization report. Now with version 10 numerous performance optimizations have been put in the active personalization list, including infinite scrolling, caching, lazy loading, and back-end optimizations
- You can now abort currently running jobs - another widely demanded feature.
- Session State has been optimized for performance, expecting a 10-15% faster response time for CD servers.
- The Shared Session State database is now disabled by default, but can be enabled if required.
- Application map support has been one of the highest requested features for operations teams running their infrastructure on Azure, now it's possible to view and diagnose the xConnect stack directly in the application map, with monitoring and diagnosing allowing to start tracing requests.
- Massive performance improvements to xDB change tracking achieved by changing the way changes are tracked in xDB. This allows for a faster processing when there is a high volume of changes being made, while simultaneously being less heavy on server resources.
- A new page that automatically collects basic information about your Identity Server instance has been added.
- You can configure service pages (Error, Not Found, and so on) for each website on content tree structure.
- There is also already available Sitecore Commerce 10.0 that works on top of Sitecore XP 10.0.
18. Further reading
This is not the full list of changes and features coming with this so much promising Sitecore 10 release. You may use the links below for your own investigation: