Experience Sitecore ! | All posts tagged 'Virtualization'

Experience Sitecore !

More than 200 articles about the best DXP by Martin Miles

Cannot use a Hyper-V disk VHDX image you've been shared with? That's how to manage it properly

Cannot use a Hyper-V disk VHDX image you've been shared with? It can be your colleague's shared VM or a disk exported from Azure VM. Below I am going to describe the steps required to managed it properly.

The first thing one is likely to perform is either importing this disk or creating a new VM without disk and attaching it later. Despite it seems absolutely valid, that will end up with:

If you see the above error it means you've most likely created a VM of 2-nd Generation of Hyper-V, and attached you drive to it. That won't work, but why?

To answer this question let's define the difference between both generations. The main fact about Generation 1 is that it emulates hardware - all required hardware components must be emulated to make the virtual machine work! Special software that can imitate the behaviour of real hardware is included in Hyper-V, as a result the VM can operate with virtual devices. Emulated hardware (that behaves identical to real hardware) includes drivers to most operating systems in order to provide high compatibility.

Generation 1 the emulation works way less productive compared to native equipment and has numerous limitations. Among those:

  • a legacy network adapter
  • IDE controllers with only 2 devices could be attached to each
  • MBR with max disk size of 2TB and not more than 4 partitions.

The 2-nd Generation uses:

  • UEFI BIOS
  • GPT support (without size and partitions legacy limit) and Secure Boot
  • because of the above - VMs boot (and operate) much faster
  • fewer legacy devices and new faster synthetic hardware used instead
  • better CPU and RAM consumption

UEFI is not just a replacement of BIOS, UEFI extends support of devices and features, including GPT (GUID Partition Table).

Secure Boot is a feature that allows protection against modifying boot loaders and main system files, done by comparing the digital signatures that must be trusted by the OEM.


The solution is quite simple.

What you need to do is create a 1-st Generation VM (without creating a new disk drive) and reference existing VHDX file. That would work and OS will load (slowly but will do). The laziest person would probably stop at this stage, but we progress ahead with converting it to the 2-nd Generation VM. But, how do we?

All you need to do is convert legacy BIOS to UEFI running the following command executed within a 1-st Generation VM:

mbr2gpt.exe /convert /allowFullOS

Please pay attention to the warning: since now you need to boot in UEFI mode.

Now you can turn off the Windows VM, delete existing 1-st Generation VS from Hyper-V Manager (but not the disk drive!), and then create a new 2-nd Generation VM referencing the converted VHDX disk image. Also make sure the attached hard Drive stands first for at the boot sequence order (Firmware tab) and also you may want unchecking Enable Secure Boot switch from the Security tab.

Now you may successfully start your received Hard Drive with a fast and reliable 2-nd Generation VM that manages resources of your host machine in a much reliable and savvy way!

Running IIS on local Windows Nano Server in Hyper-V rather than in docker

I've been enjoying Docker for a while, its flexibility and optimized images. However, there are two things, in general, I'd like to improve with the ops process:

  1. getting more control over the containers
  2. obtaining even more persistence, like the ability to create snapshots, switching between them, and few more features very common for traditional VMs

I have a host machine running Windows 10 x64 Professional, that's why I benefit from Hyper-V coming out-of-the-box with this OS. Saying that I mean creating a chain of checkpoints, switching between them, backing up and restoring images as well as other traditional ops activities - that all happens nicely and rapidly! Not to say that VMs work as effective, as the host does - at least I do not feel any difference.

The downside, however, is an extreme size of VMs - some are taking 50+ gigs of drive space!  That's due to Windows 10 running inside, so obviously looking at docker windows systems I felt quite jealous since Windows Server Core takes about 4 gigs and Nano Server is only half a gig! That's still 100 times more than smallest Alpine image, but still the smallest windows unit option possible.

So wondered if that's possible to have Nano Server, but hosted at local Hyper-V in Windows 10, so that I can not just cluster them as many as I may need without any host machine performance impact, but also mix them with other OS VMs sharing the same network and resources. And of course, get the ability to do checkpoints and remote management (PowerShell in that case since Nano does not have any UI). Going ahead, I confirm that all of the above was achieved, and this article explains how.


Content

  1. Defining objectives
  2. Preparing virtual drive
  3. Setting up a VM
  4. Running Nano Server
  5. Remote administration
  6. The result


1. Defining objectives

Achievables for this exercise are listed below:
  
  • Running Nano Server as a guest OS from Hyper-V manager using UI.
  • Being able to utilize all Hyper-V features, such as checkpoints, backups and restore
  • Run several machines in the same stable and configurable virtual network
  • Mixing various types of containers, such as bot GUI and non-GUI Windows OS along with Linux
  • Get the minimal Windows-based OS with IIS running
  • Being able to manage that OS remotely (with PowerShell since that OS does not have UI)

2. Preparing a virtual drive


While you can manually create Nano server virtual hard drive with a (long) PowerShell command, there is a nice tool that allows you to define what you'd like to get as the result. Here's this tool - NanoServerImageBuilder.msi (2.6MB). Once run it will look up for the prerequisites.

If you miss any of the dependencies, Nano Server Image Builder will identify them, download and install:


After installation, you'll have two options, and since we are going to build a virtual hard drive for VM - select the top one:


At this stage, you need to provide Windows Server 2016 installation ISO.


As the dialogue box kindly advises, the server OS image should contain the NanoServer folder at the root of ISO image:

When choosing an edition - pick up Datacenter as it is the smallest one. From optional packages make sure you check IIS as that's among out achievable lisе:

Give a machine name and admin password:

If you intend to manage your VM from a Hyper-V virtual subnet only (and not from outside networks), leave this unchecked:

As for IP address - we'll use DHCP client, but having static IP is an optional benefit - feel free to choose if you need that.

And that's it! As you see, this tool is just a GUI wrapper over a PowerShell command extracting necessary components and generating a Nano Server virtual hard drive out of traditional Windows Server 2016 ISO image. That actual command is listed below as well:

The tool ends up with creating a VHD-file which is a virtual hard drive containing our Nano Server (and yes, it is half-a-gig in size!), but at the next stage we need to create a new VM and attach created drive to it in order to run a VM:


3. Setting up a VM

As usual, create a new Virtual Machine. Once done, attach the drive and complete the wizard:


4. Running Nano Server

In Hyper-V Manager you are now able to run Nano Sever:


That's the only UI you may be able to see from your image. Enter the Administrator password you provided upon image creation:


The choice of available options with UI is not as impressive at all:


Networking is probably the only useful configuration screen here. Obviously, that's where you configure network parameters such as IP addresses, network mask, DHCP and the rest of them - use it not configured network correctly at the stage of preparing a virtual hard drive.

Done and let's finally turn to the most interesting part - remote management!


5. Remote administration

Just before you start, run the command below in order to find out if WSMan in enabled. The WSMan provider is a set of tools for PowerShell that lets you add, change, clear, and delete WS-Management configuration data on local or remote computers. 
The screenshot below tells me it is up and running there at Nano Server:
Test-WsMan IP_ADDRESS


At the next step, you may need to run these two commands: first enables PowerShell Remoting and the second creates a rule of treating everything as a trusted host (it is safer to use exact IP address instead of *-asterisk wildcard).

Enable-PSRemoting           #     we need to enable PowerShell remoting first
Set-Item WSMan:\localhost\Client\TrustedHosts *        #     adding hosts to trusted

Now let's try to execute PowerShell command remotely (within a context of given Nano Server). This command runs code within curly braces on Nano Server - an example below shows root level of remote C-drive:

Invoke-Command -ComputerName 192.168.181.136 -ScriptBlock { Get-ChildItem C:\ } -credential Administrator


Alternatively, you may "enter" an interactive mode (same that you get by using -it with Docker), and run commands one by one, all in the context of remote Nano Server. Let's, for example, navigate into IIS directory and check what is there:

Enter-PSSession -ComputerName 192.168.181.136 -Credential Administrator


6. The result

You might have seen those default HTM and PNG files, coming with IIS by default at the previous remote output. When starting correctly prepared Nano Server, IIS is also up and running showing the default website. 


From now on I can backup, restore and duplicate the instance that has IIS running straight away and is remotely manageable via PowerShell. I can use it as a base image for further experiments without an impact on the performance of a host machine.

Please bear in mind that Nano Server does not support full .NET Framework, so you can only run .NET Core and static websites from such IIS instance. If you need full .NET Framework - use a similar approach with Windows Server Core.

Hope you find this useful!

Starting with Docker and Sitecore

There was much of recent buzz around containers as technology and Docker in particular, especially now where more and more community efforts focused at Docker in conjunction with Sitecore. Plenty of articles do explain how it works on the very top level, what the benefits are but very rare do precise guidance. As for an ultimate beginner - I know how it is important to get a quick start, the minimal positive experience as a further point of development. This blog exactly about how to achieve the bare minimal Sitecore running in Docker.

Content


1. Terminology

  • Docker images - a blueprint for creating containers, is what you pull from remote registry
  • Docker container - an implementation of a specific image, you run and work with containers, not images
  • Docker repository - a logical unit containing one or many built images (specified by tags)
  • Docker registry - works like a remote git repo, it's a hosted solution to you push your built images into

There are plenty more of terminology, but these are the essentials for a demo below

2. Installing Docker

If you have it up and running, you may skip to the next part.

In order to operate the repository for given walk-through, you need to have Windows 10 x64 with at least build 1809.

The simplest way is to install it from Chocolatey gallery:

cinst docker-desktop

Missing something from your host OS installation? Docker will manage that itself!

Once done, you'll need to switch a mode. Docker for Windows can work in either Windows or Linux mode at the same time - which means you cannot mix types of containers.

One of the biggest issues at the moment is the size of Windows base images - the minimal Nano Server with almost everything cut off is already 0.5Gb and Server Core (this one either does not have UI - just a console) goes to 4Gb. That's too much comparing to minimal Linux images starting from as little as 5 megs. That's why it may seem very attractive to run Solr from Linux image (as both Solr and Java it requires are cross-platform and there are ready-to-use images there), same for Ms SQL Server which also has been ported on Linux and its images are also available.

Until the very-very recent the short answer was no - one could manage only single type of container at a time (while already running Linux container will keep up running unmanageable, there are also few workarounds how to make them work in parallel, but that's out of scope for now), but as from April 2019 it is doable (from Linux mode on Windows), I managed to combine NGINX on Linux with IIS on Windows.

Switching mode from UI is done by right-clicking Docker icon context menu from a system tray:


3. Docker registry

What you should do next is to provide a docker registry. Docker Hub is probably the first option for any docker beginner.

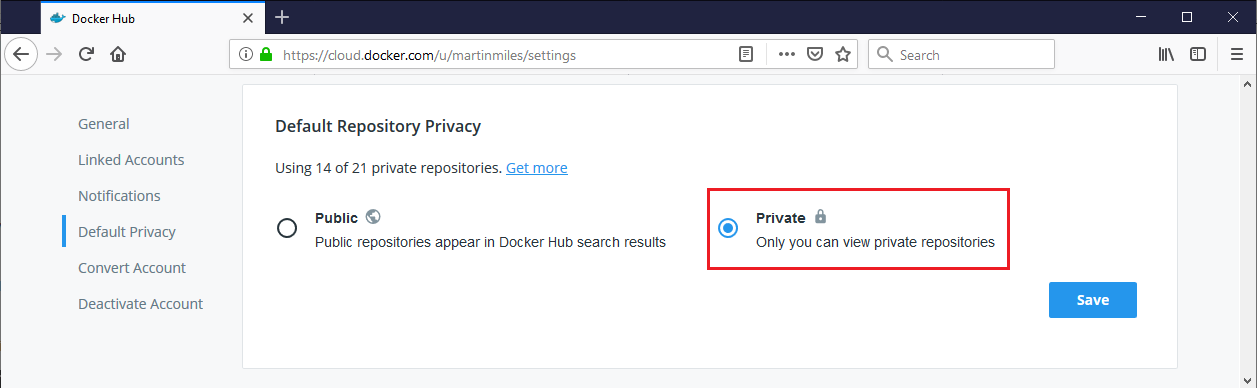
Docker Hub however allows only one private repository for free. You need to ensure sure all your repositories are private. Images you're building will contain your license file, having them in a public access will also be treated as sharing Sitecore binaries on your own, which you're not allowed - only Sitecore can distribute that publicly.

Alternatively, you may consider Canister project, they give up to 20 private repositories for free.

Pluralsight has a course on how to implement your own self-hosted docker registry.

But what is even more surprising, Docker itself provides a docker image with Docker Registry for storing and distributing Docker images.


4. Preparing images

Now let's clone Sitecore images repository from GitHub - https://github.com/sitecoreops/sitecore-images

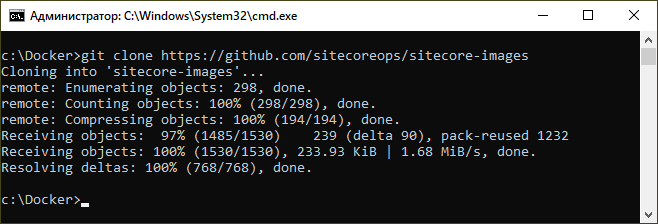
If you don't have git installed - use Chocolatey tool already familiar from previous steps: cinst git (once complete - you'll need to reopen console window so that PATH variable gets updated).

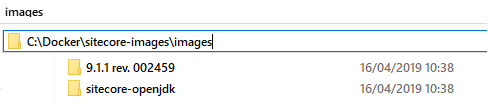
To keep things minimal, I go to sitecore-images\images folder and delete everything unwanted - as for this demo, I keep only 9.1.1 images, removing the rest. So, I left only 9.1.1 images and sitecore-openjdk required for Solr:

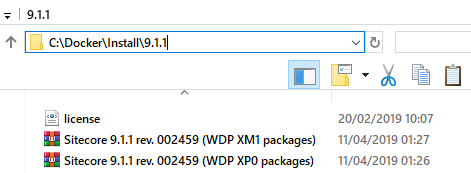
Images folder contains instructions on how to build you new Sitecore images. As input data they require Sitecore installers and license file, so put them into this folder:

And the last but not the least, create build.ps1 PowerShell script.

Important: do not use an email as the username, it's not your email (in my case username is martinmiles), and from what I've heard many people find this confusing and were wondering why getting some errors.

This is my build script, replace usernames and password and you're good to go:

"YOUR_DOCKER_REGISTRY_PASSWORD" | docker login --username martinmiles --password-stdin

# Load module
Import-Module (Join-Path $PSScriptRoot "\modules\SitecoreImageBuilder") -Force

# Build and push
SitecoreImageBuilder\Invoke-Build `
    -Path (Join-Path $PSScriptRoot "\images") `
    -InstallSourcePath "c:\Docker\Install\9.1.1" `
    -Registry "martinmiles" `
    -Tags "*" `
    -PushMode "WhenChanged"


5. Building images

Run the build script. If receiving security errors, you may also be required to change execution policy prior to running build:

set-executionpolicy unrestricted
Finally you get your base images downloading and build process working:

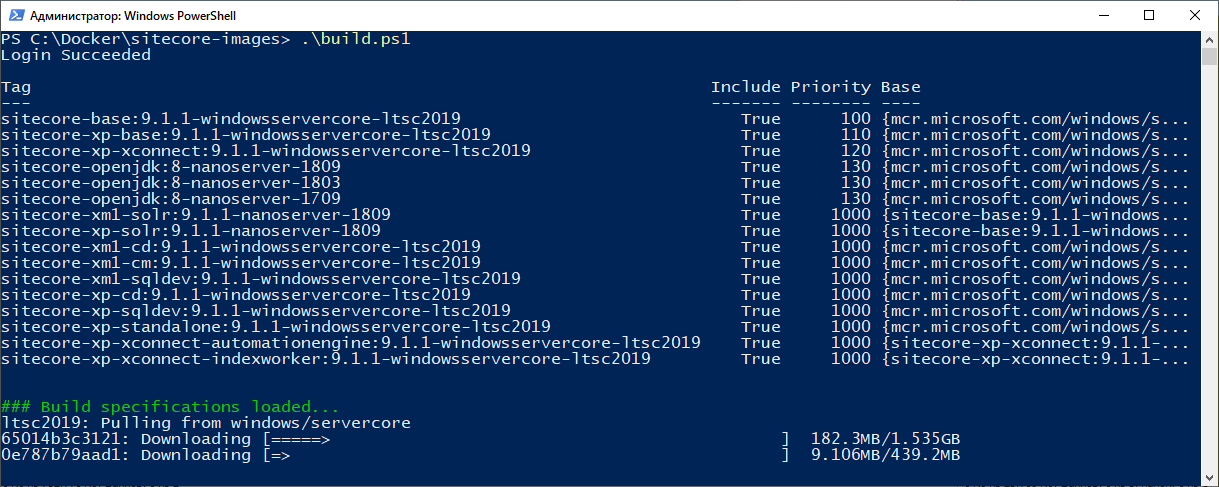
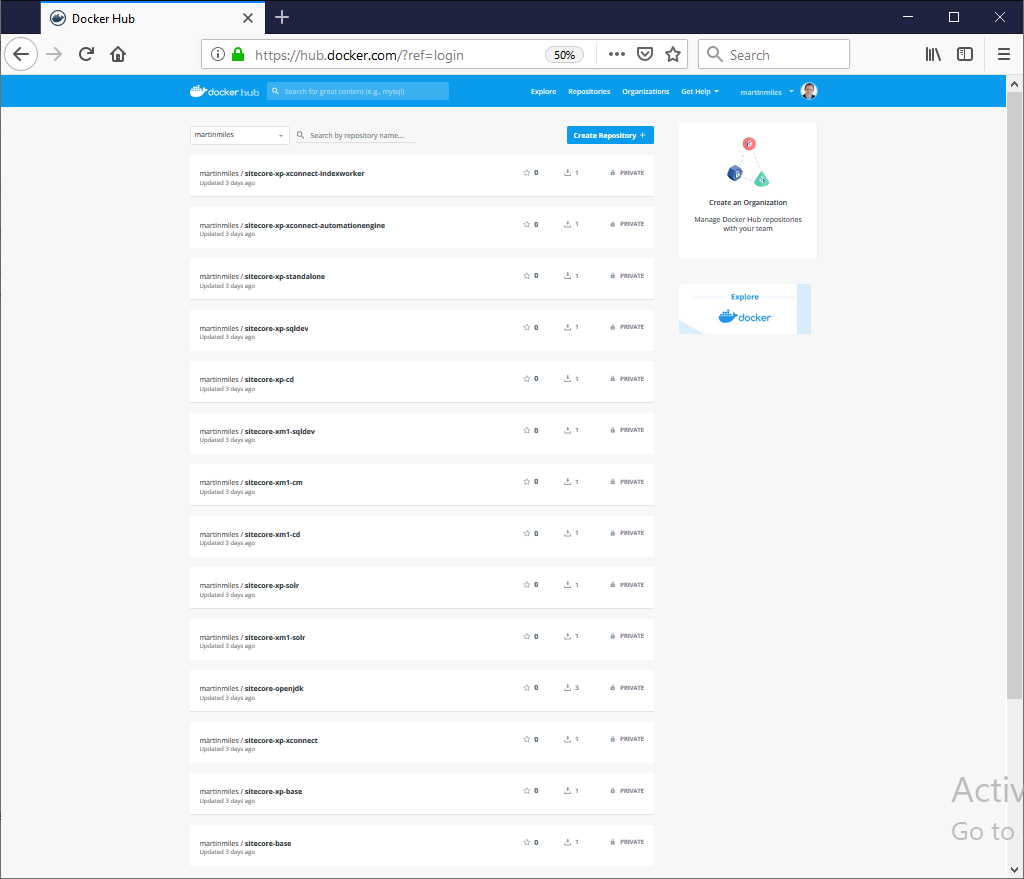
As I said, the script pulls all the base images and builds, as scripted. Please be patient as it may take a while. Once built, your images will be pushed to the registry. Here's what I finally got - 15 images built and pushed to Docker Hub. Again, please pay attention to Private badge next to each repository:

Docker Hub has a corresponding setting for defining privacy defaults:


6. Running containers

Images are built and pushed to registry, so we are OK to run them now. Navigate to tests\9.1.1 rev. 002459\ltsc2019 folder where you see two docker-compose files - one for XM topology and another for XP. If simplified, docker compose is a configuration for running multiple containers together defining common virtual infrastructure, it is written in YAML format.

Since we are going the simplest route - we keep with XM topology, but that same principle works well for anything else.

Rename docker-compose.xm.yml to docker-compose.yml and open it in the editor. What you see is a declarative YAML syntax of how containers will start and interact with each other.

version: '2.4'

services:

  sql:
    image: sitecore-xm1-sqldev:9.1.1-windowsservercore-ltsc2019
    volumes:
      - .\data\sql:C:\Data
    mem_limit: 2GB
    isolation: hyperv
    ports:
      - "44010:1433"

  solr:
    image: sitecore-xm1-solr:9.1.1-nanoserver-1809
    volumes:
      - .\data\solr:C:\Data
    mem_limit: 1GB
    isolation: hyperv
    ports:
      - "44011:8983"

  cd:
    image: sitecore-xm1-cd:9.1.1-windowsservercore-ltsc2019
    volumes:
      - .\data\cd:C:\inetpub\sc\App_Data\logs
    isolation: hyperv
    ports:
      - "44002:80"
    links:
      - sql
      - solr

  cm:
    image: sitecore-xm1-cm:9.1.1-windowsservercore-ltsc2019
    volumes:
      - .\data\cm:C:\inetpub\sc\App_Data\logs
    isolation: hyperv
    ports:
      - "44001:80"
    links:
      - sql
      - solr

If your docker-compose has isolation set to process, please change it to hyperv (this is mandatory hosts on Windows 10, while on Windows Server docker can also run its process natively). In that case, processes will run in a hypervisor and is not a naked process next to native windows processes, that prevents you from memory allocations errors such as PAGE_FAULT_IN_NONPAGED_AREA and TERMINAL_SERVER_DRIVER_MADE_INCORRECT_MEMORY_REFERENCE

Notice data folder? This is how volumes work in docker. All these folders within data are created on your host OS file system - upon creation, a folder from container is mapped to a folder on a host system, and once container terminates, data still remains persistent on a host drive.

For example, one running SQL Server in docker can place and reference SQL database files (*.mdf and *.ldf files) on a volume externally in such a manner so that databases actually exist on a host OS and will not be re-created on each container run.

My data folder already has data folders mapped to data folders from all the various roles' containers run on previous executions (yours will be blank at that moment before the first run):

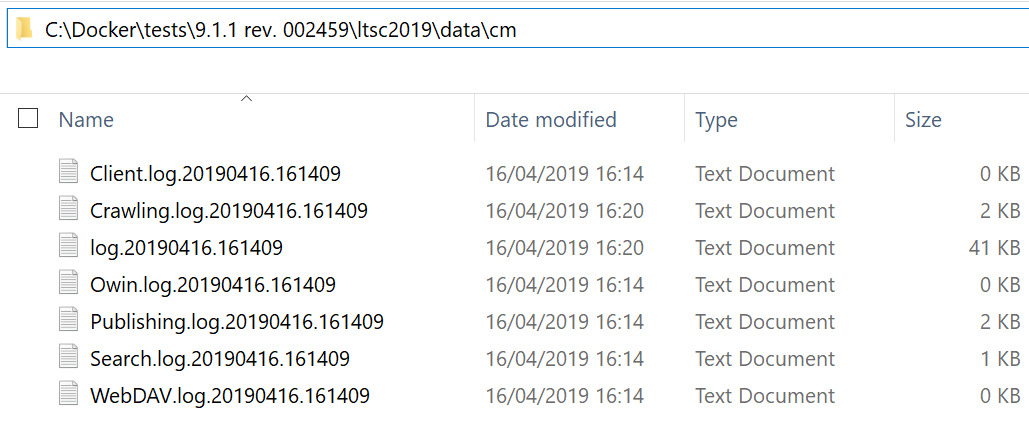
Just for a curiosity, below is an example of what you can find within cm folder, looks familiar, right?


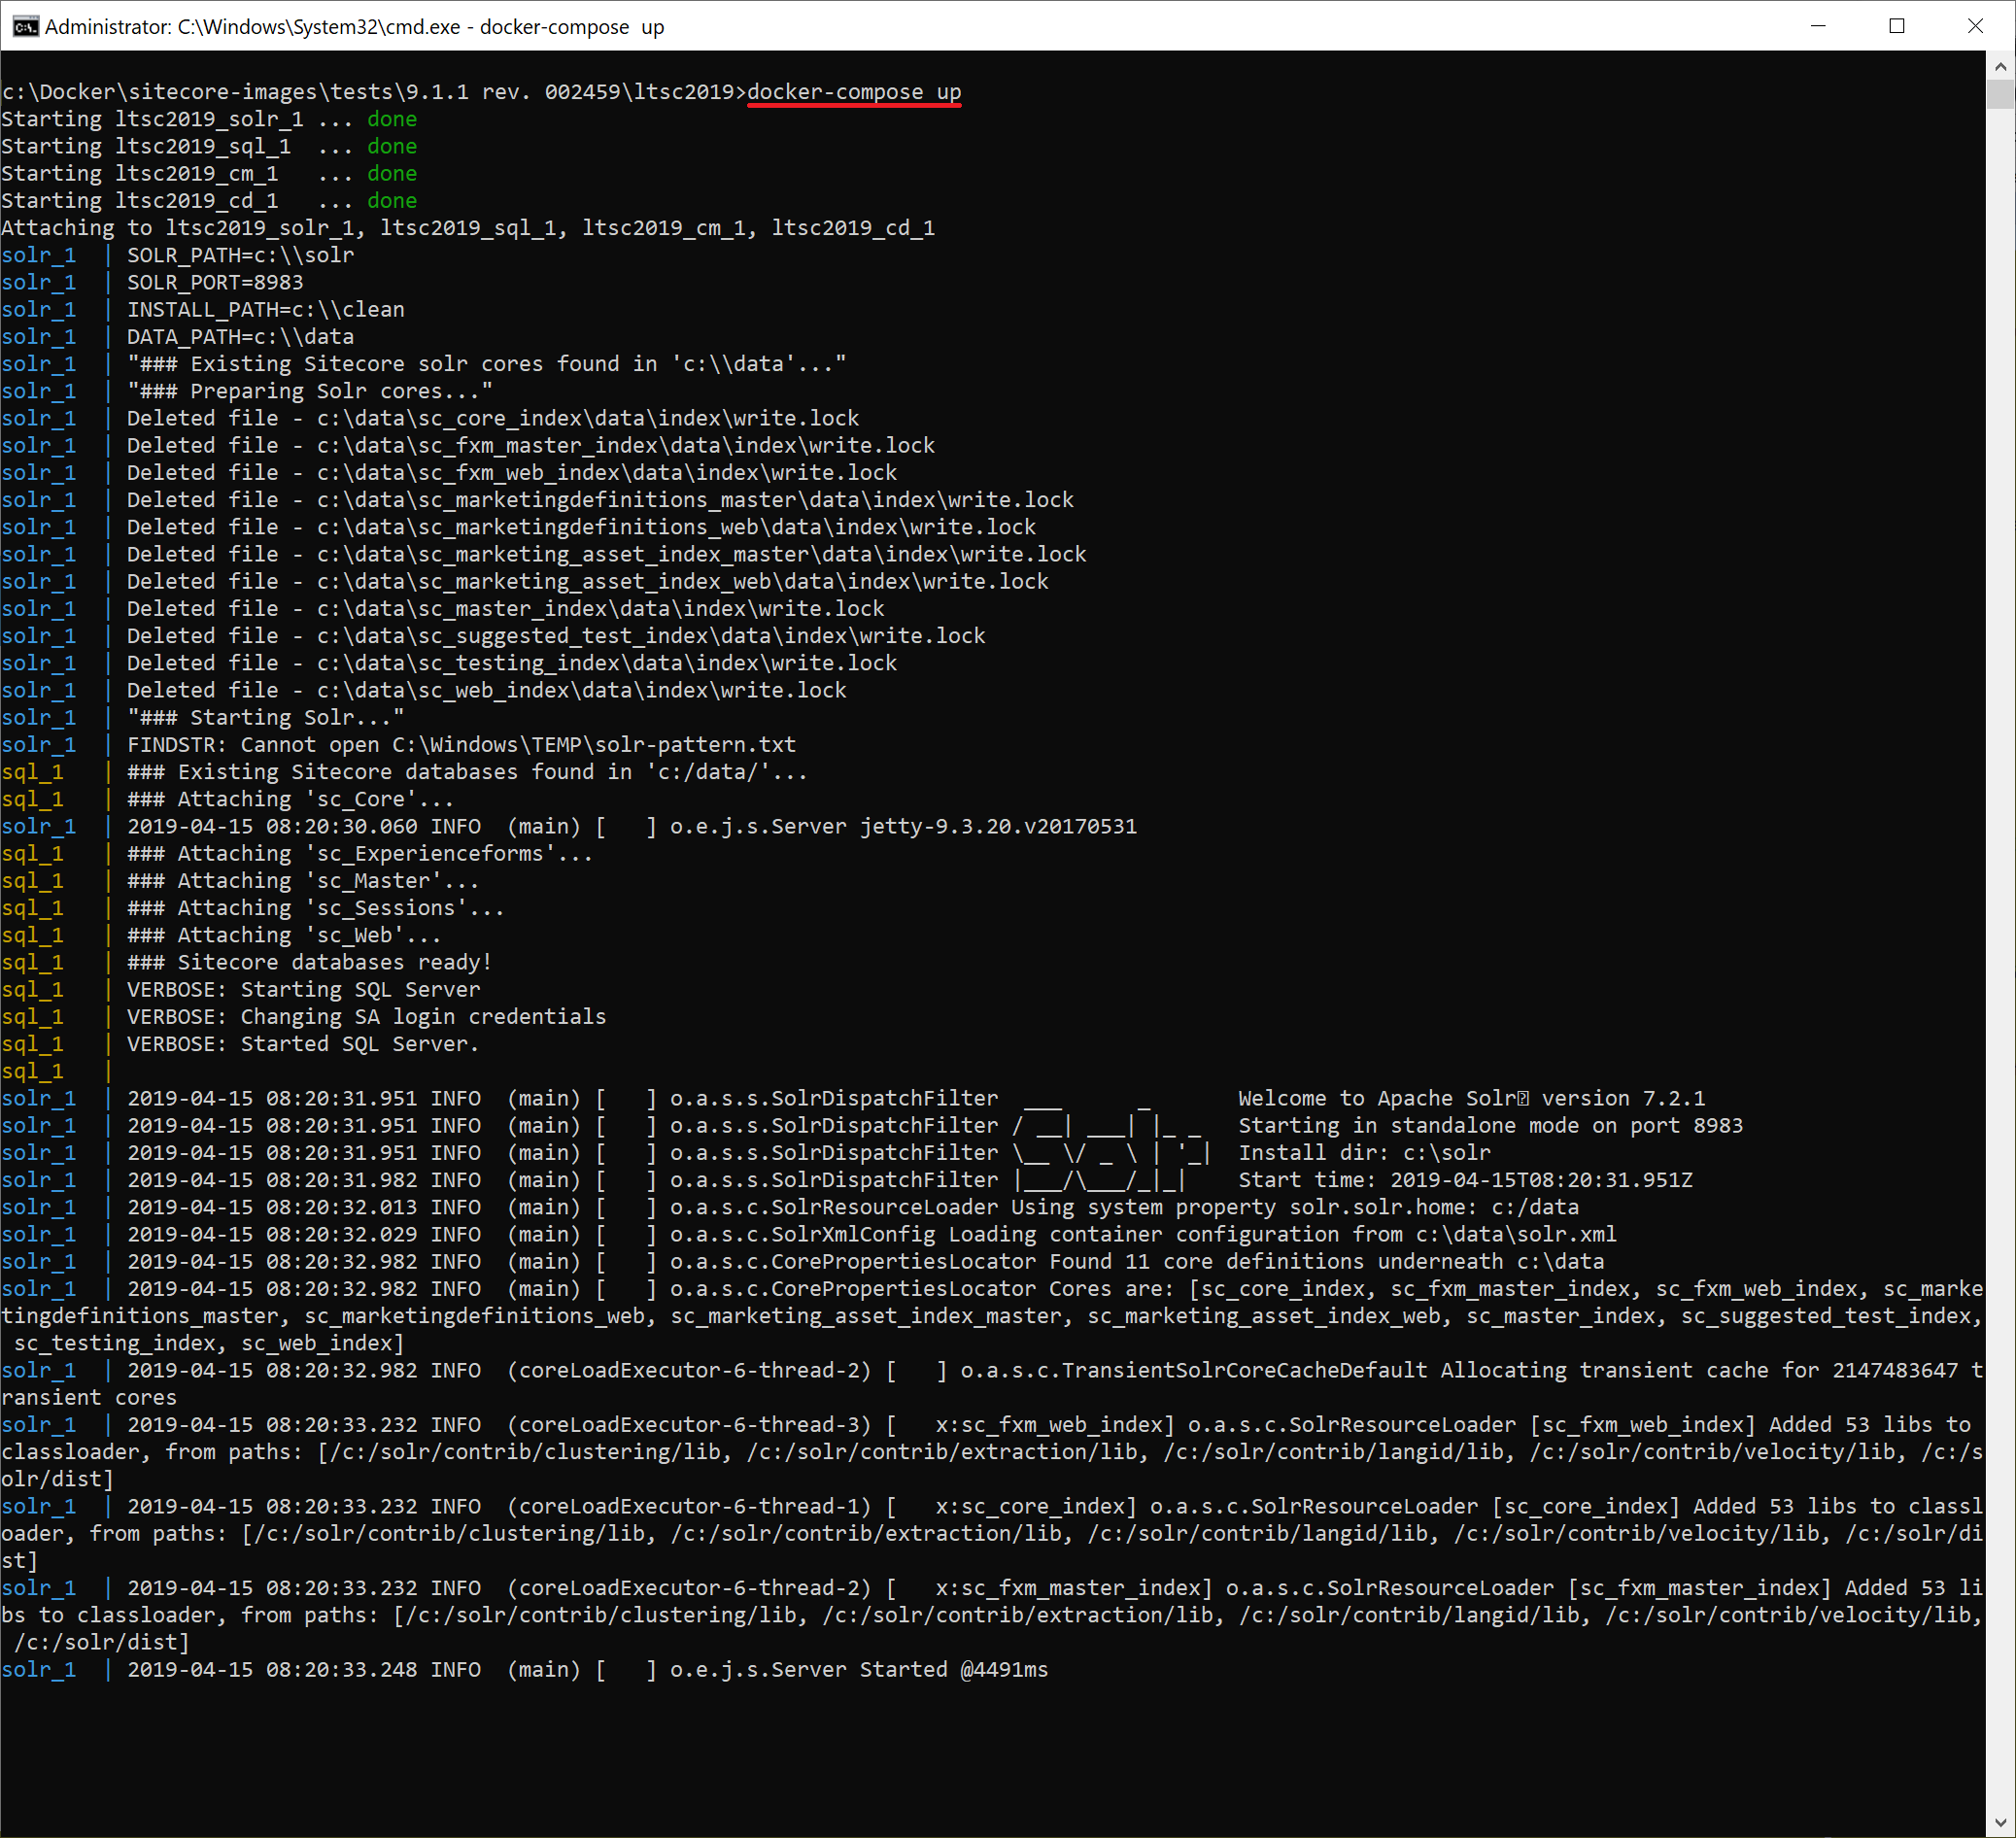
Anyway, we are ready to run docker-compose:

docker-compose up

You'll then see 4 containers being created, then Solr container starts making its job, providing plenty of output:

In a minute you'll be able to use these containers. In order to log into Sitecore, one needs to know an IP address of a container running a particular role - so need to refer to a cm container. Every container has its hash value which serves as an identifier, so with docker ps command you can list all docker containers currently running, get hash of cm and execute ipconfig command within a context of that cm container (so that ipconfig runs inside of it internally):

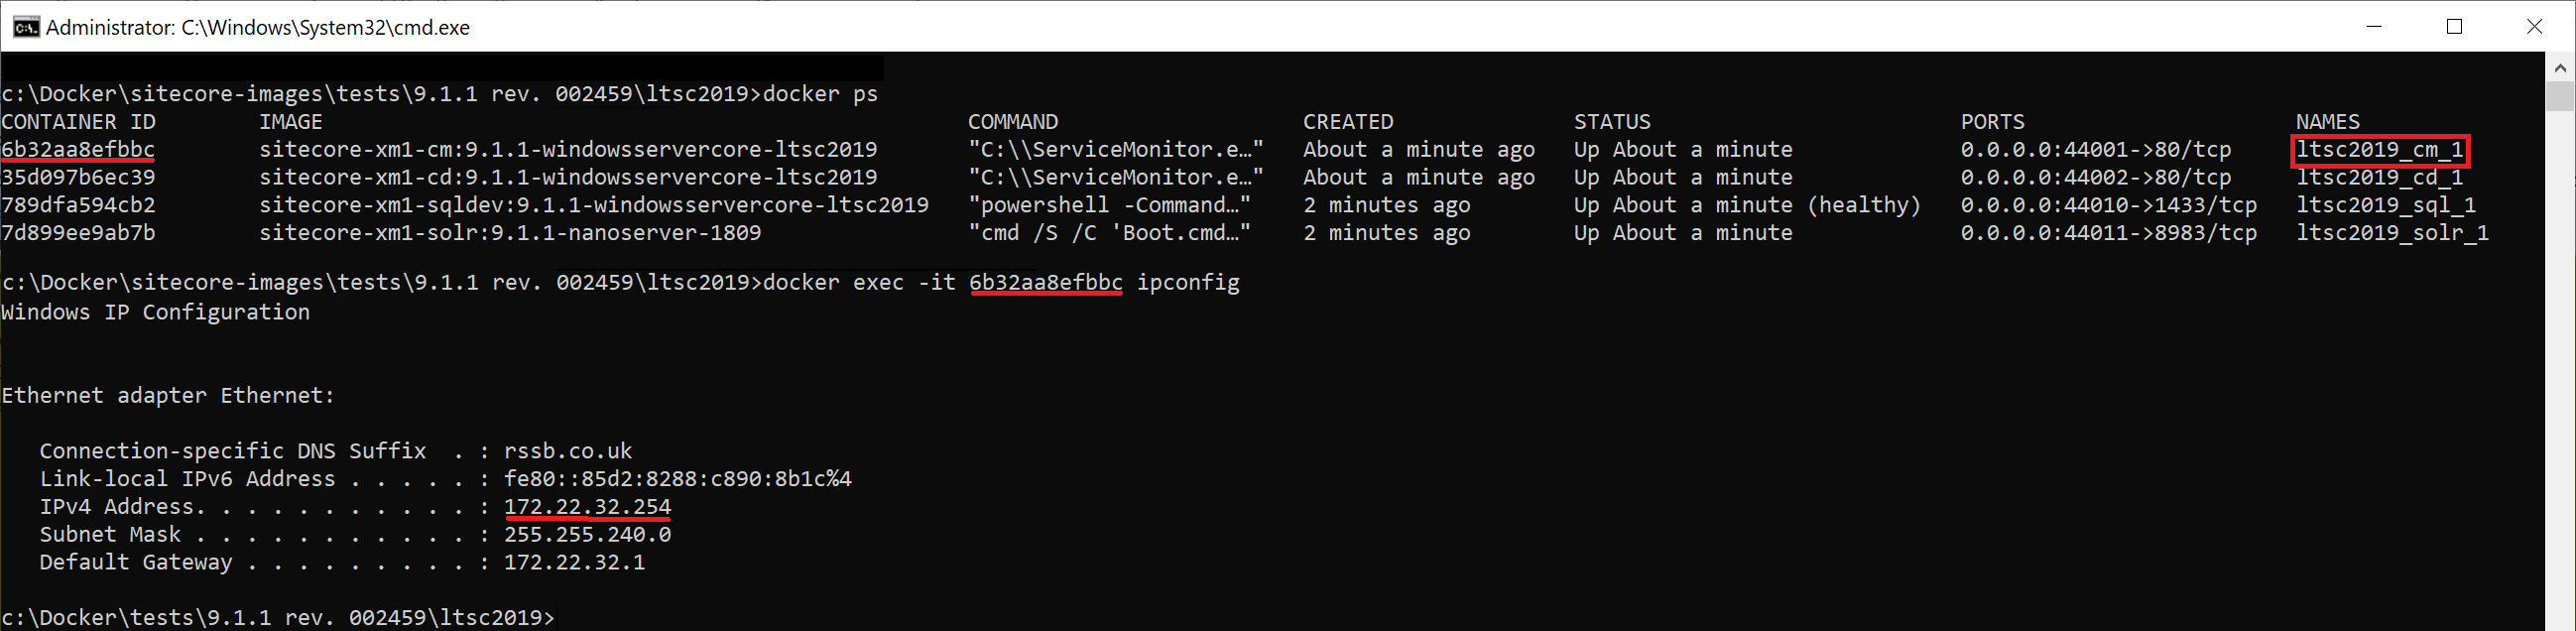
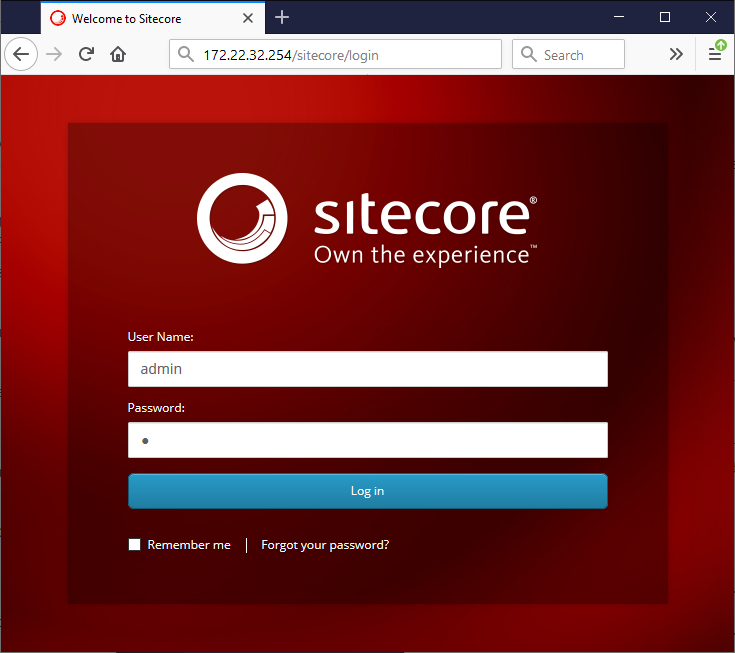
Now I can call 172.22.32.254/sitecore in order to login to CMS:

What else can you do?

With docker you may also execute commands in interactive mode (sample) with -it switch, so you may do all the things such as deploying your code there (it is always good to deploy on top of clean Sitecore instance). That's how to enter an interactive session with remote command prompt:

docker exec -it CONTAINER_HASH cmd

You may go with more folder mappings using volume. Running XP topology offers even more interesting but safe playground for experiments.

Building other versions of Sitecore allows regression testing your code against legacy systems - always quick manner and always on clean! Going ahead you may use it for the development having only Visual Studio running on a host machine, with no IIS and no SQL server installed, publishing from VS directly in docker. Plenty other scenarios possible - it's only for you to choose from.


7. Stopping and clean-up

Stopping containers occurs in a similar way:

docker-compose down
After finished, you won't see any of the containers running by executing
docker ps
You'll be still able to see existing images on a system and their size occupied:
docker image ls

So if finally, after playing it over and want to clean-up you drive a noticed there's way less free disk space now. I want to beware you from doing one more common mistake - don't delete containers data manually! If you navigate to c:\ProgramData\Docker\windowsfilter folder, one can see plenty of them:

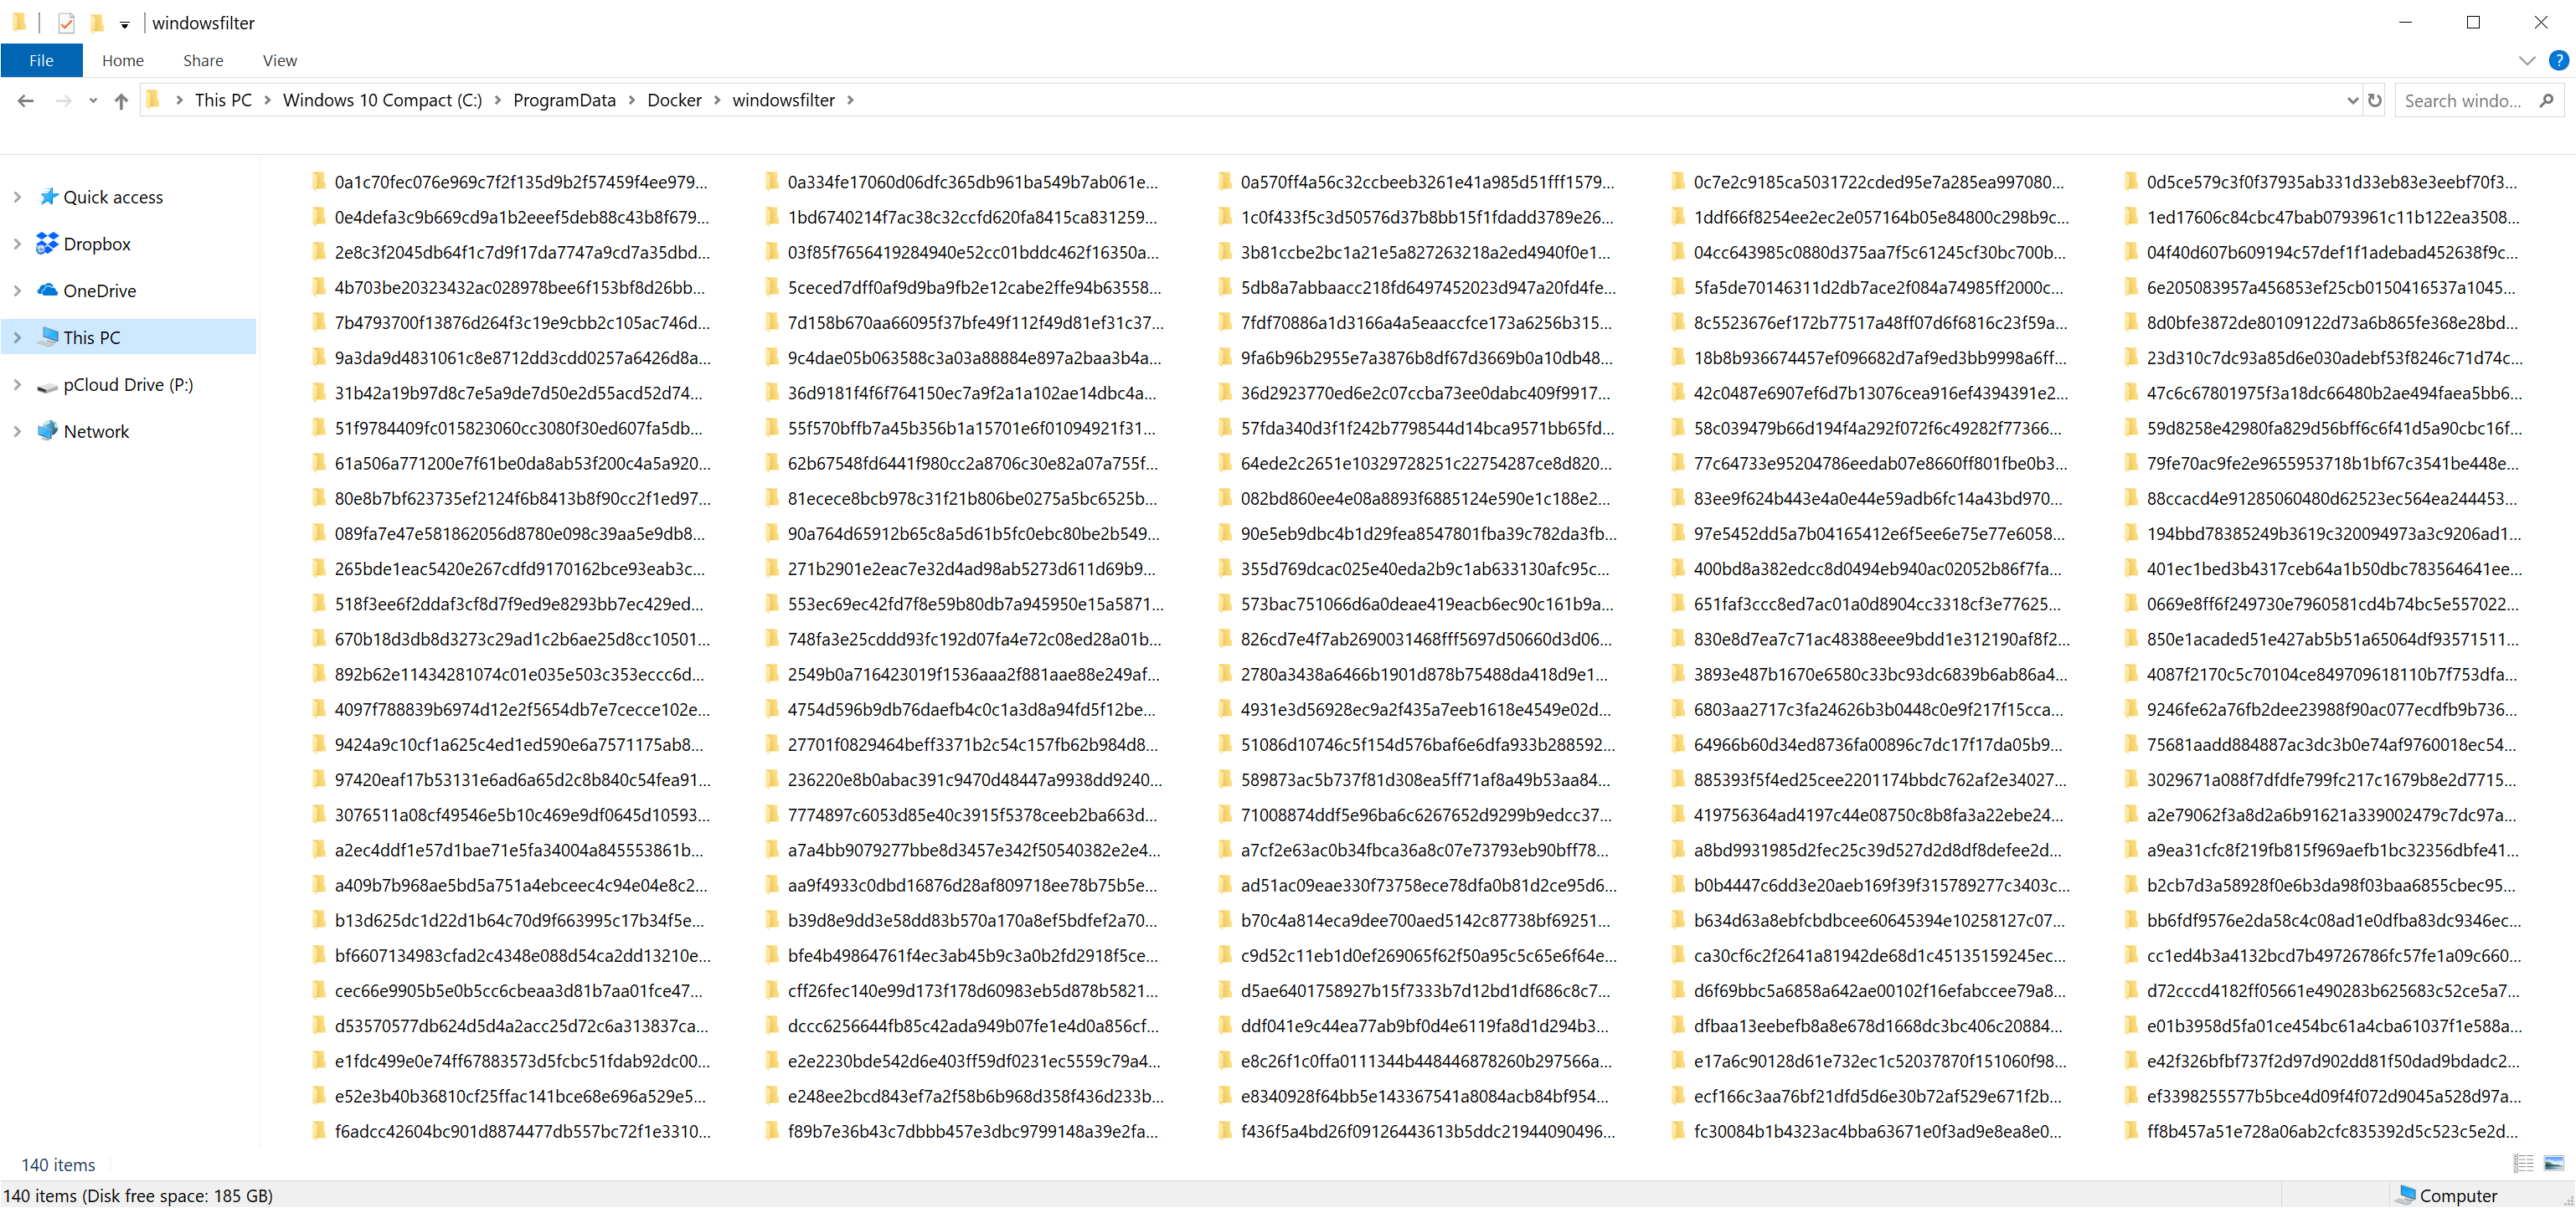
These are not container folders, they are symlinks (references) to windows system resources folders - deleting data from these symlinks actually deleted you resources from your host OS bringing you to a sorry state. Instead, use the command:

docker prune -a

This gets rid of all the images and containers from your host system correctly and safely.


8. Afterthoughts

Docker is a very strong and flexible tool, it is great for devops purposes. I personally find questionable using it for production purposes. That may be fine with Linux containers, but as for Windows... I'd rather opt out, for now, however I am aware of people doing that.

Proper use docker will definitely improve your processes, especially combining it with other means of virtualisation. Containers may take you a while to get properly into, but after getting your hands on you'll have your cookbook of docker recipes for plenty of day-to-day tasks.

As for Sitecore world, I do understand it is all only starting yet, but docker with Sitecore becomes more inevitable, as Sitecore drills deeper into microservices. Replacing Solr and SQL Server with Linux-powered images is only a matter of time, and what I am anticipating so much is XP and XC finally running together in Docker, facaded by IDS (ideally also on Linux) just in fractions after calling docker-compose. Fingers crossed for that.

Hope this material serves you as a great starting point for containers and Docker!