Experience Sitecore ! | All posts tagged 'Licensing'

Experience Sitecore !

More than 200 articles about the best DXP by Martin Miles

Troubleshooting Sitecore Commerce 9 installation

While installing Sitecore Commerce I came across several blockers I had to sort out in:

  1. SIF
  2. Business Tools
  3. Storefront

1. You are getting 500.19 error during SIF. Other people who came across advice that you are to install ASP.NET Core 2. That's correct, as Commerce micro-services utilize .NET core, but not everything. There was a strong assumption of something missing from IIS or being mis-configured, so in my case it was this component unchecked:


Also, keep in mind you must have URL-Rewrite module installed (the easiest way is: choco install urlrewrite).

Another non-critical error I am getting from time to time is "The service cannot accept control messages at this time". IIS does respond at the moment - you may run iisreset and try warm it up by hitting URL manually in browser. Then repeat SIF deploy.

If SIF is complaining about duplicate certificates, you may need to delete those from Microsoft Management Console (MMC). In order to do that, click Start button, then type in mmc and hit enter. Once there, File - Add/Remove Snap-ins and select Certificates, as on screenshot below:


One more error from SIF: "Error: Unable to add user SITECOREDEV\WindowsUserName. Details: Database 'sc902com_Core' does not exist. Make sure that the name is entered correctly." In that case, ensure you're referencing correct database name for SitecoreCoreDbName variable (line 29 of default deploy script)


2. Running Business Tools may bring an error. In some previous versions Business Tools desktop icon was referencing invalid port, so make sure it is 4200 (by default). You can do that by changing Link field for Business Tools launchpad icon, as you usually do in corу database (item path: /sitecore/client/Applications/Launchpad/PageSettings/Buttons/Commerce/BusinessTools)

While running Business Tools, if you may see to following error:


The error means your browser needs a security exception for self-signed certificate, no worries - that's only for localhost and needs to be done once. Just open a new browser tab and follow to localhost:5000, confirming security exception, as prompted.

3. Once you have successfully installed Sitecore Commerce, you try to access storefront. So you hit URL in browser (sxa.storefront.com) and ... see default Sitecore home page. Why?

The first assumption coming into one's mind is that since storefront is running on top of SXA - you should configure the hostname at HostName field of /sitecore/content/Sitecore/Storefront/Settings/Site Grouping/Storefront item. But wait! sxa.storefront.com is the default value and already presents there. Does it work now? Nope ...

Firstly, try open storefront in Experience Editor (from master database). If you see the right storefront - just re-publish site, and update indexes - it will work from web database then. But if not - the answer is different: it appeared that my current partner's license does not include SXA. Not obvious, but when you're out of license - storefront default to Home page rather than notify you re. that error.

Remember, that you may apply for a developer trial license valid for two month that will include all the features of Sitecore, including SXA and JSS.

Sitecore gives 60 days of trial for developers

Previously, it was sort of vicious circle for new developers willing to start learning Sitecore. "How can I start working with Sitecore" - one of the most common questions asked at StackOverflow and (mostly non-Sitecore) user groups when enthusiasts wanted to download their developer copy and play with it on his/her local dev. machine. 

The problem came from a situation when one could install Sitecore only with having a license file, that could be taken from a client he's already working for. Surely, in order to obtain such a job, one should already have reasonable skills with Sitecore obtained from somewhere. Also, Sitecore installers are also not in the free access and require at SDN credentials to be downloaded, even with SIM tool.

Now the process becomes simpler, as Sitecore is going to provide trial licenses for the developers. Currently, they run a pilot testing of that program, offering just 100 developers trial license, with a waiting list for those who not quick enough to get into first hundred. Please read more at the official source of the trial program here: Announcing the preview of the upcoming Developer Trial Program

Hope this helps to attract more developers in order to fill the lack of professionals on the market.

Sitecore 8: Federated Experience Manager - what is all about?

One of the greatest features of Sitecore 8 is Federated Experience Manager (FXM). What is FXM about and how can it help us?

Previously we had Page Editor - the tool allowing content editors to author and save content inline, right on the page. It also offered other flexible options to operate with non-visible content of features that cannot be edited inline (ie. Edit Frames), also do customisation (A/B multivariate testing), personalisation on rule-based criteria and much more. So far, so good.

In Sitecore 8, Page Editor was replaced with a new feature called Experience Editor (EE). EE is not just a rename for Page Editor, despite it does all the same old good features, it brings great new opportunities in chain with FXM.

With FXM it is now possible to customise any other website page, not only those coming from Sitecore, but even any PHP or just static HTML. And further on, with EE it is now possible to do all good old Page Editor features, such as replace content on external website, create placeholders and append sitecore components there, apply personalisation, set goals etc.

Sounds fantastic and impossible? Not as much - all that is working out box now, and moreover is very simple. Let's take a look on how that works and what is involved.


FXM is an applications shipped out of box and is available from Launchpad - just a usual SPEAK application. As soon as it loads, you'll get a management screen to register external websites. Clicking Add External Website will load you the following screen:


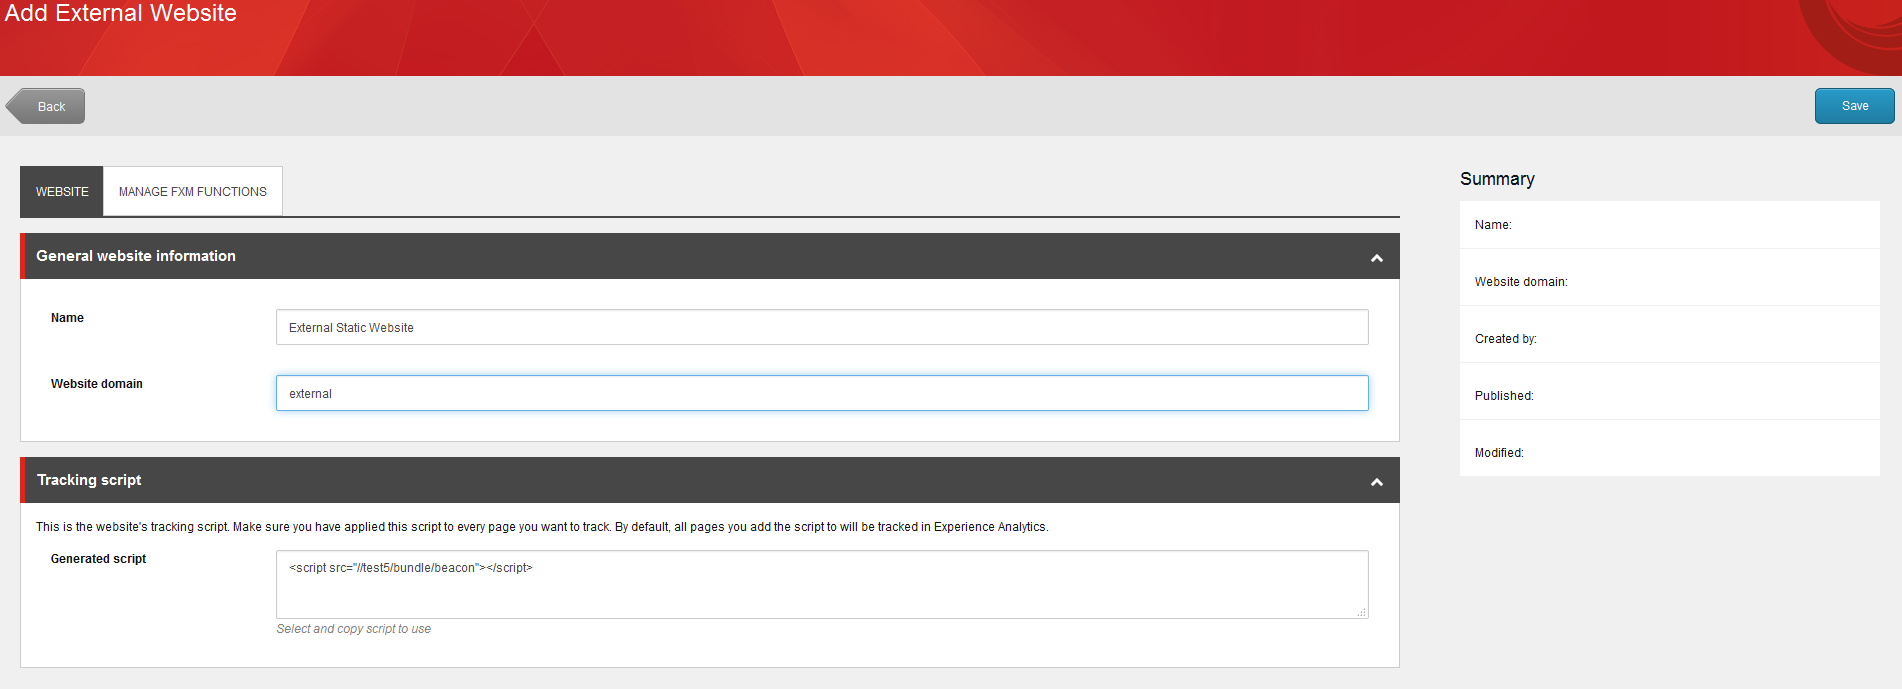
What is required on that step is to provide a hostname for external website and add one line of code into external website pages - a javascript reference for a beacon:


So, it stands obvious that you need to have an access to modify the code of pages on that website. Normally you'd do that for all pages, so it makes sense to modify some master layout or any sort of global header.

One important thing to note: external html should be properly formed, otherwise there will be an error. Saying properly formed I mean just opening and closing tags for html head and body, as minimal as:

<!DOCTYPE html>
<html lang="en" xmlns="http://www.w3.org/1999/xhtml">
    <head></head>
    <body></body>
</html>
After that done - it becomes possible to open that external website with Experience Editor. And here you can perform:
  • tracking of external website into xDB
  • create placeholders before, after or instead certain html elements on external website
  • having Sitecore-controlled placeholders it is now possible to append components from Sitecore there
  • components from Sitecore can be literary everything, even WFFM forms (however not yet in current version)
  • cleaning up, replacing or extending original content from external website
  • apply customisation and / or personalisation to external content, controllable from Sitecore
  • set goals


It is essential to understand that those features work due cross site scripting called CORS, so certain limitations should be taken off, other wise it won't work

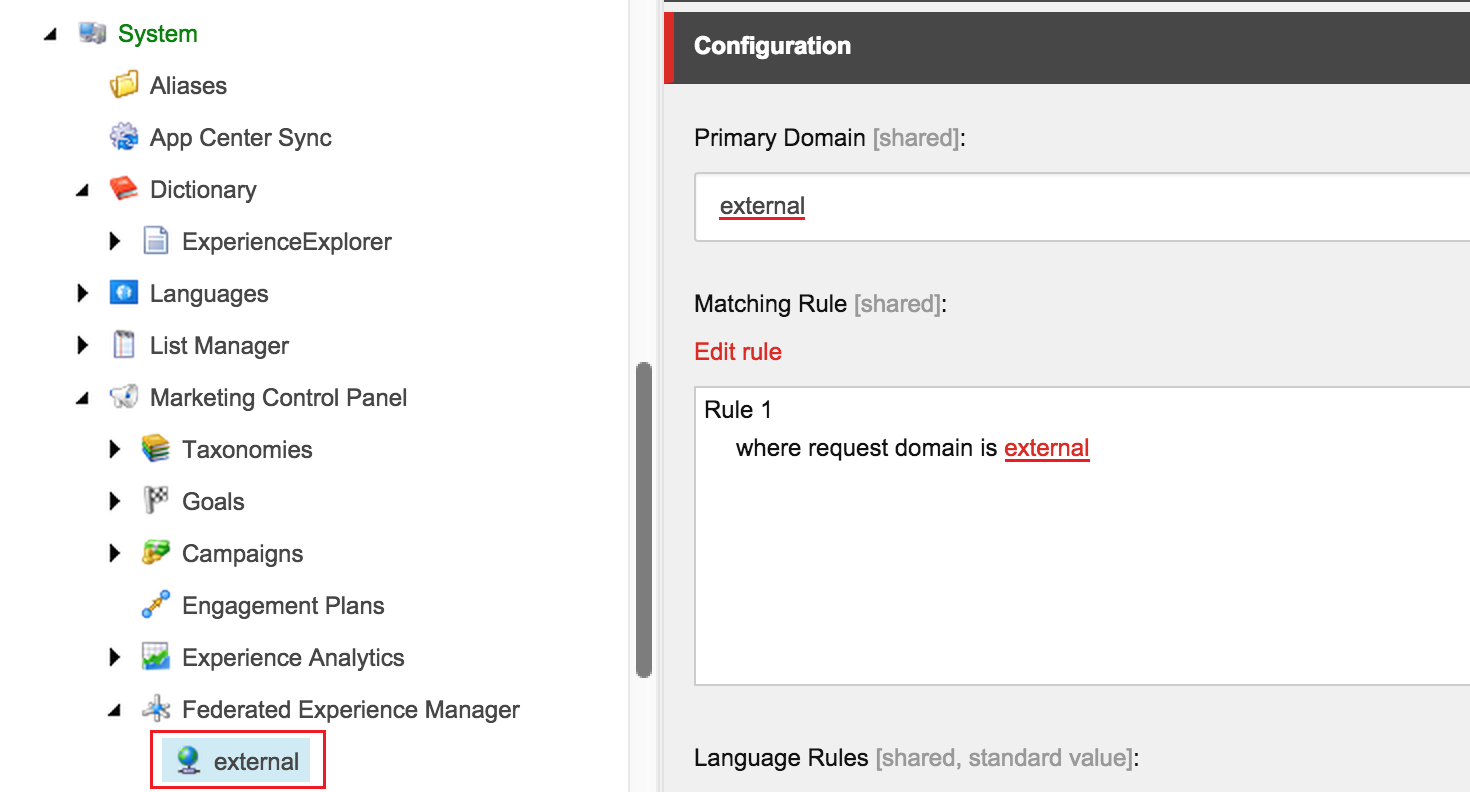
After site has been created at /sitecore/system/Marketing Control Panel/FXM/External you need to open that node and create a rule in order to match the same domain. Without doing that it would work only in Experience Editor, but not on the live website.


When opening external website it in Experience Editor, click on Add Placeholder button twice (to get it activated), then click first paragraph. You will see it identified as div with three options on how to insert a Sitecore-controllable placeholder: before, after or replace that div element. Let's choose after, in order to implement sitecore controllable rendering in between those two paragraphs on external website:

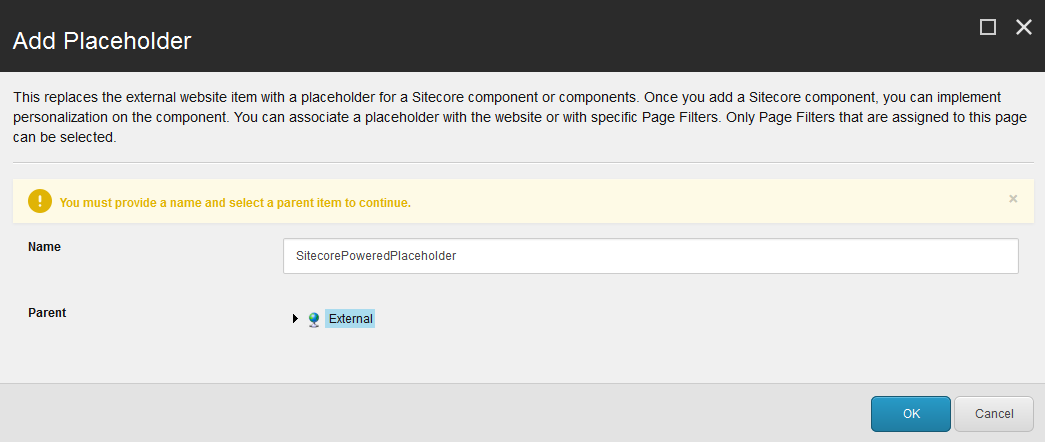
After choosing where exactly to implement a placeholder, you'll be prompted to enter placeholder name and select parent website:


Note: licensing is important to mention. FXM works only with new license issued with Sitecore 8, so if you have license file from one of previous versions, it would not have appropriate permission (Sitecore.Federated Experience) for running FXM. For some reasons Sitecore did not implement obvious message telling that you are not able to set a placeholder externally because of license. I spent decent time previously trying to understand why that did not work for me. Please find more details in my answer on StackOverflow for that question.

Once done, there will be last screen, showing newly created placeholder exactly in between those two paragraphs and offering to append a rendering to it:


To make things easier, I have just slightly modified Sample Rendering that comes with Sitecore, so that it now looks like that:
<?xml version="1.0" encoding="UTF-8"?>
<xsl:stylesheet version="1.0"
  xmlns:xsl="http://www.w3.org/1999/XSL/Transform"
  xmlns:sc="http://www.sitecore.net/sc"
  xmlns:sql="http://www.sitecore.net/sql"
  exclude-result-prefixes="sc sql">
  <xsl:output method="html" indent="no" encoding="UTF-8"  />

  <xsl:template match="*">
    <div>
      <h3>FXM-powered placeholder</h3>
      <span>This content comes from Sitecore and is editable with Experience Editor. 
      Other cool features as personalization are also available with FXM.</span>
      <br/><br/>
    </div>
    
  </xsl:template>
</xsl:stylesheet>
That's mostly done! Do not forget to publish your site definition (under FXM node) with children (there will be placeholder item we've just created) to content delivery environment in order to work there. Let's now test it! I enter http://external into a browser and get exactly what expected - there is a sitecore controllable placeholder in between the paragraphs and it has a rendering being set into it:


Opening that in any dev. tools like Firebug will show the following nice and clean code has been rendered:


How to check your license in Sitecore

From time to time you may need to obtain your licensing information, for instance when you need to submit support ticket.

License information is displayed right at the loging screen in Sitecore 6.X - 7.X (as per screenshot below):


Once you need more details about current license, (for example to see which modules you are licensed to) you may find that from two menus (Licenses and About) under Sitecore button in Content Editor:


However Sitecore 8 login screen does not show this information by default anymore. To enable displaying licensing info, you need to change one configuration file switch:

<setting name=”Login.DisableLicenseInfo” value=”false” />

Then you'll get a button that reveals your licensing information, including the License key:


Sitecore button in the left top corner of Content Editor has now become "hamburger" button, but provides all the same functionality:


For me (being a developer), the quickest option to remind the license number is just looking up directly at License.xml file:


Hope this helps!