Experience Sitecore ! | All posts tagged 'Templates'

Experience Sitecore !

More than 200 articles about the best DXP by Martin Miles

Creating custom SXA components with rendering variants and (almost) no codebehind on an example of social share buttons

Introduction. Initially, I was going to implement social share buttons on my page. The first thing coming into my mind was to use existing share components coming OOB with SXA. That's what I did and it looked well.. until I viewed generated source. It looks quite monstrous, includes iframes, inline JavaScripts and in general brought customization issues for my front-end developers. Here's how 2 of 3 buttons look like when rendered (3-rd is collapsed):
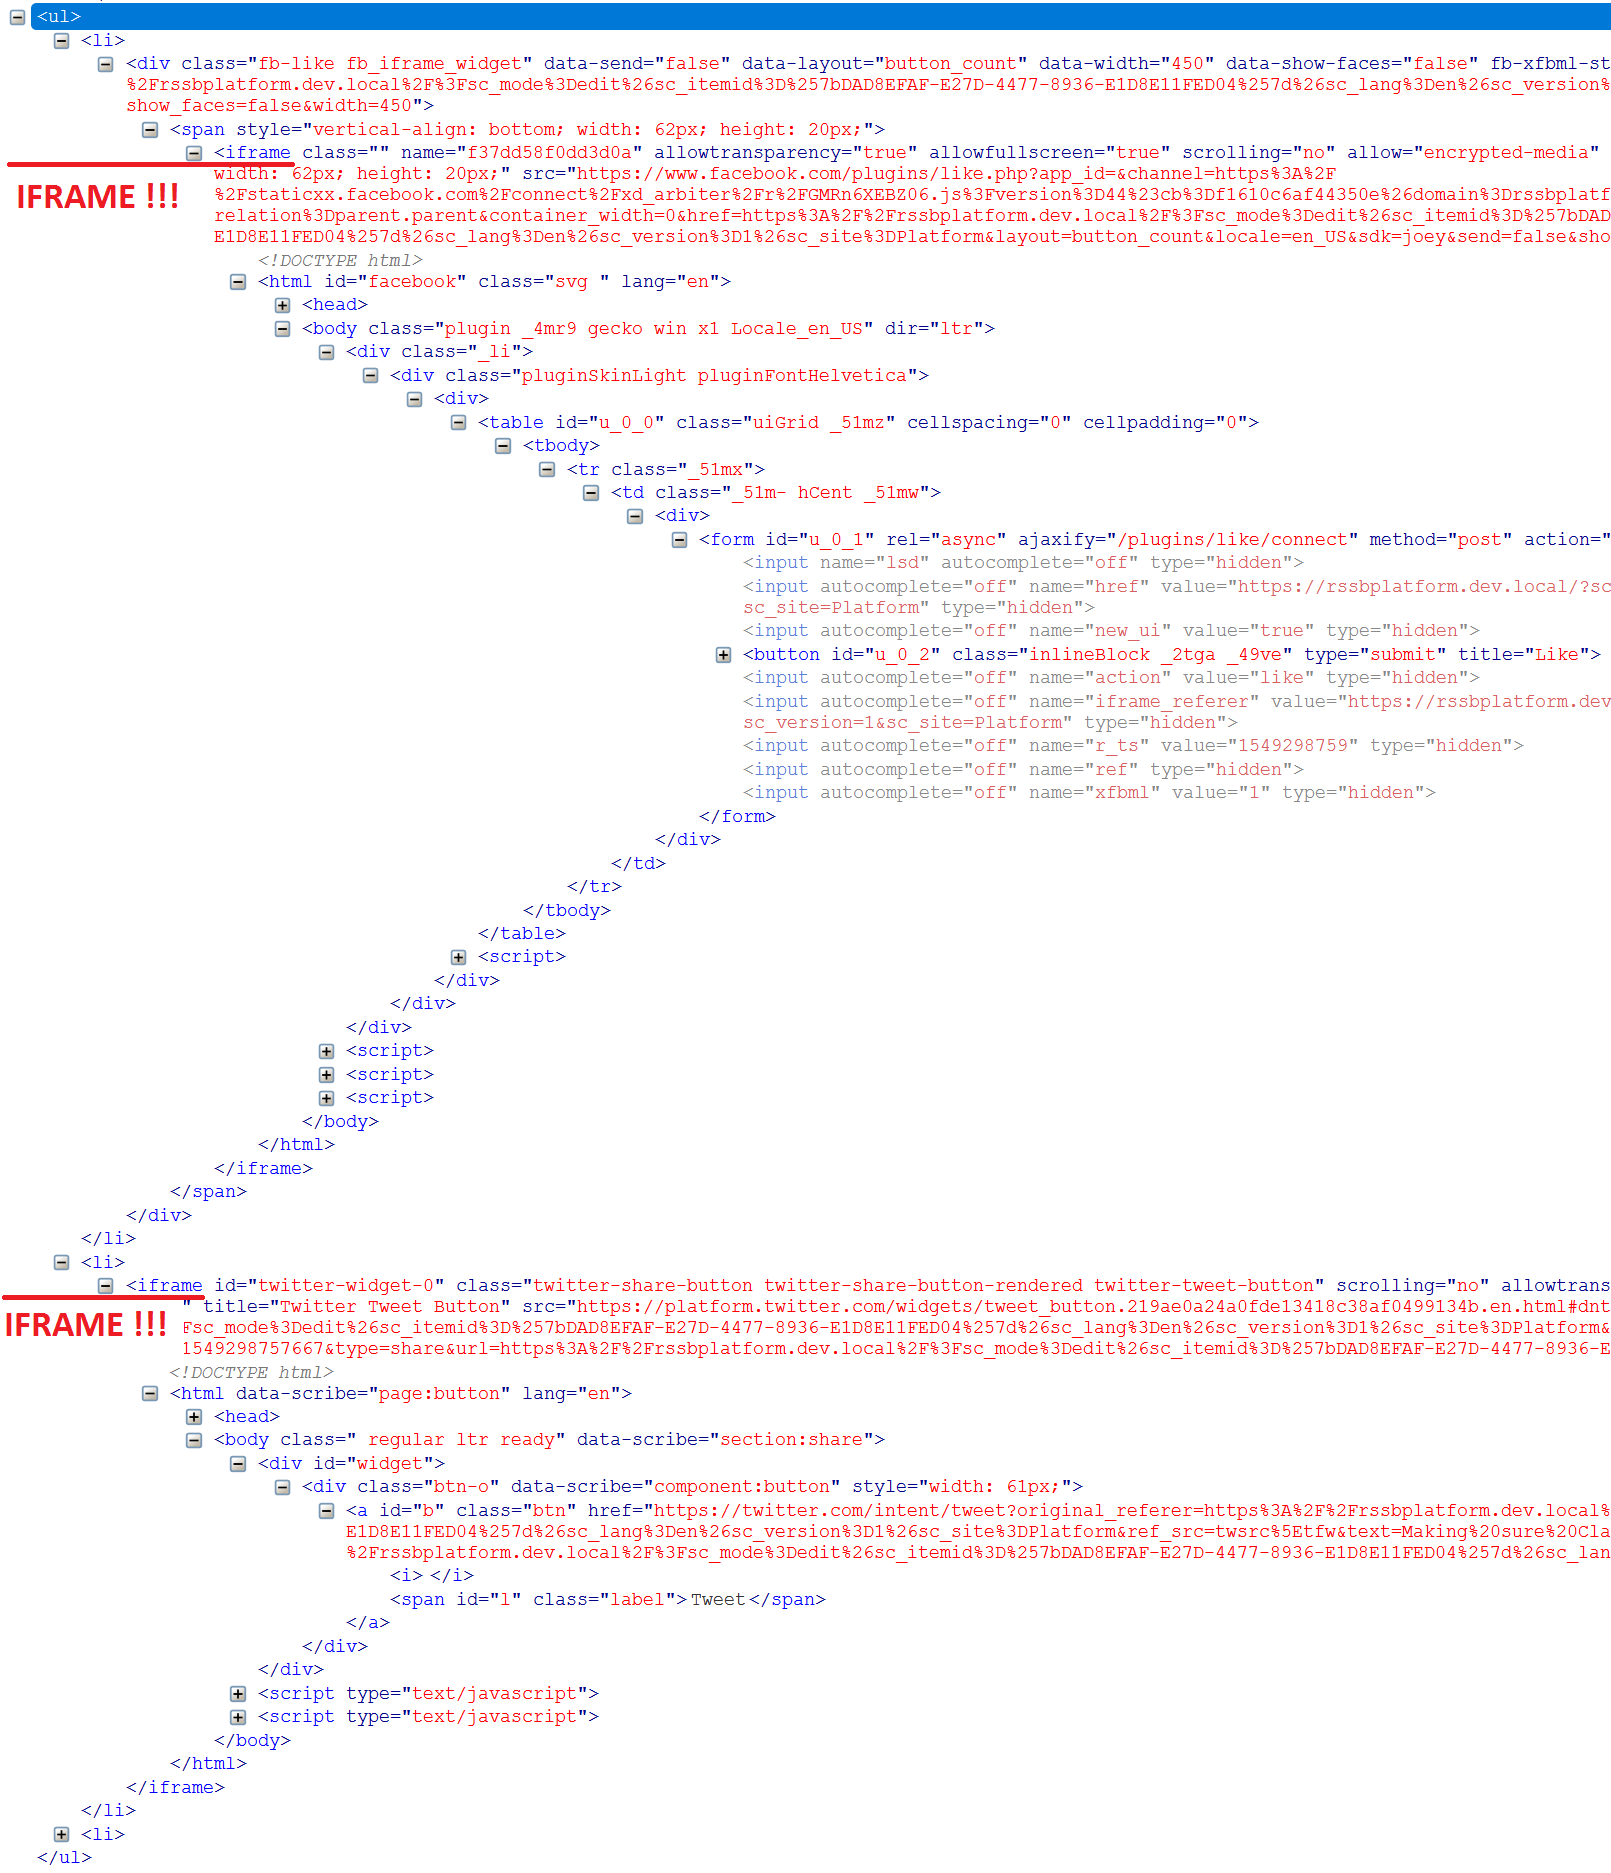

In general, that looks sort of over-engineering for given requirements. The code suggested by my front end developers looked more-less elegant like this:

<div class="social-block">
	<span class="social-block__label">share this</span>
	<ul class="social-block__list">
		<li class="social-block__item">
			<a href="#" class="social-block__link social-block__link_facebook"></a>
		</li>
		<li class="social-block__item">
			<a href="#" class="social-block__link social-block__link_twitter"></a>
		</li>
		<li class="social-block__item">
			<a href="#" class="social-block__link social-block__link_linkedin"></a>
		</li>
		<li class="social-block__item">
			<a href="#" class="social-block__link social-block__link_mail"></a>
		</li>
	</ul>
</div>

Definitely much nicer and cleaner, given that sharing functionality provided by many social platforms can be implemented just in a form of a link (ie. //www.facebook.com/sharer/sharer.php?u=https://your-site/page-to-share), so that can be simply passed with href attribute of anchor tag. 


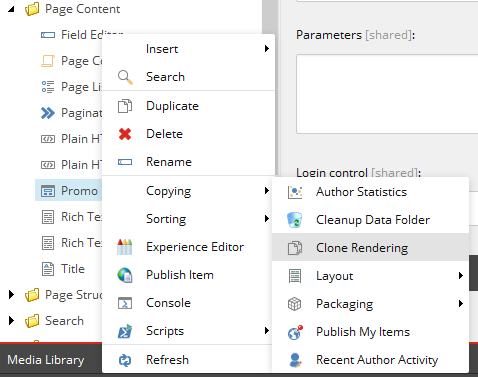
Implementation. Based on that, I decided to implement my own Share buttons component. Of course, unwilling to create a new component from a scratch, I decided to take a look on existing with a purpose of cloning it. There were 2 requirements while picking the right component to clone: 1) it should support rendering variants and 2) it should work with datasource template, so that those are also cloned. It looks that Promo component fits the purpose well, so here we go, by using an SXA built-in clone script available from a context menu:


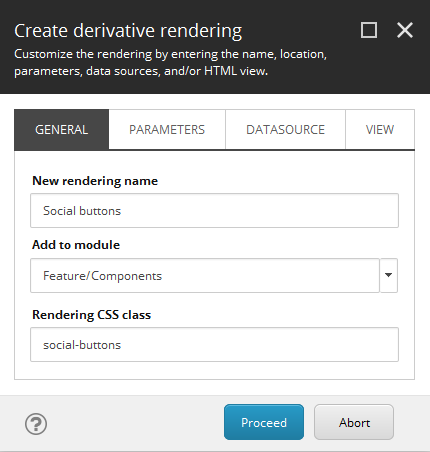
By that moment, I already have my custom module named Components, sitting outside of Experience Accelerator folder, that will likely be overridden by next version update, and where I separate my custom controls. So, in the following dialog, name the component, state where you want to put it and also give the name to CSS class to be used with it. 

I called my new component Social buttons, so that I will make two rendering variant as the part of it: one for sharing current page over social networs, and another will be called Social presense simply leading to my company's social network accounts. I also named CSS class social-buttons:
Also, in order to be able to provide some defaults, I also make a copy of Promo's rendering parameters under a new name, so that I could adjust it later according to my requirements:
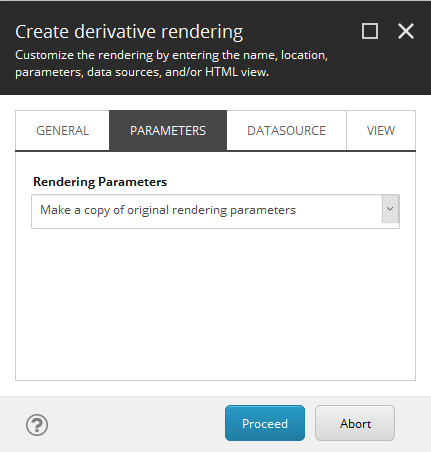
And also copying datasource:
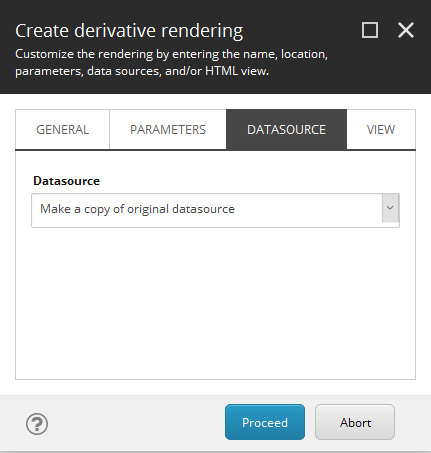
And finally, to make my new component even more isolated from its donor, I copy the rendering view file as well:
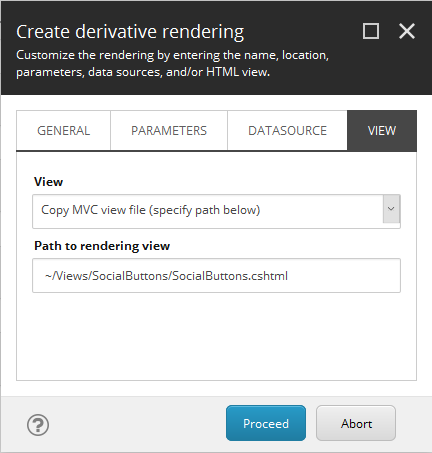

It is not mandatory, you may keep using existing control rendering. However, In my case I do want to modify HTML structure, to get rid of nested <div class="component-content"> elements, so I select "Copy MVC view file (specify path below)" option. 

Note 1: before you start cloning component, make sure ~/Views/SocialButtons target folder exists, otherwise script errors out. Also, once done don't forget to copy cloned rendering into your working folder so that you include it into solution and add to the source control (somewhere similar to src/Feature/Components/code/Views/SocialButtons/SocialButtons.cshtml as in my case).

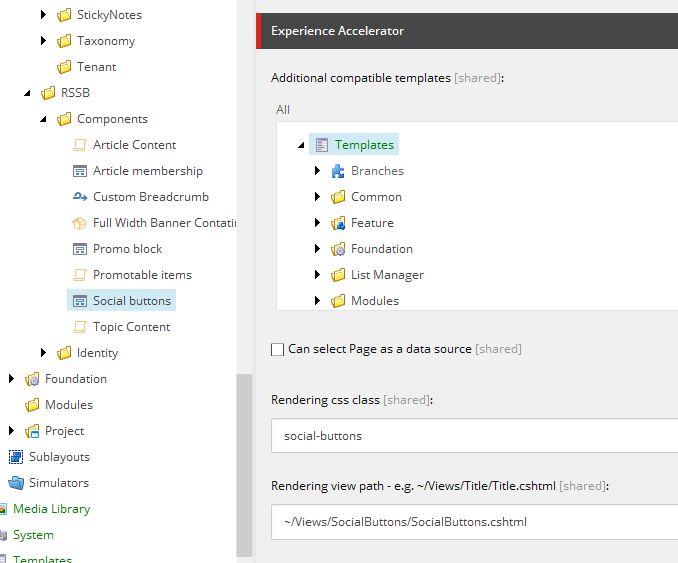
Note 2: just to remind, that rendering view, CSS class name for the component and other settings can be adjusted later at the Experience Accelerator section of rendering item:
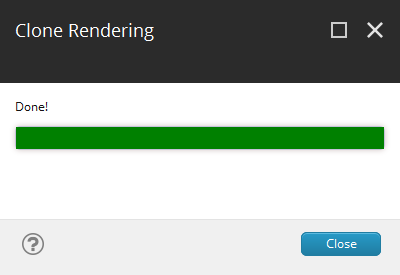
Click Proceed and when complete, you see successful result confirmation:

Once clone script finished, we may also want to add new component into the toolbox. To do so, navigate to Presentation - Available Renderings, find the desired module and add a new component into it:
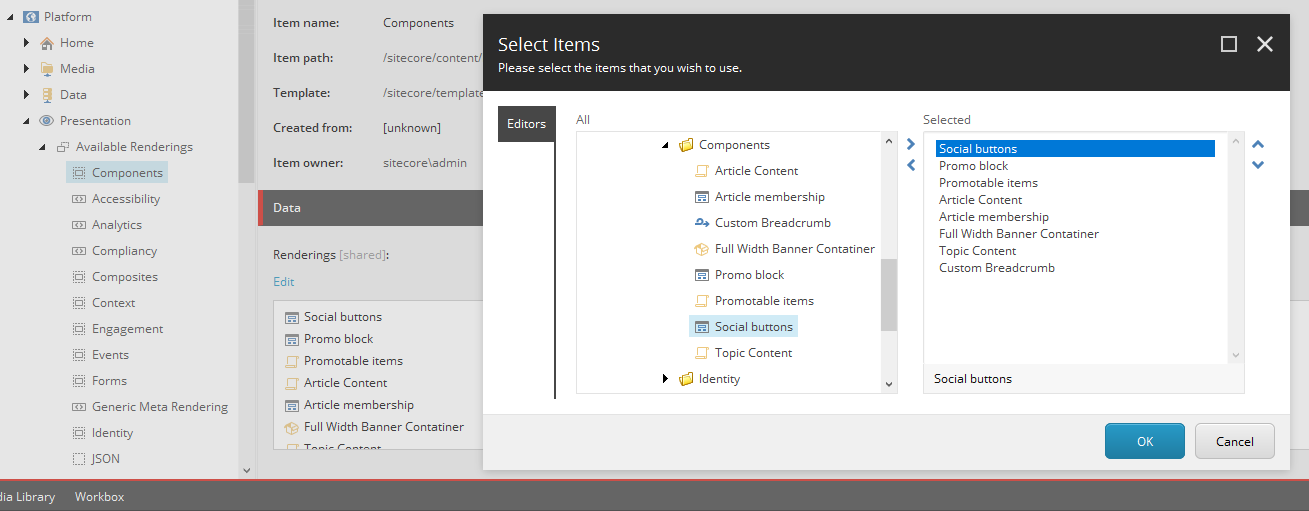
I made few more changes - renamed Social buttons into Social buttons group as it makes more sense, and made item and folder templates for buttons. 

Here's what I got under feature templates for Social buttons group:


and for Social button:

You may also notice two correspondent folder templates to create folders for storing items of these new types.

These were feature-layer templates, but there's one more project-layer interface template to be appended to page types inheritance:


So now, under Data folder I can create social buttons and a social share group based on (some of) these buttons. I made just one and called it Default


From this moment, adding _Social share groups interface template into an inheritance of some page templates adds a section with an option of selecting a social group for all pages of these type. You may also customize label (and if) shown next to social buttons.


Usage. Here we carry on. After adjusting placeholder settings, you added a new component to a page, then selected appropriate datasource but nothing appears as the result. This comes due to a component supporting rendering variants, does not have any single variant availability. How comes that? 

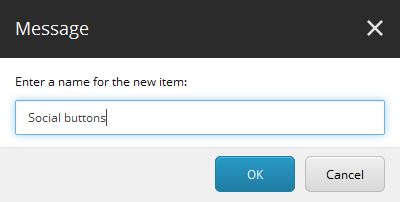
Note 3: the clone script does not clone rendering variants (at least per SXA version 1.8), so you need to create at least one. Remember that when creating new Variants item (or duplicating an existing one), the name should be the same, as the name of the corresponding rendering:

Insert at least one Variant Definition. 

Note 4: the way rendering variants work it the first Variant Definition in the list becomes default one, if not set explicitly. I called variant Share buttons and added Info field so that it becomes visible on partial design in Experience Editor straight away (I explain Info field trick in more details in this article).
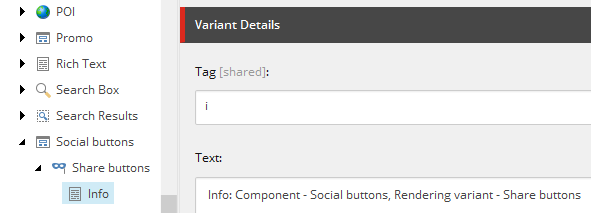

At least component shows up in Experience Editor as:


Now being aware that right component with right rendering variant presents on a page, I can carry on implementing that variant according to my desired output. 

Note 5: these buttons are not subjects to changes by content editors from within EE, rather they are configured by the site setup. That's why links should not be editable so I can use template variant field in order to render anchor tag precisely as per our requirements.


Creating rendering variant. This is how I implemented Share buttons rendering variant:


Few things I'd like to explain about the way it is structured and how it works. 

1. Naming conventions. instead of giving sections generic names, I am following "Element - Class" approach. Of course, it would make much sense from interpreting the point of view to name them "Element.Class" as CSS selectors normally do, however using dot is not allowed to be used for Sitecore item names by default while explicit setting that value for display name is an exhaustive waste of time. In any case, it is clear what element renders to.

2. You may notice, that I am having two reference variant fields, one nested into another. The way it works is that it contains the name of a field from a context item, that has a link to another item (or items). Thus, it switched context so that all nested field will be executed in the context of that "proxied" item.

3. NVelocity template (pictured above) is the very powerful way to extend rendering variants functionality far beyond out-of-the-box variant fields, employing the power of custom C# code, pre-built tools or creating your own. In one of my previous posts, I mentioned SXA built-in token tools to be used with rendering variant templates, so I am using the one already have in my solution, but if you haven't - these 2 snippets would be the only piece of your C# code to implement. Link Tool:

public class LinkTool
{
    public static string GetItemLink(Item item, bool includeServerUrl = false)
    {
        var options = UrlOptions.DefaultOptions.Clone() as UrlOptions;

        if (includeServerUrl)
        {
            options.AlwaysIncludeServerUrl = true;
        }

        return LinkManager.GetItemUrl(item, options);
    }
    public static string GetCurrent(bool includeServerUrl = false)
    {
        var item = Sitecore.Context.Item;
        return item == null ? String.Empty : GetItemLink(item, includeServerUrl);
    }
}
and ItemFieldTool below:
public class ItemFieldTool
{
    public static string GetField(Item item, string fieldName)
    {
        ReferenceField field = item.Fields[fieldName];
        return field?.Value ?? String.Empty;
    }
}

The payload, however, is lack of ability to edit anchor tag, as I mentioned in Note 5 above. But, that should not surprise, given that you see that it is being calculated on a fly from different sources. GetFieldTool reads field value of a context item, where context has been changed twice already, in this case, a variant is iterating through the list of Social buttons and $item relates to Social button item.

#set($title = $itemFieldTool.GetField($item, "Title"))
#set($suffix = $itemFieldTool.GetField($item, "Style suffix"))
#set($prefix = $itemFieldTool.GetField($item, "Url prefix"))
But how do I get a something from the context of an initial item, before "tunnelling" two times through references? The code behind tools is being still executed in Sitecore.Context which means access to page item, so I implemented GetCurrent() method that returns full URL of context page. I use it for appending to URL prefix of a social button.
$linkTool.GetCurrent(true)


Getting result. Finally, after opening exact item in Experience Editor (and not the partial design edited previously that does not wire to actual data), I am getting expected share links rendered, with correct URL:


and after applying CSS styles on a published site, Info Field scaffolding is not shown and we see nicely applied social share buttons:


This is a flexible approach allowing to configure individual buttons set per each page template by standard values with an option of overriding the default for specific page individually.

That was a walkthrough of creating new components with (almost) no new backend code written. You learned how to create custom components by cloning existing, how to create rendering variants, how to use reference fields to "proxy" the context and NVelocity templates from within rendering variant.

Hope it helps!

Field level deny permissions in Helix based on Habitat and how that affects your workflows?

If you decide to use Habitat as a bootstrap platform for your Helix solution, while setting up workflows for your solution, you may come across a situation described below. By this blog post I will try to explain what happens, why is it so, and how to make things work.

Symptoms: you are about to set up workflows for the solution and have created a role for the content editors. Then you give read / write permissions for that role to the site content (likely to be /Home and /Global nodes under your site definition item, recursively). When logging as a user having Content Editor role mention above, you are able to Lock and Edit and later to Check-In an item, but the fields for that item are disabled. Weird. But doing the same on other items outside your website works well (for instance - Home item coming with Sitecore initial installation). Why is it so?


There are few of StackOverflow questions trying to sort this out: one and two. I have left few comments there helping other to solve the situation.


Explanation: Habitat uses an "intersection" of feature-or-foundation-level permissions (also knows as Functional roles) with project-level permissions (also knows as organisational rights). Most of the Habitat modules have such a functional role coming as a part of the module, is in the following format: modules\Feature XXX Admin or modules\Foundation XXX Admin.

What habitat does - it denies write access for the inheritance for all the fields by default and then explicitly allows writing permission for that particular Functional Role within a module. That is briefly explained in the official Helix documentation but two images below would be more descriptive:


Solution: two potential ways of sorting this out. The first option is when you decide to keep Functional roles as a part of your solution. In that case, you need to make sure your Content Editor roles also inherits from these Functional roles (or from an umbrella role inheriting a combination of Functional roles).

Another way will be if you decide to drop these Functional roles. In that case, you'll need to remove them from serialization config and source control, and also perform the following for each field affected:

1. Navigate to that field in Sitecore, for example: /sitecore/templates/Feature/Navigation/_Navigable/Navigation/ShowInNavigation

2. Click Security tab, then Assign. You'll see at least two roles available - Everyone and a Functional role for that module.

3. Selecting Everyone, remove Inheritance denial for both Item and Descendants by clicking both red crosses, then save (OK).

4. Repeat that for each field of each template for each of the Feature / Foundation layers.

Then users from Content Editors role will be able to edit all the fields.

Hope this helps!

Updating existing presentation details of base template's standard values after it has been set on derived templates

Problem: let's imagine the situation when you may have some complex template inheritance. You would like to set presentation details for each of these templates' standard values, somehow like below:

A - define layout, and header/footer common holders that will be shared for all sites (we've got a multisite setup for now)

B - define footer and header on a site level so that they remain the same within each of implemented sites 

C - define base page template that will add the rest of presentation shared between the pages (but not homepage)

Once you set presentation for standard values of A, you can go to standard values of B and see these changes, so that you add only B-specific components; the same exact story will be when you will go next to std. values of C an so on. So far, so good.

The problem occurs when you want to modify presentation coming with a base template after a derived presentation is already set. In that case, you will not see any difference, that may be seen a weird for a while. In our example, imagine you've set presentation for std. values of all three templates - A, B and then C, and then decided to add one more component to a presentation on A template (or change datasource item of existing etc.). You do changes for std. values of A, save it and as you see - these changes come into a play for template A, however, once you open B or C  they won't be there...

Explanation: let's think what in fact Standard Values are - just the default values for each of field defined in that (or parent) template. In the second case if a field has standard values for both parent and inherited template - it simply overrides parent value with inherited child's value. But, wait for a second - presentation is also stored in fields of Standard Template that all pages inherit from, how that makes possible, does it simply override?

No, for such particular cases when presentation fields are involved - override behaviour would not work at all. Let's look at our example - template A defines layout and header/footer sublayout and all that goes within __Renderings field - it's where (shared, not versioned) presentation is stored in XML-serialised format. But then, it would be overridden by setting concrete footer with no layout. Since it is the same field - it will lose layout at template B level and entire behaviour does not make any sense. To address this issue Sitecore implements a feature called Layout Deltas - so that presentation fields are not stupidly overwritten. Instead, after we defined default presentation for template A, it goes as is, as A does not have any base template with presentation set. But when setting presentation for B - it will only save the difference between itself and presentation of base template (if exists). When page is being rendered, Sitecore is wise enough to construct resulting page presentation from all the base templates only adding deltas with each derived template. That is how Layout Deltas work.

One may create multilevel presentation inheritance of standard values, appending more and more presentation on each of derived levels. However, when we want to adjust the presentation of base template (A) of current template (B) - changes will be affected only for A, but not B or C if they already have layout deltas defined. That behaviour raises questions without a doubt.

Solution: what we need to do to in order to ensure changing presentation details for A will be affected for all derived templates' items is to recourse inheritance tree of A and re-calculate layout delta for each of them with recent updates from A. In order to get this done I have re-worked a solution suggested by ... The difference is that since that time we now got a feature called Versioned Layouts, so that we need to operate both fields - __Renderings and __Final Renderings correspondingly. Apart from that I have tested it for a while and fixed few of stability issues.

Implementation: when we change presentation - we change the field, so eventually the holding item is being updated. In order to intercept this we add a pipeline processor for item:saving event:

<?xml version="1.0" encoding="utf-8"?>
<configuration xmlns:patch="http://www.sitecore.net/xmlconfig/" xmlns:set="http://www.sitecore.net/xmlconfig/set/">
  <sitecore>
    <events>
      <event name="item:saving">
        <handler type="Sitecore.Foundation.Presentation.Services.LayoutInheritance, Sitecore.Foundation.Presentation" method="OnItemSaving"/>
      </event>
    </events>
  </sitecore>
</configuration>

And the code. I am using XmlDeltas.GetDelta() and XmlDeltas.ApplyDelta() static classes of Sitecore.Data.Fields namespace to make this work.

using System;
using Sitecore;
using Sitecore.Data;
using Sitecore.Data.Events;
using Sitecore.Data.Fields;
using Sitecore.Data.Items;
using Sitecore.Data.Managers;
using Sitecore.Data.Templates;
using Sitecore.Diagnostics;
using Sitecore.Events;
using Sitecore.Globalization;
using Sitecore.SecurityModel;

namespace Sitecore.Foundation.Presentation.Services
{
    public class LayoutInheritance
    {
        public void OnItemSaving(object sender, EventArgs args)
        {
            Item item = Event.ExtractParameter(args, 0) as Item;
            PropagateLayoutChanges(item);
        }

        private void PropagateLayoutChanges(Item item)
        {
            if (StandardValuesManager.IsStandardValuesHolder(item))
            {
                Item oldItem = item.Database.GetItem(item.ID, item.Language, item.Version);

                PropagateLayoutChangesForField(item, oldItem, FieldIDs.LayoutField);
                PropagateLayoutChangesForField(item, oldItem, FieldIDs.FinalLayoutField);
            }
        }

        private void PropagateLayoutChangesForField(Item item, Item oldItem, ID layoutField)
        {
            string layout = item[layoutField];
            string oldLayout = oldItem[layoutField];

            if (layout != oldLayout)
            {
                string delta = XmlDeltas.GetDelta(layout, oldLayout);
                foreach (Template templ in TemplateManager.GetTemplate(item).GetDescendants())
                {
                    ApplyDeltaToStandardValues(templ, layoutField, delta, item.Language, item.Version, item.Database);
                }
            }
        }

        private void ApplyDeltaToStandardValues(Template template, ID layoutField, string delta, Language language, Sitecore.Data.Version version, Database database)
        {
            if (template?.StandardValueHolderId != (ID)null)
            {
                try
                {
                    Item item = ItemManager.GetItem(template.StandardValueHolderId, language, version, database, SecurityCheck.Disable);

                    if (item == null)
                    {
                        Log.Warn($"Foundation.Presentation: Item is null {template.StandardValueHolderId} in database {database.Name}", template);
                        return;
                    }

                    Field field = item.Fields[layoutField];

                    if (field == null)
                    {
                        Log.Warn($"Foundation.Presentation: Field is null in item {item.ID} in database database.Name", item);
                        return;
                    }

                    if (!field.ContainsStandardValue)
                    {
                        string newFieldValue = XmlDeltas.ApplyDelta(field.Value, delta);
                        if (newFieldValue != field.Value)
                        {
                            using (new EditContext(item))
                            {
                                LayoutField.SetFieldValue(field, newFieldValue);
                            }
                        }
                    }
                }
                catch (Exception e)
                {
                    Log.Info($"Foundation.Presentation: Exception {e.Message}", e);
                    throw;
                }
            }
        }
    }
}
As I am using Helix in my development, I created a foundation module Presentation and placed the above code and config into it correspondingly. 

Hope this helps someone!

Why am I getting "Item is not a template" error on data items in Content Editor?

Very simple and even stupid error I have met few times, just want to describe it here to make it google-searchable so that it might help someone.

Image you're going across you content items , and when clicking by one of your data items, you see similar screen, saying: Item "/sitecore/content/Home/Data/Simple item" is not a template.


First of all, why does I got yellow screen? Well, the error is quite descriptive, saying that my Simple item is not a template.

Sure, it isn't, we know that and can prove that by clicking Content tab, that will show us exactly the item's data:


But why on earth do I see other two tabs, that shouldn't be there for data item?

The answer can be either of two cases:

1. Simple silly case - the template of you item is either directly inherited from default Template item (located at /sitecore/templates/System/Templates/Template) rather than Standard template (/sitecore/templates/System/Templates/Standard template).


In that case simply replace one with Standard template to fix.

2. More complex case - when you're likely to have a complicated inheritance chain, especially if you are working with Helix or playing around Habitat. It that case your data item is based on a composite template, that is likely to inherit multiple other templates, at least one of which inherits from Template rather than Standard template, exactly as described in a case above. Solution is the same as above - identify the culprit and change inheritance to Standard template.

Finally your data will be based on correct set of templates and you won't evidence unwanted tabs anymore.

Hope this post helps someone!

StackOverflow: Is it possible to change a Page to branch?

Another question I have explained on StackOverflow - (original link on StackOverflow):

Is it possible to change the Template of a page to Branch Template? When I try in Sitecore 7.0 UI it gives a error message stating to "Select a Template".

Is there any other way to change an Item's Template to be a Branch Template?

Answer: You cannot just substitute a template of an item with a branch template. You might be probably confused by mutual term template they both use and the fact the both exist undet /sitecore/templates node, however they are absolutely different in their internals.

Branch templates are just template sub-nodes that are being copied in instantiation. You may still use tokens and they would apply for every single item in a branch. But each of the items from a branch would still origin from certain individual template.

enter image description here

Thus, you cannot just do Configure --> Change on an item and then select a branch template instead of ordinary template, that's why Branches node is highlighted with grey color and even if you try to select any - sitecore will tell you "please select a template".

enter image description here

What you can do is just to re-create your item from branch template and (assuming) previous item now becomes a part of your branch - you may simply manually copy all the presentation details. However an ID of that item would differ with an ID of initial item (unless you manually replace original item into a branch instantiated)

I previously wrote an article on how to copy presentation detail manually between items, it will help you with your case:

https://blog.martinmiles.net/post/copying-presentation-details-manually

StackOverflow: Need clarity on Sitecore template values, standard values, and branch templates

One more question from a developer startin with Sitecore, who had a point of confusion between templates, standard values and branch templates (link to the original question on StackOverflow).

When creating a data template: what is the difference between just filling in the values on the template, and adding standard values? Don't both become default values whenever you create an instance of that template? If I want to make sure each item of a template has a certain value, which should I use and why? When is it appropriate to just fill out the value on the template, as opposed to adding standard values?
Branch templates: I need to create a group of items whenever a single item is created, and it sounds like branch templates are perfect for this. However, I recently read that instantiated items from a branch template stop inheriting the moment they're created.

For example, I have a branch template called Store, and create an item based off of this called Walmart. I then add features to the Store by adding new items, but Walmart doesn't get those changes? If this is problematic to my situation. I really need to keep all instantiated items in line with the branch template, and give them the new features. If my understanding is correct, how can I get around this?

I decided to answer and it seems to be a pretty good explanation:

Templates. For mature .NET developer it would make sense to think about templates as about C# classes - they define the data structure for the items that would be created on that particular template. Like classes in C# they may be inherited, but unlike in C# multiple inheritance is supported with them. Official documentation on templates is quite descriptive and handy: https://sdn.sitecore.net/upload/sitecore7/70/data_definition_api_cookbook_sc70_a4.pdf

Standard Values is a kind of blueprint prototype item for your template. You create some default values that will be auto-filled as soon as you create an item of that particular template. Standard Values item is a child item of a template definition item. You may also use tokens - dynamic values like $name, $parentname, $date, $time, $now, $id and others (you may also create your own tokens). Please read more about standard values: http://goo.gl/uUZJZf

enter image description here

Branch templates allow you to re-produce a sub-tree on instantiation, not just one item, but also some children (and children of those children) as you specify in branch template itself. As on screenshot below, whatever is selected within red frame will be created as a result of branch template instantiation:

enter image description here

Also, Sitecore items can't inherit from values set in a branch template. They will always default to the values in the original template's standard values. This is a limitation of branches (as described in this SO question: http://goo.gl/PSElYy)

As far as I understood your case, you should have a branch template called Store (somewhere underneath /sitecore/templates/Branches) and within that item reproduce exact structure that will be created on when template is used to replicate into a new branch in your content. Again, you may use tokes all around branch template (at any level) - they would be replaced with actual values. Likewise, when you use your Store branch template to create Walmart, you may auto set its display name to Walmart by using $name token.