This may be a not as comprehensive guidance, as it should be, however, I am using this blog post mostly for leaving notes in a cheatsheet manner for later. So, there are several steps to make things happen.
1. Let's create a security domain for our website - that should typically be in a site config on a project layer (Website1.Website.config for my example):
<?xml version="1.0"?>
<configuration xmlns:patch="http://www.sitecore.net/xmlconfig/" xmlns:role="http://www.sitecore.net/xmlconfig/role/">
    <sitecore>
        <domainManager defaultProvider="file">
            <patch:attribute name="defaultProvider">config</patch:attribute>
            <domains>
                <domain id="website1" type="Sitecore.Security.Domains.Domain, Sitecore.Kernel">
                    <param desc="name">$(id)</param>
                    <ensureAnonymousUser>false</ensureAnonymousUser>
                </domain>
            </domains>
        </domainManager>
    </sitecore>
</configuration>
2. Create 3 roles: website1\Editor and website1\Approver on the same domain, as well as website1\everyone that is a member of sitecore\Sitecore Client Authoring and is shared between first two. Make website1\Editor and website1\Approver members of website1\everyone and website1\everyone in turn member of sitecore\Sitecore Client Authoring.Also make website1\Approver member of sitecore\Sitecore Client Publishing
3. Create user accounts. I am creating them as part of website1 domain but they may be part of sitecore domain if need them instance-wide.
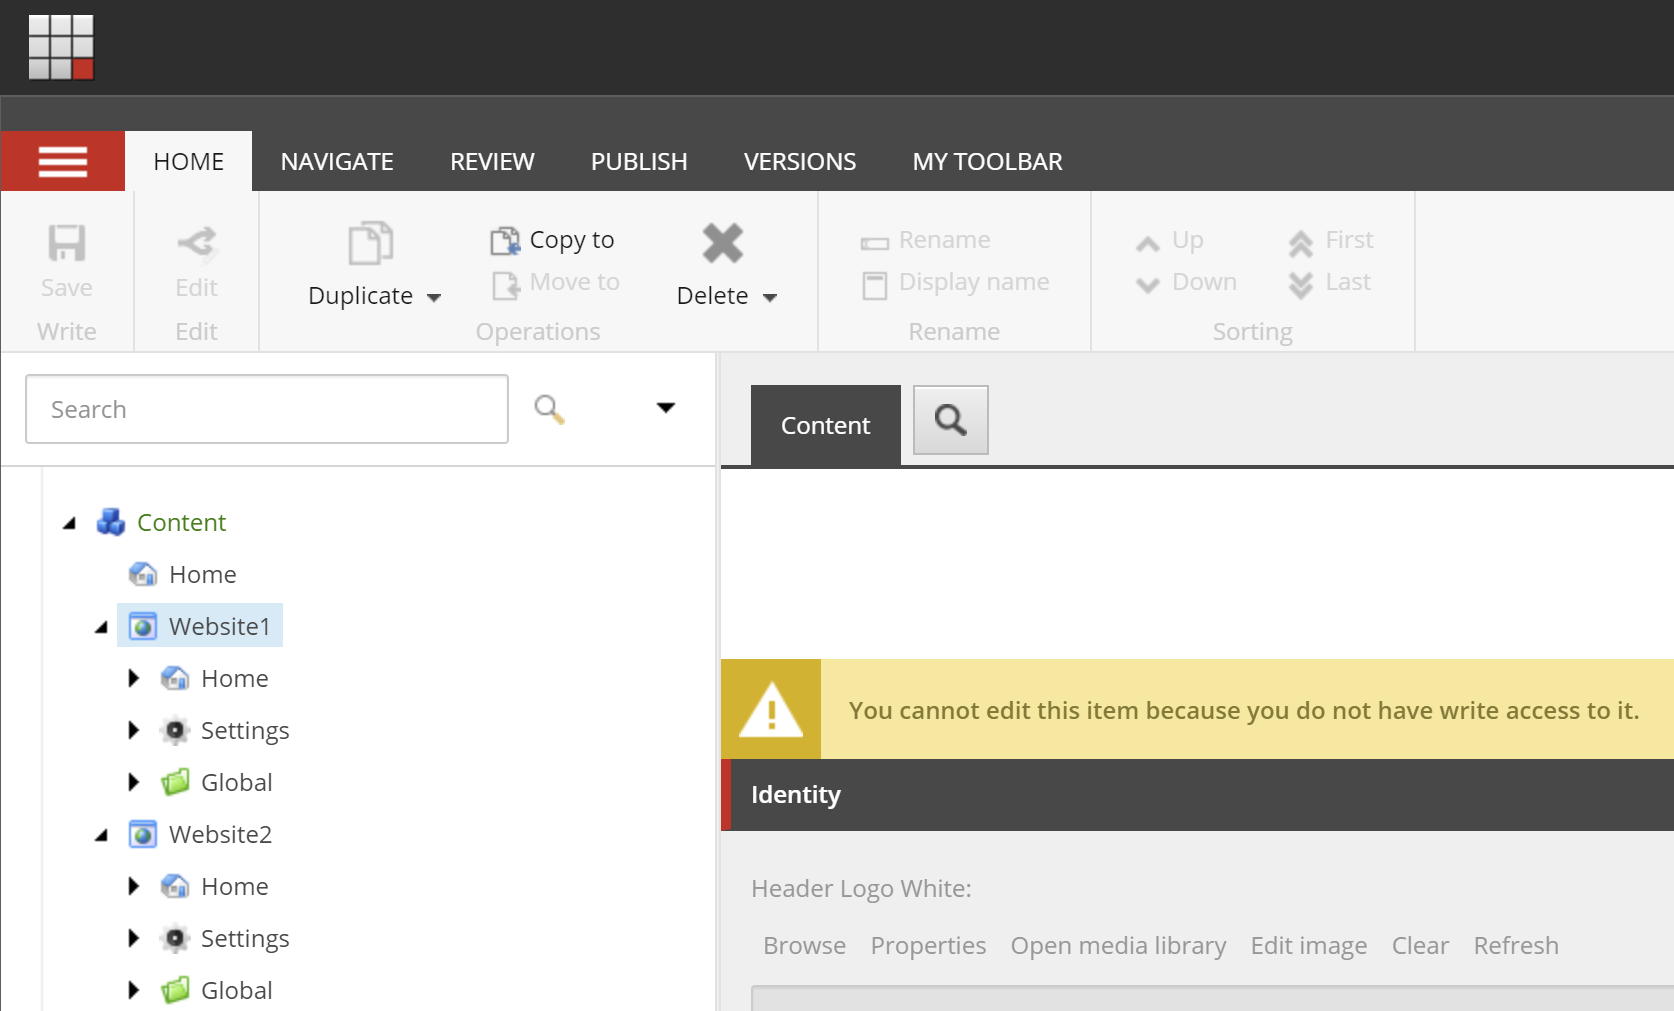
4. Assign users to their appropriate roles - editors or approvers. Once assigned - the user is able to log in and load content editor, however not able to insert new item for our website or change presentation details. User also is able to open a page in experience editor but again cannot edit this item because do not have write access to it.
Image above shows how LaunchPad looks when users log into Sitecore. However due to not having permissions they will see the following message in a Content Editor:

5. Create your workflow. I won't be original calling new workflow as Website1 Workflow. The easiest for a quick start would be to clone Sample Workflow and adjust states and other refs to point within corresponding items within that newly created workflow.
6. Then assign page relevant templates into Website1 Workflow. (Standard values -> Workflow section. Set default workflow into Website1 workflow). This ensures all the new items of this template will have Workflow field set into Website1 Workflow and State field will have state preselected as per workflow's Initial state field (workflow definition item)
7. Now give permissions to the role:
Open Access Viewer, click Account from the left top corner and select website1\Editor. Then having it selected give permissions to for everything under
/sitecore/content/Website1/Home,/sitecore/content/Website1/Global (but explicitly deny editing and deleting the top node itself), and do not forget media library for that project
Once complete - users will be able to Lock and Edit items and later submit for approval. So far so good.
8. Next step is to ensure that editors will not be able to approve items. It can be done by denying permission on Awaiting Approval state for editor.
That will result in the following permissions set for Editors in Access Viewer:
While Approvers' Acess Viewer shows Awaiting Approval state available:
9. One more thing to mention - if you got your Helix solution created from Habitat - you may come into a situation when certain fields are not editable. That happens due to write permission of fields for Feature-level templates are set to deny. I have written an explanation and the solution in a separate
blog post.
10. Add language permissions to a shared role website1\everyone:
11. Last, but not the least - serialization. What you will serialize? Standard values for all templates that now became part of the workflow. Workflow itself (as a part of your Website1 project serialization configuration), Roles, possibly Users (however remember that there is no way to serialize a user with password - the only option is deserializing a user by Unicorn with setting a default password, also apart having the same default password these users will have Created field updated, which in turn will trigger source control changes). Also need to serialize Languages (foundation layer) with updated permissions - .\src\Foundation\Serialization\serialization\Foundation.Serialization.Languages\Languages.yml should be serialized.
12. Testing workflows in its basic falls into three steps routine:
- Firstly, you need to log in as an Editor and create a page and provide the rest of required content. Once done - submit that for approval. An important check is opening workbox to ensure that editors can only see Draft mode but not Awaiting approval
- Secondly, re-login as Approver and open Workbox. Now you should see Awaiting Approval section and will be able to Approve using it.
- Finally, login as an admin, switch to web database and make sure all the content has been published. That includes related and child items.